Saltar al contenido principal

HP 17-bs049dx Motherboard Replacement

Qué necesitas

  1. HP 17-bs049dx Motherboard Replacement, Back Panel: paso 1, imagen 1 de 1
    • Remove the four screws (13.7mm) with a Phillips #0 screwdriver.

    • Be sure to lift all four rubber tabs to access screws (7.51mm) underneath.

    • Rubber tabs will require force to access screws.

  2. HP 17-bs049dx Motherboard Replacement: paso 2, imagen 1 de 1
    • Use the Philips 0 screwdriver to unscrew the screws (7.51mm) that were underneath the battery.

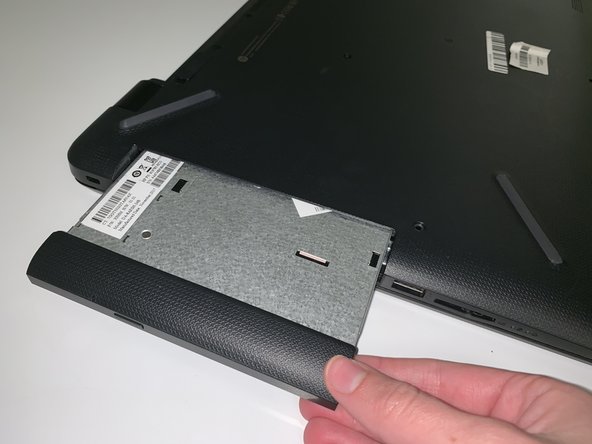
  3. HP 17-bs049dx Motherboard Replacement: paso 3, imagen 1 de 2 HP 17-bs049dx Motherboard Replacement: paso 3, imagen 2 de 2
    • Pull outwards on the disk reader to remove from main frame.

    • This removal will require force.

    • All screws must be removed before removing disk reader.

  4. HP 17-bs049dx Motherboard Replacement: paso 4, imagen 1 de 1
    • Lift back panel to access internal components.

    • You will need to use force to pry it open.

  5. HP 17-bs049dx Motherboard Replacement, Hard Drive: paso 5, imagen 1 de 1
    • Remove screw (7.51mm) on USB port with "Phillips 0 Screwdriver".

    • Lift the USB port over and away from hard drive.

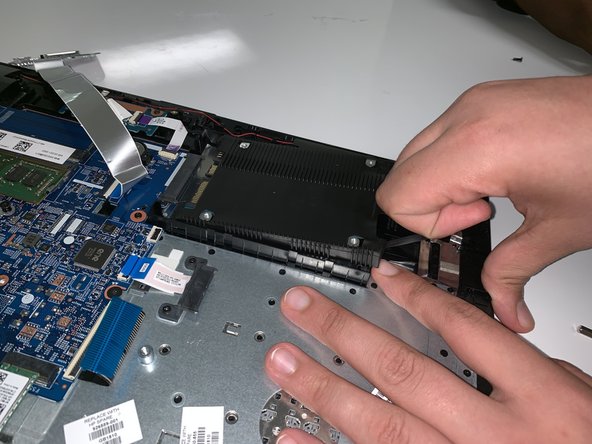
  6. HP 17-bs049dx Motherboard Replacement: paso 6, imagen 1 de 2 HP 17-bs049dx Motherboard Replacement: paso 6, imagen 2 de 2
    • Lift rubber black tabs located on the hard drive upwards.

    • Disconnect hard drive from motherboard by pulling towards you.

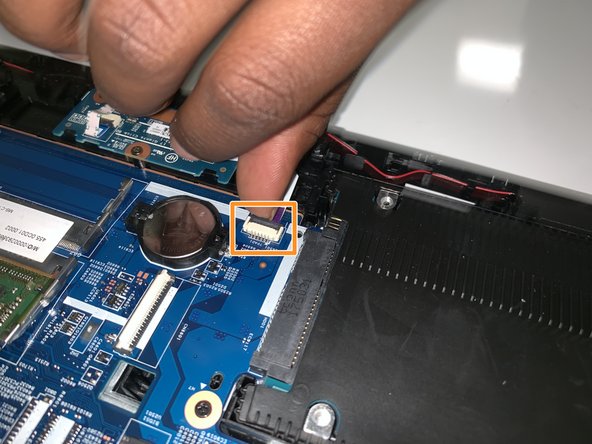
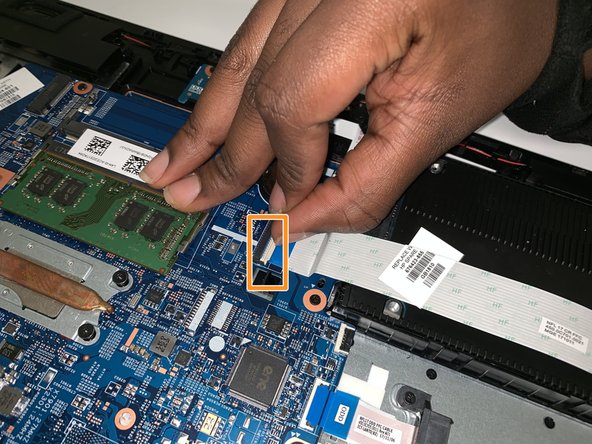
  7. HP 17-bs049dx Motherboard Replacement, Motherboard: paso 7, imagen 1 de 3 HP 17-bs049dx Motherboard Replacement, Motherboard: paso 7, imagen 2 de 3 HP 17-bs049dx Motherboard Replacement, Motherboard: paso 7, imagen 3 de 3
    • Make sure to unplug everything connected to the motherboard.

    • Be gentle with this step.

  8. HP 17-bs049dx Motherboard Replacement: paso 8, imagen 1 de 1
    • Remove the screws (7.51mm) with a Phillips #0 screwdriver.

    • Once all of the screws are removed, remove the motherboard from the device.

Conclusión

To reassemble your device, follow these instructions in reverse order.

Una persona más ha completado esta guía.

0 comentarios

Agregar Comentario

Ver Estadísticas:

Ultimas 24 horas: 0

Ultimos 7 días: 0

Ultimos 30 días: 8

Todo El Tiempo: 801