Saltar al contenido principal

HP 15-f009wm Motherboard Replacement

Qué necesitas

  1. HP 15-f009wm Motherboard Replacement, Battery: paso 1, imagen 1 de 2 HP 15-f009wm Motherboard Replacement, Battery: paso 1, imagen 2 de 2
    • Turn laptop upside down.

    • Flip the lock switch to the unlocked setting.

  2. HP 15-f009wm Motherboard Replacement: paso 2, imagen 1 de 3 HP 15-f009wm Motherboard Replacement: paso 2, imagen 2 de 3 HP 15-f009wm Motherboard Replacement: paso 2, imagen 3 de 3
    • Flip the release switch.

    • Once the flip is switched, the battery should pop out.

  3. HP 15-f009wm Motherboard Replacement: paso 3, imagen 1 de 2 HP 15-f009wm Motherboard Replacement: paso 3, imagen 2 de 2
    • Slide the battery out.

  4. HP 15-f009wm Motherboard Replacement, RAM: paso 4, imagen 1 de 3 HP 15-f009wm Motherboard Replacement, RAM: paso 4, imagen 2 de 3 HP 15-f009wm Motherboard Replacement, RAM: paso 4, imagen 3 de 3
    • Remove the two Phillips #1 screws from the RAM panel.

  5. HP 15-f009wm Motherboard Replacement: paso 5, imagen 1 de 3 HP 15-f009wm Motherboard Replacement: paso 5, imagen 2 de 3 HP 15-f009wm Motherboard Replacement: paso 5, imagen 3 de 3
    • Use the plastic opening tool to pop the panel off.

  6. HP 15-f009wm Motherboard Replacement: paso 6, imagen 1 de 3 HP 15-f009wm Motherboard Replacement: paso 6, imagen 2 de 3 HP 15-f009wm Motherboard Replacement: paso 6, imagen 3 de 3
    • Release the tabs on each side of the chip by simultaneously pushing each tab away from the RAM.

    • These tabs lock the chip in place and releasing them will cause the chip to "pop" up.

  7. HP 15-f009wm Motherboard Replacement: paso 7, imagen 1 de 1
    • Remove the RAM chip from the laptop.

  8. HP 15-f009wm Motherboard Replacement, Hard Drive: paso 8, imagen 1 de 1
    • Remove the sixteen 7mm Phillips #1 screws from the bottom panel.

  9. HP 15-f009wm Motherboard Replacement: paso 9, imagen 1 de 3 HP 15-f009wm Motherboard Replacement: paso 9, imagen 2 de 3 HP 15-f009wm Motherboard Replacement: paso 9, imagen 3 de 3
    • Pull the disk drive out of the laptop.

  10. HP 15-f009wm Motherboard Replacement: paso 10, imagen 1 de 1
    • Remove the three 2mm Phillips #00 screws found underneath the disk drive.

  11. HP 15-f009wm Motherboard Replacement: paso 11, imagen 1 de 3 HP 15-f009wm Motherboard Replacement: paso 11, imagen 2 de 3 HP 15-f009wm Motherboard Replacement: paso 11, imagen 3 de 3
    • Remove the single 4mm Phillips #1 screw from the Wi-Fi card.

    • Pull the Wi-Fi card out of the motherboard.

  12. HP 15-f009wm Motherboard Replacement: paso 12, imagen 1 de 3 HP 15-f009wm Motherboard Replacement: paso 12, imagen 2 de 3 HP 15-f009wm Motherboard Replacement: paso 12, imagen 3 de 3
    • Open the laptop.

    • Use a plastic opening tool to pop out the keyboard by starting at the top and working your way around the perimeter.

  13. HP 15-f009wm Motherboard Replacement: paso 13, imagen 1 de 2 HP 15-f009wm Motherboard Replacement: paso 13, imagen 2 de 2
    • Open the screen up until it lays flat and rotate the laptop until the screen is closest to you.

    • Lift the keyboard from the laptop.

    • Use a spudger to lift up the black latch on the ZIF connector and remove the ribbon cable.

  14. HP 15-f009wm Motherboard Replacement: paso 14, imagen 1 de 1
    • Remove the five 7mm Phillips #1 screws found underneath the keyboard.

  15. HP 15-f009wm Motherboard Replacement: paso 15, imagen 1 de 3 HP 15-f009wm Motherboard Replacement: paso 15, imagen 2 de 3 HP 15-f009wm Motherboard Replacement: paso 15, imagen 3 de 3
    • Use a spudger to lift the black tabs on the ZIF connectors.

    • Remove the ribbon cables from the ZIF connectors.

  16. HP 15-f009wm Motherboard Replacement: paso 16, imagen 1 de 3 HP 15-f009wm Motherboard Replacement: paso 16, imagen 2 de 3 HP 15-f009wm Motherboard Replacement: paso 16, imagen 3 de 3
    • Use a plastic opening tool to pop the palm rest off of the laptop.

    • Lift and remove the palm rest.

  17. HP 15-f009wm Motherboard Replacement: paso 17, imagen 1 de 3 HP 15-f009wm Motherboard Replacement: paso 17, imagen 2 de 3 HP 15-f009wm Motherboard Replacement: paso 17, imagen 3 de 3
    • Use a spudger to lift up the black latch on the ZIF connector.

    • Remove the USB/AUX port ribbon cable from the ZIF connector on the motherboard.

  18. HP 15-f009wm Motherboard Replacement: paso 18, imagen 1 de 2 HP 15-f009wm Motherboard Replacement: paso 18, imagen 2 de 2
    • Remove the single 7mm Phillips #1 screw from the USB/AUX board.

    • Remove the USB/AUX board from the laptop.

  19. HP 15-f009wm Motherboard Replacement: paso 19, imagen 1 de 3 HP 15-f009wm Motherboard Replacement: paso 19, imagen 2 de 3 HP 15-f009wm Motherboard Replacement: paso 19, imagen 3 de 3
    • Lift the Hard Drive from the laptop.

    • Disconnect the hard drive from the motherboard.

  20. HP 15-f009wm Motherboard Replacement, Motherboard: paso 20, imagen 1 de 2 HP 15-f009wm Motherboard Replacement, Motherboard: paso 20, imagen 2 de 2
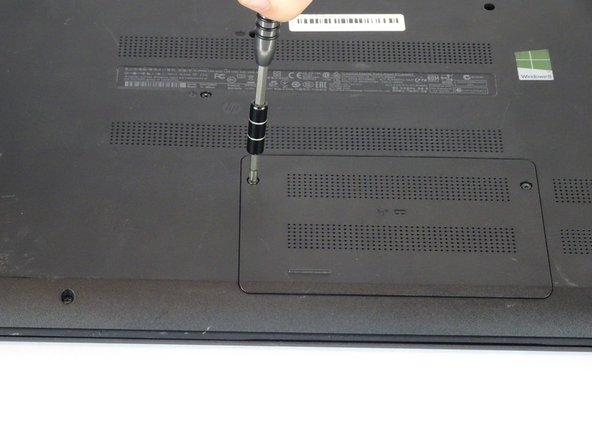
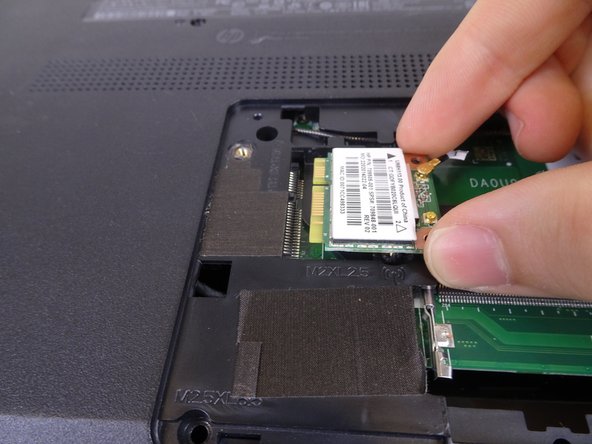
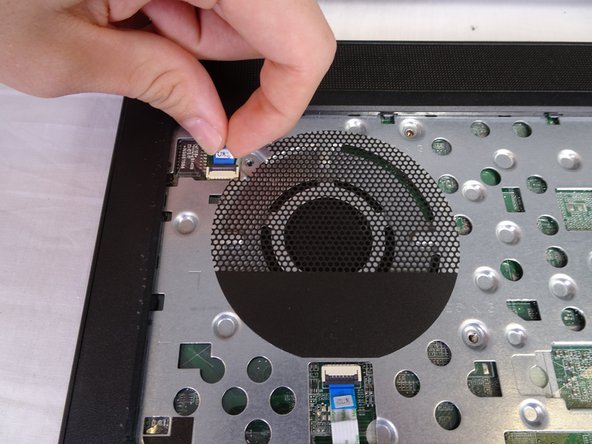
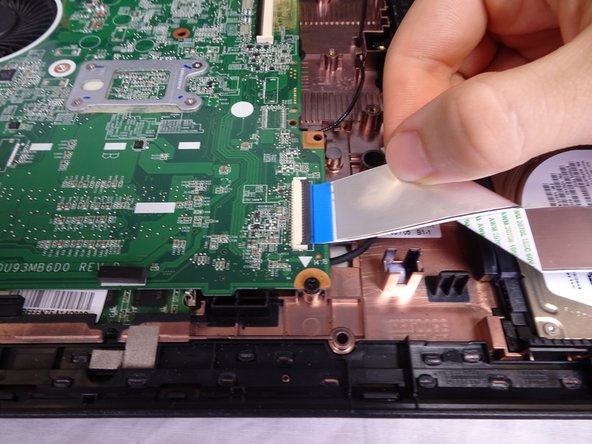
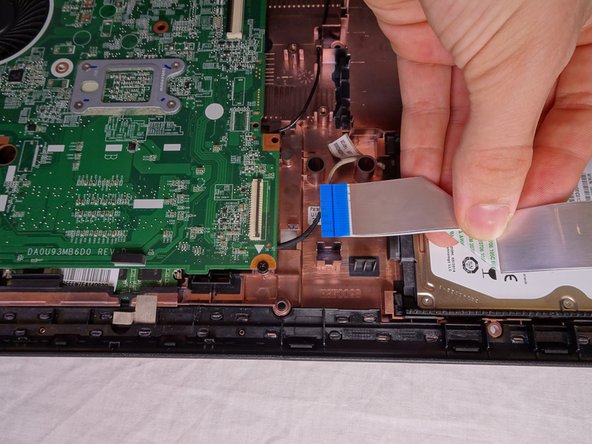
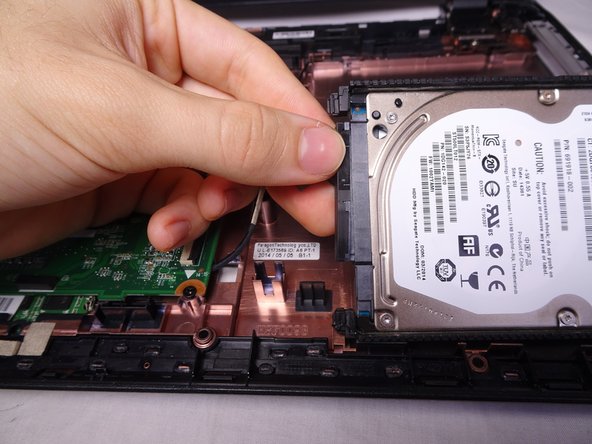
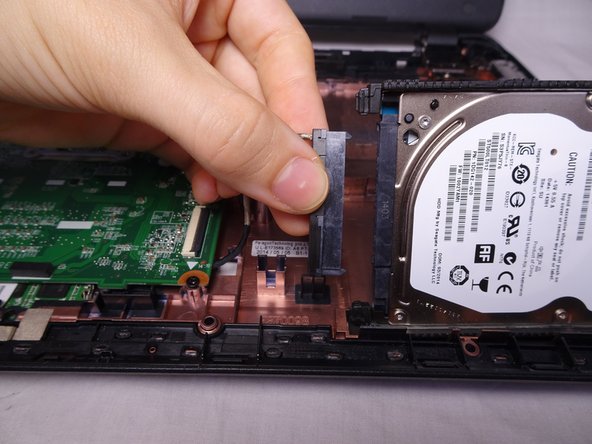
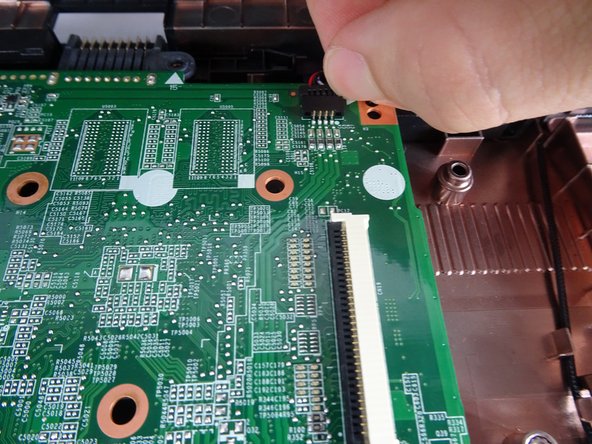
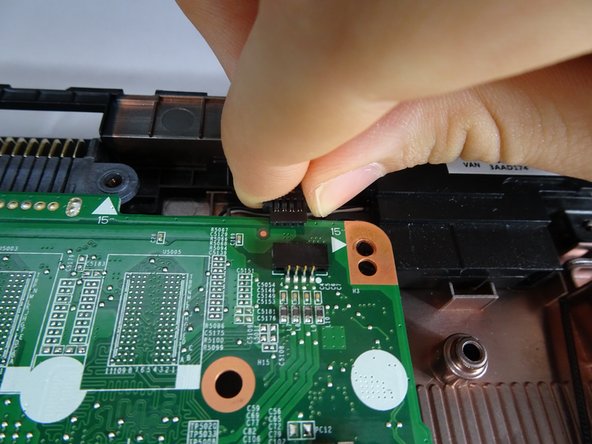
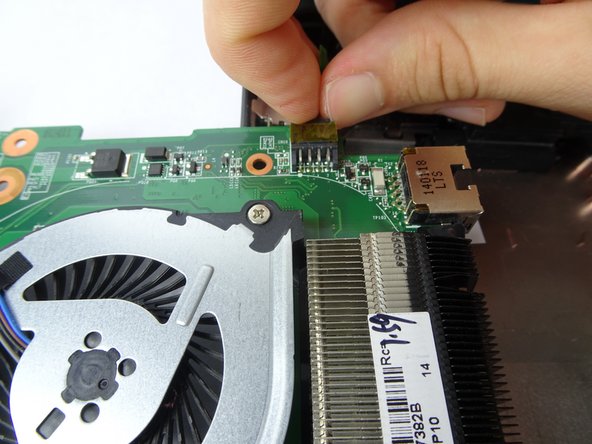
    • Remove the four 4mm Phillips #1 screws from the motherboard.

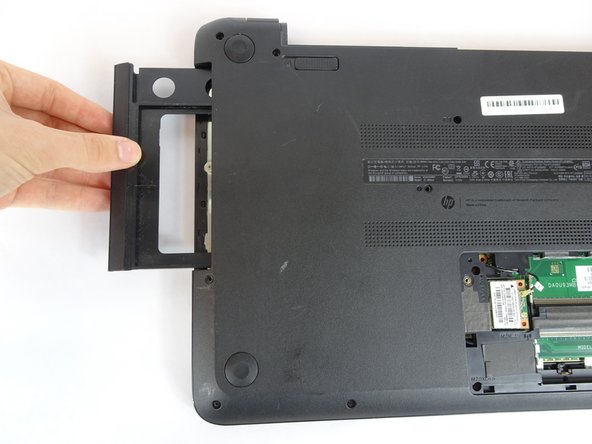
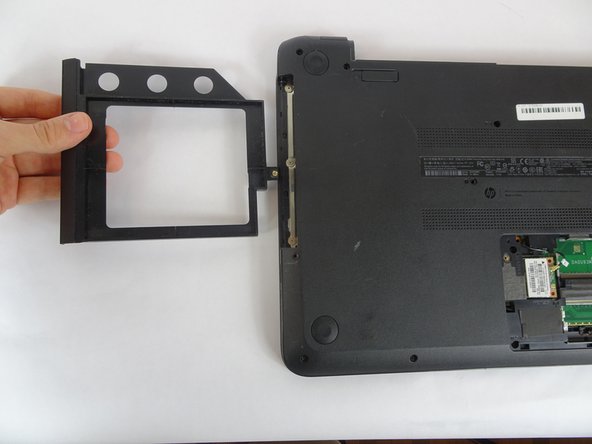
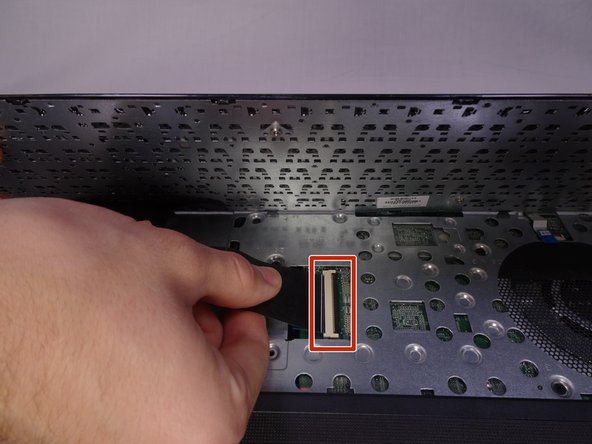
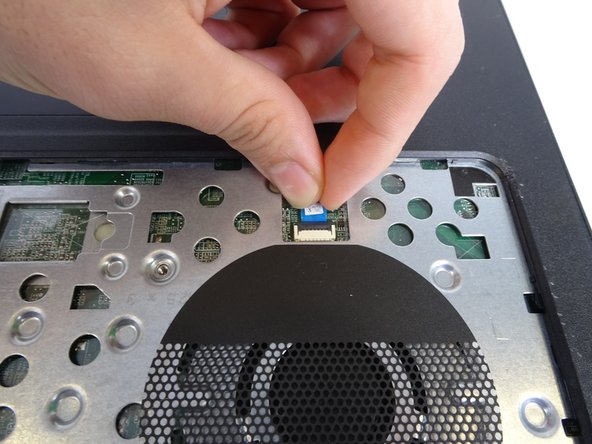
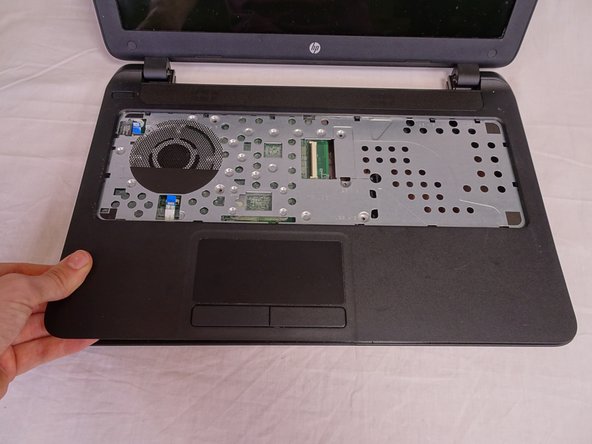
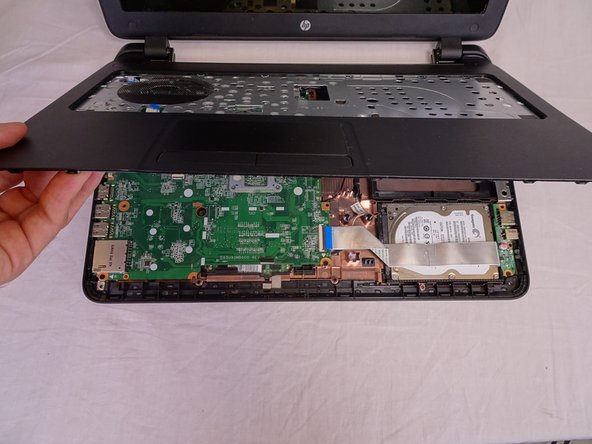
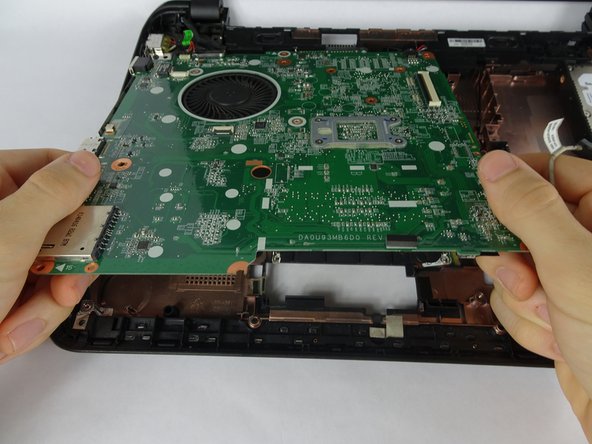
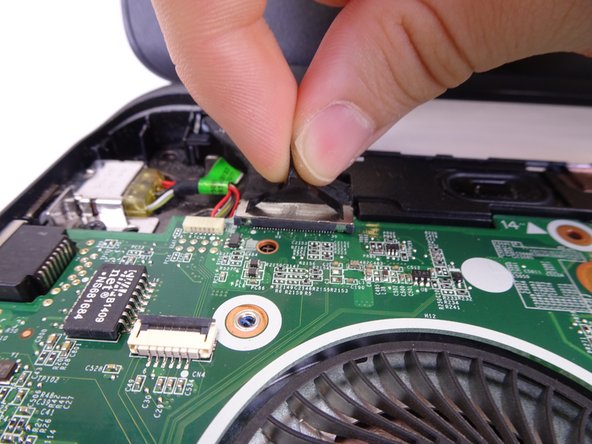
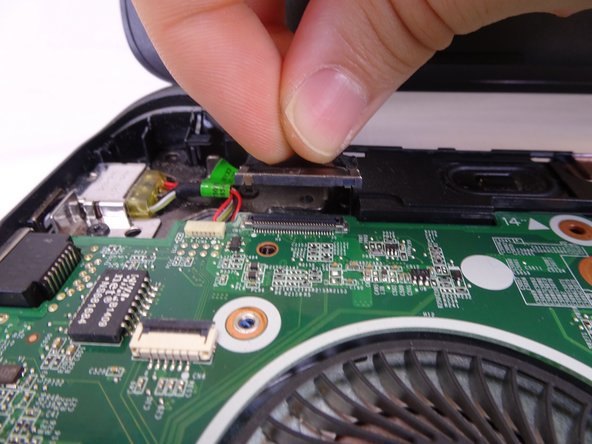
    • Lift the motherboard up from the computer.

    • There will be three wires connected underneath.

  21. HP 15-f009wm Motherboard Replacement: paso 21, imagen 1 de 3 HP 15-f009wm Motherboard Replacement: paso 21, imagen 2 de 3 HP 15-f009wm Motherboard Replacement: paso 21, imagen 3 de 3
    • Disconnect the speaker.

  22. HP 15-f009wm Motherboard Replacement: paso 22, imagen 1 de 3 HP 15-f009wm Motherboard Replacement: paso 22, imagen 2 de 3 HP 15-f009wm Motherboard Replacement: paso 22, imagen 3 de 3
    • Remove the display connection wire. Lift the connection straight up from the motherboard.

  23. HP 15-f009wm Motherboard Replacement: paso 23, imagen 1 de 3 HP 15-f009wm Motherboard Replacement: paso 23, imagen 2 de 3 HP 15-f009wm Motherboard Replacement: paso 23, imagen 3 de 3
    • Flip the motherboard over.

    • Disconnect the charging port wire from the motherboard.

Conclusión

To reassemble your device, follow these instructions in reverse order.

Una persona más ha completado esta guía.

Alex Birchler

Miembro Desde 02/14/18

1,008 Reputación

5 Guías creadas

Equipo

USF Tampa, Team S2-G2, Nance Spring 2018 Miembro de USF Tampa, Team S2-G2, Nance Spring 2018

USFT-NANCE-S18S2G2

4 Miembros

5 Guías creadas

0 comentarios

Agregar Comentario

Ver Estadísticas:

Ultimas 24 horas: 0

Ultimos 7 días: 2

Ultimos 30 días: 12

Todo El Tiempo: 1,453