Saltar al contenido principal

HP 15-f009wm Hard Drive Replacement

Qué necesitas

  1. HP 15-f009wm Hard Drive Replacement, Battery: paso 1, imagen 1 de 2 HP 15-f009wm Hard Drive Replacement, Battery: paso 1, imagen 2 de 2
    • Turn laptop upside down.

    • Flip the lock switch to the unlocked setting.

  2. HP 15-f009wm Hard Drive Replacement: paso 2, imagen 1 de 3 HP 15-f009wm Hard Drive Replacement: paso 2, imagen 2 de 3 HP 15-f009wm Hard Drive Replacement: paso 2, imagen 3 de 3
    • Flip the release switch.

    • Once the flip is switched, the battery should pop out.

  3. HP 15-f009wm Hard Drive Replacement: paso 3, imagen 1 de 2 HP 15-f009wm Hard Drive Replacement: paso 3, imagen 2 de 2
    • Slide the battery out.

  4. HP 15-f009wm Hard Drive Replacement, RAM: paso 4, imagen 1 de 3 HP 15-f009wm Hard Drive Replacement, RAM: paso 4, imagen 2 de 3 HP 15-f009wm Hard Drive Replacement, RAM: paso 4, imagen 3 de 3
    • Remove the two Phillips #1 screws from the RAM panel.

  5. HP 15-f009wm Hard Drive Replacement: paso 5, imagen 1 de 3 HP 15-f009wm Hard Drive Replacement: paso 5, imagen 2 de 3 HP 15-f009wm Hard Drive Replacement: paso 5, imagen 3 de 3
    • Use the plastic opening tool to pop the panel off.

  6. HP 15-f009wm Hard Drive Replacement: paso 6, imagen 1 de 3 HP 15-f009wm Hard Drive Replacement: paso 6, imagen 2 de 3 HP 15-f009wm Hard Drive Replacement: paso 6, imagen 3 de 3
    • Release the tabs on each side of the chip by simultaneously pushing each tab away from the RAM.

    • These tabs lock the chip in place and releasing them will cause the chip to "pop" up.

  7. HP 15-f009wm Hard Drive Replacement: paso 7, imagen 1 de 1
    • Remove the RAM chip from the laptop.

  8. HP 15-f009wm Hard Drive Replacement, Hard Drive: paso 8, imagen 1 de 1
    • Remove the sixteen 7mm Phillips #1 screws from the bottom panel.

  9. HP 15-f009wm Hard Drive Replacement: paso 9, imagen 1 de 3 HP 15-f009wm Hard Drive Replacement: paso 9, imagen 2 de 3 HP 15-f009wm Hard Drive Replacement: paso 9, imagen 3 de 3
    • Pull the disk drive out of the laptop.

  10. HP 15-f009wm Hard Drive Replacement: paso 10, imagen 1 de 1
    • Remove the three 2mm Phillips #00 screws found underneath the disk drive.

  11. HP 15-f009wm Hard Drive Replacement: paso 11, imagen 1 de 3 HP 15-f009wm Hard Drive Replacement: paso 11, imagen 2 de 3 HP 15-f009wm Hard Drive Replacement: paso 11, imagen 3 de 3
    • Remove the single 4mm Phillips #1 screw from the Wi-Fi card.

    • Pull the Wi-Fi card out of the motherboard.

  12. HP 15-f009wm Hard Drive Replacement: paso 12, imagen 1 de 3 HP 15-f009wm Hard Drive Replacement: paso 12, imagen 2 de 3 HP 15-f009wm Hard Drive Replacement: paso 12, imagen 3 de 3
    • Open the laptop.

    • Use a plastic opening tool to pop out the keyboard by starting at the top and working your way around the perimeter.

  13. HP 15-f009wm Hard Drive Replacement: paso 13, imagen 1 de 2 HP 15-f009wm Hard Drive Replacement: paso 13, imagen 2 de 2
    • Open the screen up until it lays flat and rotate the laptop until the screen is closest to you.

    • Lift the keyboard from the laptop.

    • Use a spudger to lift up the black latch on the ZIF connector and remove the ribbon cable.

  14. HP 15-f009wm Hard Drive Replacement: paso 14, imagen 1 de 1
    • Remove the five 7mm Phillips #1 screws found underneath the keyboard.

  15. HP 15-f009wm Hard Drive Replacement: paso 15, imagen 1 de 3 HP 15-f009wm Hard Drive Replacement: paso 15, imagen 2 de 3 HP 15-f009wm Hard Drive Replacement: paso 15, imagen 3 de 3
    • Use a spudger to lift the black tabs on the ZIF connectors.

    • Remove the ribbon cables from the ZIF connectors.

  16. HP 15-f009wm Hard Drive Replacement: paso 16, imagen 1 de 3 HP 15-f009wm Hard Drive Replacement: paso 16, imagen 2 de 3 HP 15-f009wm Hard Drive Replacement: paso 16, imagen 3 de 3
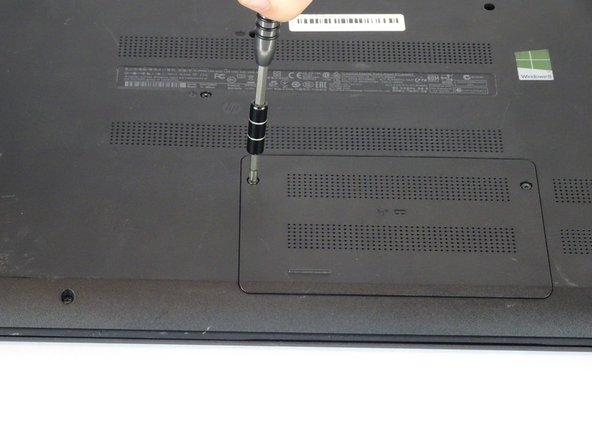
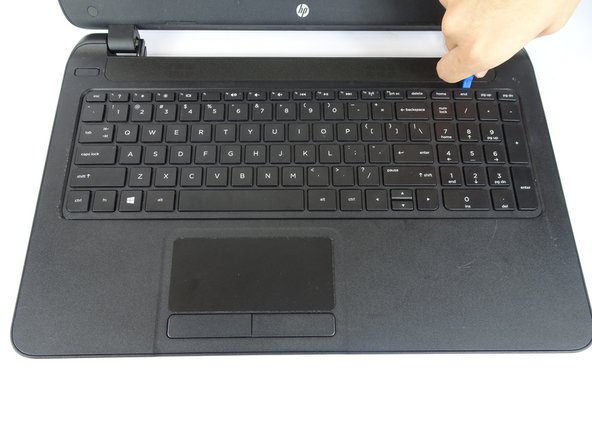
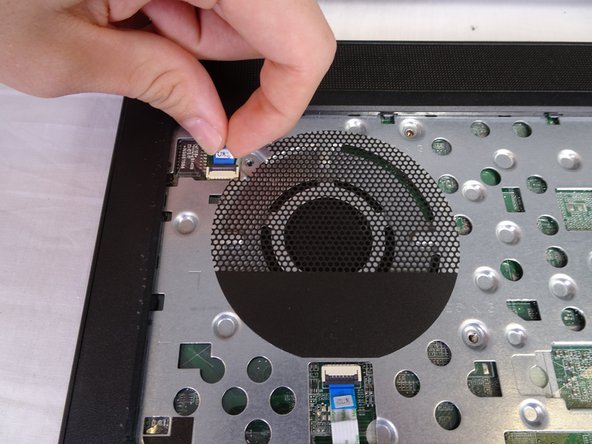
    • Use a plastic opening tool to pop the palm rest off of the laptop.

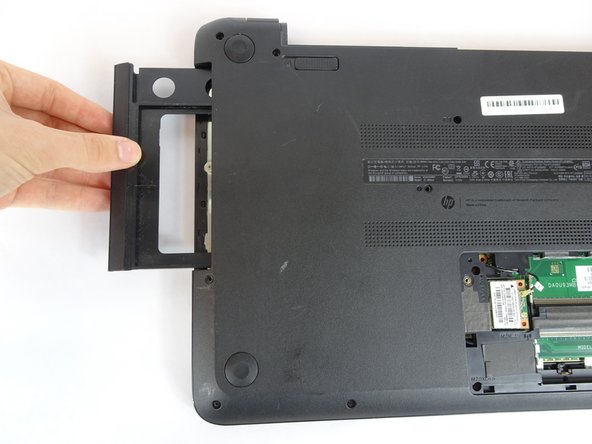
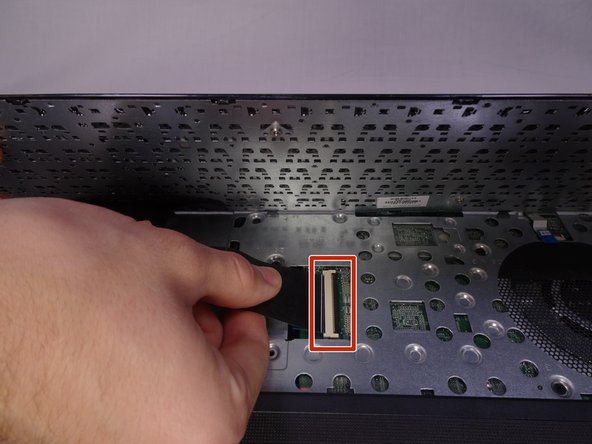
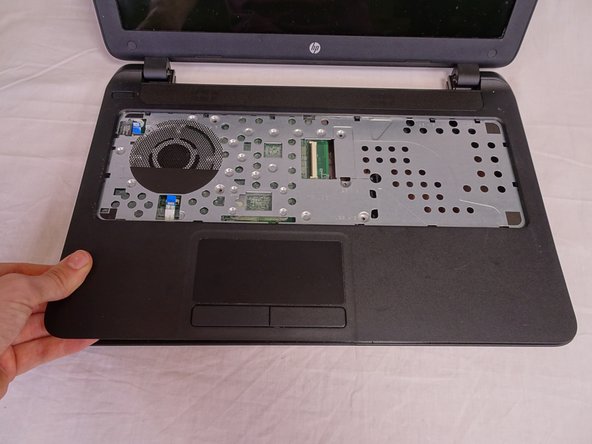
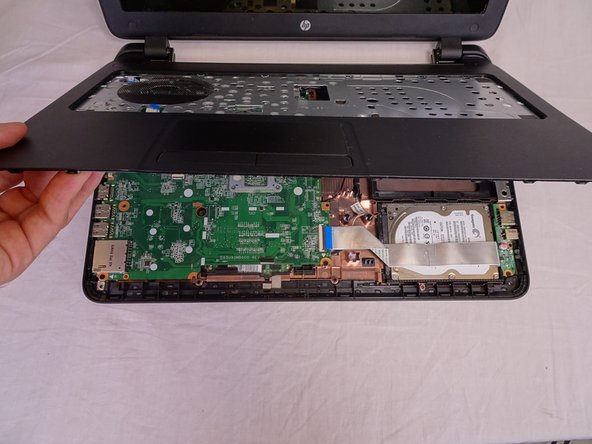
    • Lift and remove the palm rest.

    Step 16 - Note

    This repair guide is “almost perfect” for HP model 15-f100dx EXCEPT - removal of the Palm Rest - MUST REMOVE BACK (under Display Panel) FIRST! Attempting to remove using - the “Begin at front corner” method “WILL LIKELY CAUSE DAMAGE”. HP is generally pretty good about supplying service manuals. I find it interesting that many of the models within 15-xxxxdx series - no “online” manuals are available. I cannot say if these manuals were ever available and HP removed them from the support site, or they never existed. This genre was during the time HP was having heat issues and conflicts with “nVidia” over “WHO was actually to blame for the heat issues”. Nonetheless, at the end of the day it was and still is us lowly consumers (and repair Techs) that were and still are the MOST affected & damaged parties. Just my humble opinion…

    Hope this helps,

    Doug

    admin - Contestar

  17. HP 15-f009wm Hard Drive Replacement: paso 17, imagen 1 de 3 HP 15-f009wm Hard Drive Replacement: paso 17, imagen 2 de 3 HP 15-f009wm Hard Drive Replacement: paso 17, imagen 3 de 3
    • Use a spudger to lift up the black latch on the ZIF connector.

    • Remove the USB/AUX port ribbon cable from the ZIF connector on the motherboard.

  18. HP 15-f009wm Hard Drive Replacement: paso 18, imagen 1 de 2 HP 15-f009wm Hard Drive Replacement: paso 18, imagen 2 de 2
    • Remove the single 7mm Phillips #1 screw from the USB/AUX board.

    • Remove the USB/AUX board from the laptop.

  19. HP 15-f009wm Hard Drive Replacement: paso 19, imagen 1 de 3 HP 15-f009wm Hard Drive Replacement: paso 19, imagen 2 de 3 HP 15-f009wm Hard Drive Replacement: paso 19, imagen 3 de 3
    • Lift the Hard Drive from the laptop.

    • Disconnect the hard drive from the motherboard.

Conclusión

To reassemble your device, follow these instructions in reverse order.

9 personas más completaron esta guía.

Alex Birchler

Miembro Desde 02/14/18

1,008 Reputación

5 Guías creadas

Equipo

USF Tampa, Team S2-G2, Nance Spring 2018 Miembro de USF Tampa, Team S2-G2, Nance Spring 2018

USFT-NANCE-S18S2G2

4 Miembros

5 Guías creadas

3 comentarios

This guide helped me so much with my laptop, thanks m8

Connor Cornelison - Contestar

Thank you for this excellent write-up!

Dan Snow - Contestar

Hello, i have a question. How much of capacity and technology i could use to upgrade my hard drive?

Samuel Arreaza - Contestar

Agregar Comentario

Ver Estadísticas:

Ultimas 24 horas: 2

Ultimos 7 días: 5

Ultimos 30 días: 19

Todo El Tiempo: 3,838