Saltar al contenido principal

HP 15-dy2702dx Lower Case Replacement

Qué necesitas

  1. HP 15-dy2702dx Lower Case Replacement, Lower Case: paso 1, imagen 1 de 1
    • Remove both of the rubber strips to uncover the hidden screws.

    • You can use a prying tool to help lift an end.

  2. HP 15-dy2702dx Lower Case Replacement: paso 2, imagen 1 de 1
    • Unscrew all 8 Phillips #0 screws on the bottom panel:

    • Two M2.5x6

    • Six M2x6

  3. HP 15-dy2702dx Lower Case Replacement: paso 3, imagen 1 de 2 HP 15-dy2702dx Lower Case Replacement: paso 3, imagen 2 de 2
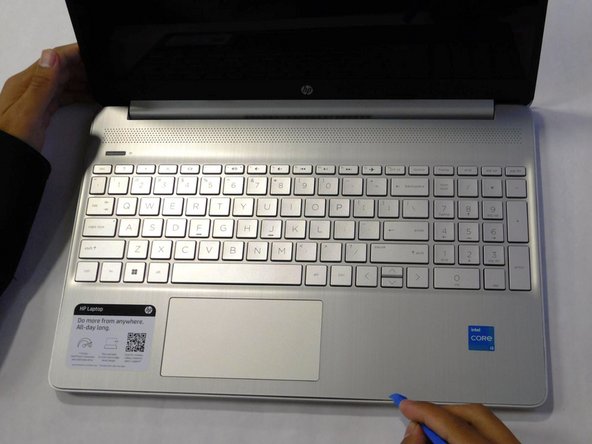
    • Flip the laptop over and open the lid.

    • Separate the bottom panel from the main body by using the iFixit opening tool.

    • Ensure that the bottom panel is completely separated along the edges.

  4. HP 15-dy2702dx Lower Case Replacement: paso 4, imagen 1 de 2 HP 15-dy2702dx Lower Case Replacement: paso 4, imagen 2 de 2
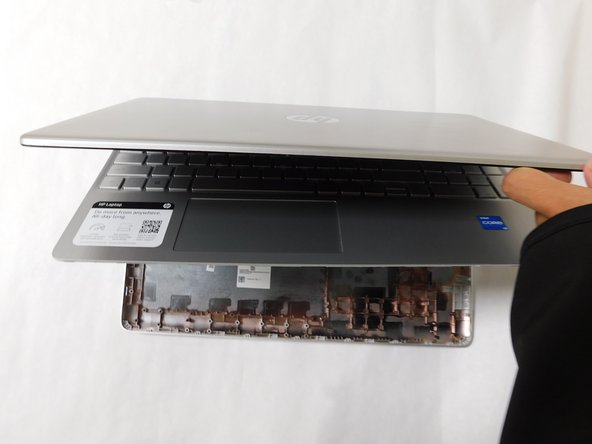
    • If you can lift the laptop like shown in the first picture, the bottom panel is nearly separated.

    • Close the laptop to allow the back edges to fully separate

  5. HP 15-dy2702dx Lower Case Replacement: paso 5, imagen 1 de 3 HP 15-dy2702dx Lower Case Replacement: paso 5, imagen 2 de 3 HP 15-dy2702dx Lower Case Replacement: paso 5, imagen 3 de 3
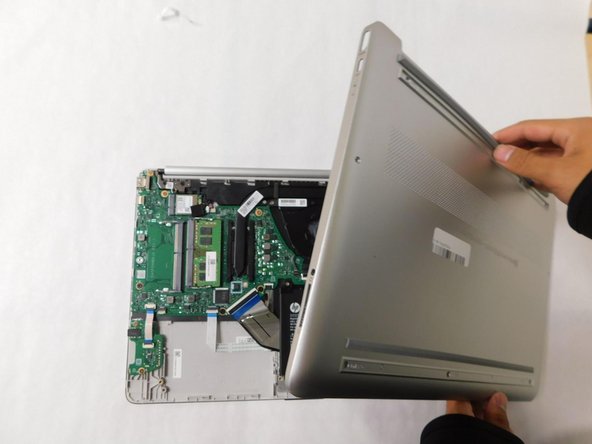
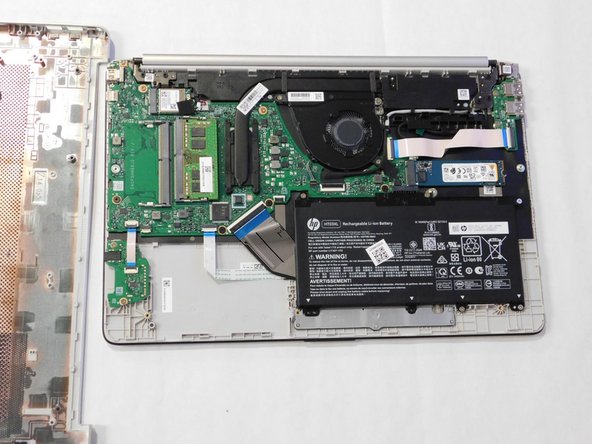
    • Flip the laptop over and carefully remove the lower case.

Conclusión

To reassemble your device, follow these instructions in reverse order.

Una persona más ha completado esta guía.

Zander Herbold

Miembro Desde 09/05/23

643 Reputación

4 Guías creadas

Equipo

Gateway, Team 1-4, Pee Fall 2023 Miembro de Gateway, Team 1-4, Pee Fall 2023

GCC-PEE-F23S1G4

4 Miembros

8 Guías creadas

0 comentarios

Agregar Comentario

Ver Estadísticas:

Ultimas 24 horas: 1

Ultimos 7 días: 7

Ultimos 30 días: 21

Todo El Tiempo: 156