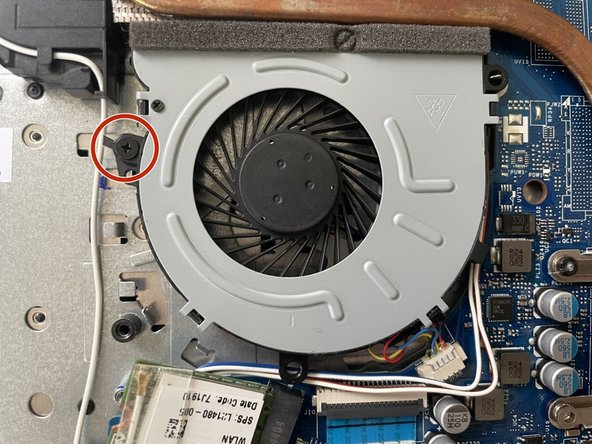
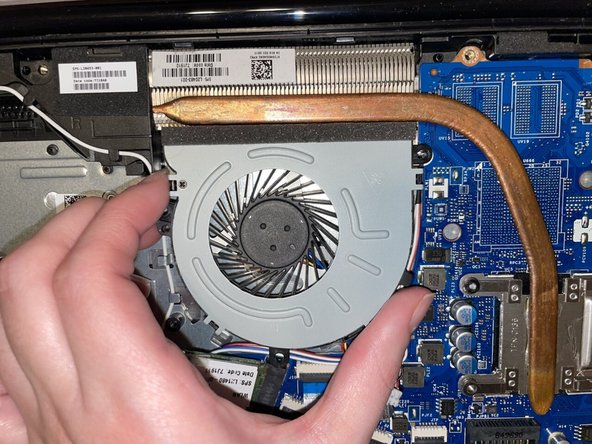
Saltar al contenido principal

HP 15-db0004dx Fan Replacement

Qué necesitas

  1. HP 15-db0004dx Fan Replacement, Bottom Case: paso 1, imagen 1 de 2 HP 15-db0004dx Fan Replacement, Bottom Case: paso 1, imagen 2 de 2
    • Turn the laptop off and unplug it before starting.

    • Flip your laptop over, face down.

  2. HP 15-db0004dx Fan Replacement: paso 2, imagen 1 de 1
    • Peel off the two long rubber grips running lengthwise on the laptop.

  3. HP 15-db0004dx Fan Replacement: paso 3, imagen 1 de 2 HP 15-db0004dx Fan Replacement: paso 3, imagen 2 de 2
    • Using a Phillips #000 screwdriver, remove the eleven 10 mm screws located on the underside of the laptop, that are holding the back panel in place.

  4. HP 15-db0004dx Fan Replacement: paso 4, imagen 1 de 1
    • Carefully slide the optical drive out of the laptop.

  5. HP 15-db0004dx Fan Replacement: paso 5, imagen 1 de 1
    • Use a plastic opening tool to separate the back panel from the laptop.

    • For an easier removal, start at the corner and run the tool along the edge of the cover.

    • If you do not have a plastic opening tool, open it carefully using your hands, as shown.

    • Be careful to not bend the back panel, or to not apply too much pressure and force, doing so could cause the panel to break.

  6. HP 15-db0004dx Fan Replacement, Fan: paso 6, imagen 1 de 3 HP 15-db0004dx Fan Replacement, Fan: paso 6, imagen 2 de 3 HP 15-db0004dx Fan Replacement, Fan: paso 6, imagen 3 de 3
    • Using a Phillips #000 screwdriver remove the 5mm screw holding the fan in place.

  7. HP 15-db0004dx Fan Replacement: paso 7, imagen 1 de 3 HP 15-db0004dx Fan Replacement: paso 7, imagen 2 de 3 HP 15-db0004dx Fan Replacement: paso 7, imagen 3 de 3
    • After the screw is removed, carefully unplug the set of wires with one of each colored, red, black, yellow, and blue, from the white connector it is secured at.

    • To unplug it gently pull the white connector from the adapter, possibly in a back and forth motion to free it.

    • DO NOT pull on the wires, doing so could cause damage to the wires, or for them to become disconnected to the white adapter they are attached to.

  8. HP 15-db0004dx Fan Replacement: paso 8, imagen 1 de 3 HP 15-db0004dx Fan Replacement: paso 8, imagen 2 de 3 HP 15-db0004dx Fan Replacement: paso 8, imagen 3 de 3
    • Carefully remove the fan from the laptop.

    • Be careful with removal as to not bend or break anything. There is a metal peg shown in the image, that the fan is secured on that could potentially bend

Conclusión

To reassemble your device, follow these instructions in reverse order.

0 comentarios

Agregar Comentario

Ver Estadísticas:

Ultimas 24 horas: 0

Ultimos 7 días: 0

Ultimos 30 días: 12

Todo El Tiempo: 113