Saltar al contenido principal

HP 15-da0002dx Fan Replacement

Qué necesitas

  1. HP 15-da0002dx Fan Replacement, Back Cover: paso 1, imagen 1 de 1
    • Make sure the computer is completely turned off.

  2. HP 15-da0002dx Fan Replacement: paso 2, imagen 1 de 1
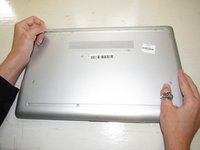
    • Turn over the laptop.

    • The HP label should be touching the table and the bottom cover should be facing up.

  3. HP 15-da0002dx Fan Replacement: paso 3, imagen 1 de 2 HP 15-da0002dx Fan Replacement: paso 3, imagen 2 de 2
    • Two plastic feet are located on adjacent sides of the back cover.

    • Peel back the plastic feet using the plastic opening tools.

  4. HP 15-da0002dx Fan Replacement: paso 4, imagen 1 de 1
    • Using the Phillips #1 screwdriver, unscrew the eleven 9.0 mm screws holding the back cover in place.

  5. HP 15-da0002dx Fan Replacement: paso 5, imagen 1 de 1
    • Carefully flip over the computer so the HP label is now facing the ceiling.

  6. HP 15-da0002dx Fan Replacement: paso 6, imagen 1 de 2 HP 15-da0002dx Fan Replacement: paso 6, imagen 2 de 2
    • Open the screen.

    • Run the plastic opening tools along the edge of the back cover. Do this until the back cover becomes loose.

  7. HP 15-da0002dx Fan Replacement: paso 7, imagen 1 de 1
    • Close the screen and flip over the laptop. Using the plastic opening tools, gently take off the back cover starting from the middle, bottom edge.

  8. HP 15-da0002dx Fan Replacement, Battery: paso 8, imagen 1 de 1
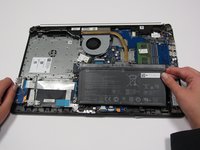
    • Remove the screws holding the battery in place using a Phillips #1 screwdriver.

  9. HP 15-da0002dx Fan Replacement: paso 9, imagen 1 de 2 HP 15-da0002dx Fan Replacement: paso 9, imagen 2 de 2
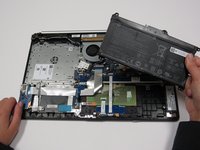
    • Using your fingers, tilt the top part of the battery towards you.

    • Continue to pull the rest of the battery away from the mounting tabs to remove.

  10. HP 15-da0002dx Fan Replacement, Fan: paso 10, imagen 1 de 2 HP 15-da0002dx Fan Replacement, Fan: paso 10, imagen 2 de 2
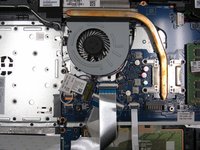
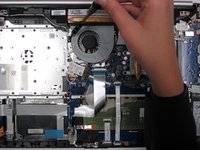
    • Hold the fan in place and remove the one 8.0 mm screw from the fan .

  11. HP 15-da0002dx Fan Replacement: paso 11, imagen 1 de 1
    • Pull out the connector for the fan cable using the opening tool or spudger.

  12. HP 15-da0002dx Fan Replacement: paso 12, imagen 1 de 1
    • Carefully take out the fan from the computer.

Conclusión

To reassemble your device, follow these instructions in reverse order.

Una persona más ha completado esta guía.

Abigail Aron

Miembro Desde 09/04/19

1,097 Reputación

5 Guías creadas

0 comentarios

Agregar Comentario

Ver Estadísticas:

Ultimas 24 horas: 2

Ultimos 7 días: 10

Ultimos 30 días: 25

Todo El Tiempo: 1,510