Introducción
The Optical Drive allows your notebook to use CD's and DVD's to listen to music and watch movies. Sometimes optical drives can be used to write your own personal data onto CD's. Make sure your notebook is unplugged and turned off.
Qué necesitas
-
-
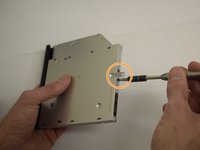
Using a small Phillips screwdriver, remove the Phillips screw in the middle of the bottom of the computer.
-
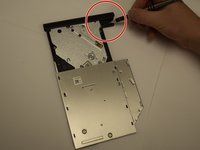
Pull the CD/DVD drive outward to slide it away from the computer.
-
-


To reassemble your device, follow these instructions in reverse order.
To reassemble your device, follow these instructions in reverse order.
Cancelar: No complete esta guía.
Una persona más ha completado esta guía.
Equipo

Cal Poly, Team S6-G2, Banghart Fall 2017 Miembro de Cal Poly, Team S6-G2, Banghart Fall 2017
CPSU-BANGHART-F17S6G2
Miembros de 5
6 Guías creadas