Saltar al contenido principal

HP 14-fq1025nr Keyboard Replacement

Qué necesitas

  1. HP 14-fq1025nr Keyboard Replacement, Back Cover: paso 1, imagen 1 de 1
    • Flip the laptop upside down so the bottom cover is facing up.

  2. HP 14-fq1025nr Keyboard Replacement: paso 2, imagen 1 de 1
    Herramienta utilizada en este paso:
    Tweezers
    $4.99
    Comprar
    • Use a pair of tweezers to grab and pull the feet off of the cover.

  3. HP 14-fq1025nr Keyboard Replacement: paso 3, imagen 1 de 1
    • Remove the two 4 mm screws using a Phillips #0 screwdriver.

    • Remove the six remaining 6 mm screws located around the edges and underneath the feet using a Phillips #0 screwdriver.

  4. HP 14-fq1025nr Keyboard Replacement: paso 4, imagen 1 de 1
    • Flip the laptop right-side up and slide an iFixit opening tool and/or Jimmy inside of the bottom cover seam to pry it open.

  5. HP 14-fq1025nr Keyboard Replacement: paso 5, imagen 1 de 1
    • Remove the bottom cover.

  6. HP 14-fq1025nr Keyboard Replacement, Battery: paso 6, imagen 1 de 2 HP 14-fq1025nr Keyboard Replacement, Battery: paso 6, imagen 2 de 2
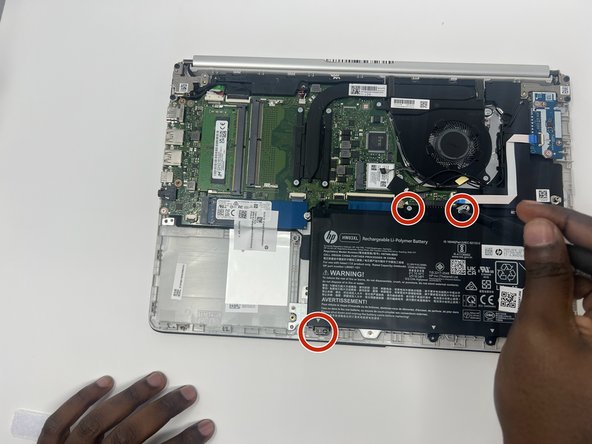
    • Remove the four gray 3 mm screws holding down the battery using a Phillips #0 screwdriver.

  7. HP 14-fq1025nr Keyboard Replacement: paso 7, imagen 1 de 1
    • Remove the battery.

  8. HP 14-fq1025nr Keyboard Replacement, Fan: paso 8, imagen 1 de 1
    • Remove the three silver screws (one 2 mm screw and two 4 mm screws) holding down the fan using a Phillips #0 screwdriver.

  9. HP 14-fq1025nr Keyboard Replacement: paso 9, imagen 1 de 1
    Herramienta utilizada en este paso:
    Tweezers
    $4.99
    Comprar
    • Unplug the fan’s power cord from the motherboard.

    • Use tweezers to pull the plug out, if needed.

  10. HP 14-fq1025nr Keyboard Replacement: paso 10, imagen 1 de 1
    • Remove the fan.

  11. HP 14-fq1025nr Keyboard Replacement, Heat Sink: paso 11, imagen 1 de 1
    • Remove the four gray 3 mm screws around the heat sink using a Phillips #0 screwdriver.

    • Remove the heat sink.

  12. HP 14-fq1025nr Keyboard Replacement, Speakers: paso 12, imagen 1 de 2 HP 14-fq1025nr Keyboard Replacement, Speakers: paso 12, imagen 2 de 2
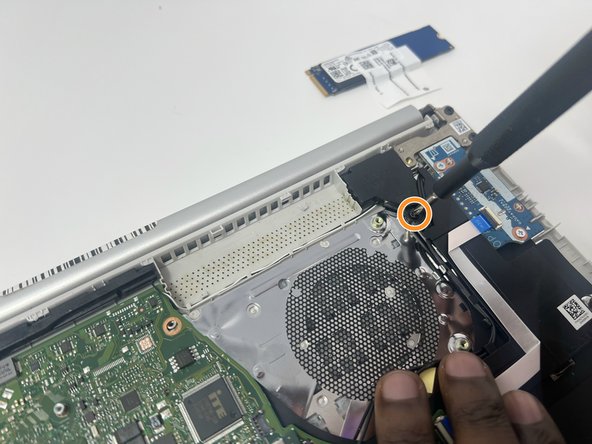
    • Using a Phillips #0 screwdriver, remove the three black 5 mm screws holding down the speaker:

    • Two screws on the left side

    • One screw on the right side

  13. HP 14-fq1025nr Keyboard Replacement: paso 13, imagen 1 de 1
    Herramienta utilizada en este paso:
    Tweezers
    $4.99
    Comprar
    • Unplug the speaker wire.

    • Use tweezers if needed.

  14. HP 14-fq1025nr Keyboard Replacement: paso 14, imagen 1 de 1
    • Remove the speaker.

  15. HP 14-fq1025nr Keyboard Replacement, SSD: paso 15, imagen 1 de 1
    • Remove the single 6 mm screw holding down the SSD using a Phillips #0 screwdriver.

  16. HP 14-fq1025nr Keyboard Replacement: paso 16, imagen 1 de 1
    • Slide the SSD out of the slot.

  17. HP 14-fq1025nr Keyboard Replacement, Motherboard: paso 17, imagen 1 de 3 HP 14-fq1025nr Keyboard Replacement, Motherboard: paso 17, imagen 2 de 3 HP 14-fq1025nr Keyboard Replacement, Motherboard: paso 17, imagen 3 de 3
    • Remove the five 3 mm gray screws from around the motherboard using a Phillips #00 screwdriver.

  18. HP 14-fq1025nr Keyboard Replacement: paso 18, imagen 1 de 2 HP 14-fq1025nr Keyboard Replacement: paso 18, imagen 2 de 2
    Herramienta utilizada en este paso:
    Tweezers
    $4.99
    Comprar
    • Unplug the wire connections.

    • Use tweezers if needed.

  19. HP 14-fq1025nr Keyboard Replacement: paso 19, imagen 1 de 1
    • Remove the motherboard.

    • Use the iFixit opening tool to pry it out if needed.

  20. HP 14-fq1025nr Keyboard Replacement, Screen: paso 20, imagen 1 de 3 HP 14-fq1025nr Keyboard Replacement, Screen: paso 20, imagen 2 de 3 HP 14-fq1025nr Keyboard Replacement, Screen: paso 20, imagen 3 de 3
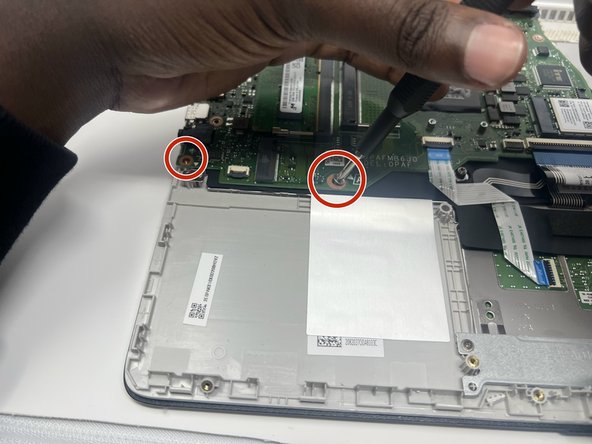
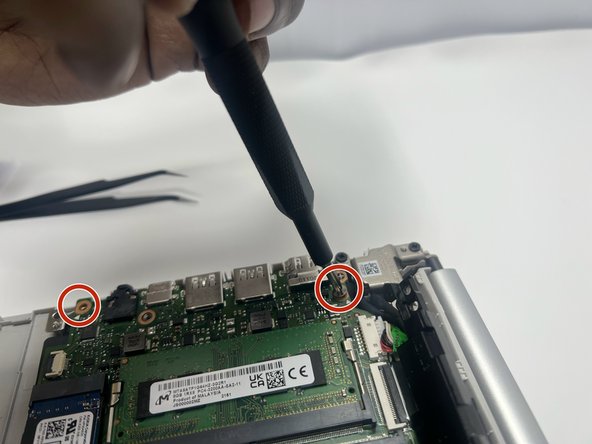
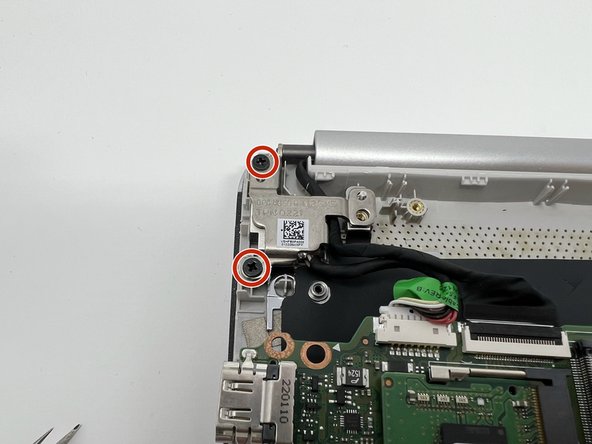
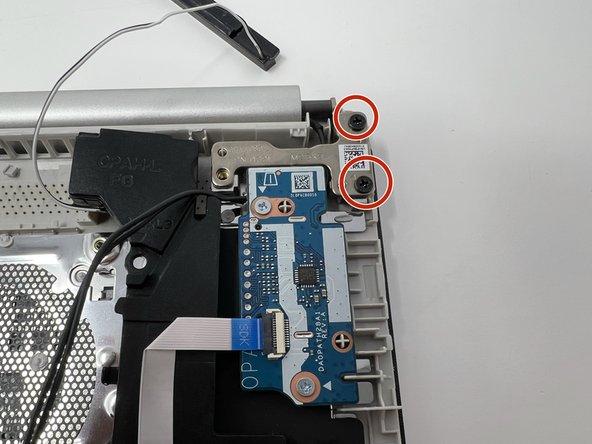
    • Remove the four black 5 mm screws holding down the two silver screen hinges using a Phillips #00 screwdriver.

  21. HP 14-fq1025nr Keyboard Replacement: paso 21, imagen 1 de 2 HP 14-fq1025nr Keyboard Replacement: paso 21, imagen 2 de 2
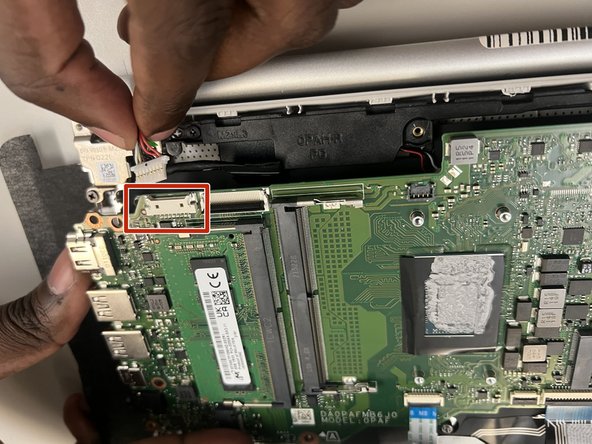
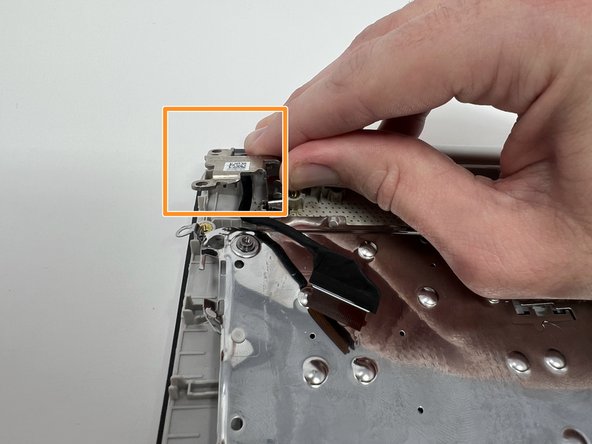
    • Unplug the screen from the motherboard by lifting the wire cover and removing the screen cord.

    • Separate the hinges from the computer.

  22. HP 14-fq1025nr Keyboard Replacement: paso 22, imagen 1 de 1
    • Remove the screen.

  23. HP 14-fq1025nr Keyboard Replacement, Keyboard: paso 23, imagen 1 de 1
    • Use an iFixit opening tool to remove all the plastic hold downs from the keyboard cover.

  24. HP 14-fq1025nr Keyboard Replacement: paso 24, imagen 1 de 1
    • Remove all remaining plastic hold downs on the main keyboard with an iFixit opening tool.

  25. HP 14-fq1025nr Keyboard Replacement: paso 25, imagen 1 de 1
    • Push the keyboard out of the computer.

    • During reassembly, make sure that the keyboard is tightened properly.

Conclusión

To reassemble your device, follow these instructions in reverse order.

Yasli Kanimba Murenzi

Miembro Desde 09/27/22

193 Reputación

2 Guías creadas

Equipo

0 comentarios

Agregar Comentario

Ver Estadísticas:

Ultimas 24 horas: 1

Ultimos 7 días: 3

Ultimos 30 días: 15

Todo El Tiempo: 176