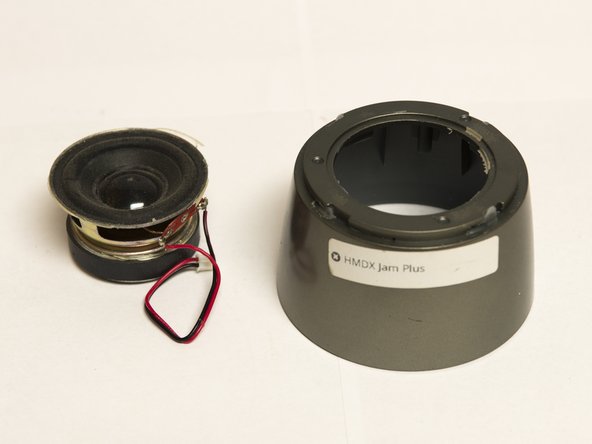
Saltar al contenido principal

HMDX Jam Plus Speaker Replacement

Qué necesitas

  1. HMDX Jam Plus Speaker Replacement, Battery: paso 1, imagen 1 de 3 HMDX Jam Plus Speaker Replacement, Battery: paso 1, imagen 2 de 3 HMDX Jam Plus Speaker Replacement, Battery: paso 1, imagen 3 de 3
    • Flip the device over so the bottom is facing up.

    • Use the large plastic opening tool to gently pry the rubber base from the device.

    • Slowly move the plastic opening tool around the edge of the rubber base to separate it from the plastic.

  2. HMDX Jam Plus Speaker Replacement: paso 2, imagen 1 de 2 HMDX Jam Plus Speaker Replacement: paso 2, imagen 2 de 2
    • Use a Phillips #1 screwdriver to remove the four black 9mm screws from the device.

  3. HMDX Jam Plus Speaker Replacement: paso 3, imagen 1 de 2 HMDX Jam Plus Speaker Replacement: paso 3, imagen 2 de 2
    • Gently separate the base from the rest of the device to reveal the battery and the main board.

  4. HMDX Jam Plus Speaker Replacement: paso 4, imagen 1 de 3 HMDX Jam Plus Speaker Replacement: paso 4, imagen 2 de 3 HMDX Jam Plus Speaker Replacement: paso 4, imagen 3 de 3
    • Carefully use the plastic opening tool to remove the glue around the battery and speaker connectors.

    • Pull gently on the connectors to separate each one from the main board.

    • The battery is connected to board in the red socket and the speaker is connected in the white socket.

  5. HMDX Jam Plus Speaker Replacement: paso 5, imagen 1 de 3 HMDX Jam Plus Speaker Replacement: paso 5, imagen 2 de 3 HMDX Jam Plus Speaker Replacement: paso 5, imagen 3 de 3
    • Batteries can be very dangerous if punctured. Use extra caution when using tools around the battery.

    • Use the plastic opening tool to gently pry the battery free from the rest of the device.

  6. HMDX Jam Plus Speaker Replacement: paso 6, imagen 1 de 2 HMDX Jam Plus Speaker Replacement: paso 6, imagen 2 de 2
    • Use new adhesive to secure battery back to the rest of the device.

  7. HMDX Jam Plus Speaker Replacement, Speaker: paso 7, imagen 1 de 2 HMDX Jam Plus Speaker Replacement, Speaker: paso 7, imagen 2 de 2
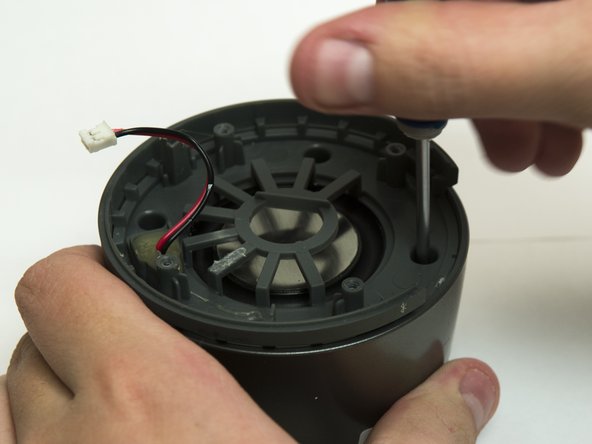
    • Use a Phillips #1 screwdriver to remove the four black 9mm screws from device.

  8. HMDX Jam Plus Speaker Replacement: paso 8, imagen 1 de 1
    • Use the plastic opening tool to pry the glue away from the wire. Be careful not to damage the wire.

  9. HMDX Jam Plus Speaker Replacement: paso 9, imagen 1 de 2 HMDX Jam Plus Speaker Replacement: paso 9, imagen 2 de 2
    • Use the plastic opening tool to separate the center plastic piece from the rest of the device.

    • Gently lift the center plastic piece and feed the speaker wire through the hole.

  10. HMDX Jam Plus Speaker Replacement: paso 10, imagen 1 de 2 HMDX Jam Plus Speaker Replacement: paso 10, imagen 2 de 2
    • Use the plastic opening tool to separate the speaker grate from the rest of the device.

  11. HMDX Jam Plus Speaker Replacement: paso 11, imagen 1 de 2 HMDX Jam Plus Speaker Replacement: paso 11, imagen 2 de 2
    • Carefully remove the speaker through the top of the device.

    • Apply new adhesive to the edge of the replacement speaker and the edge of the speaker grate to ensure they do not wiggle loose.

Conclusión

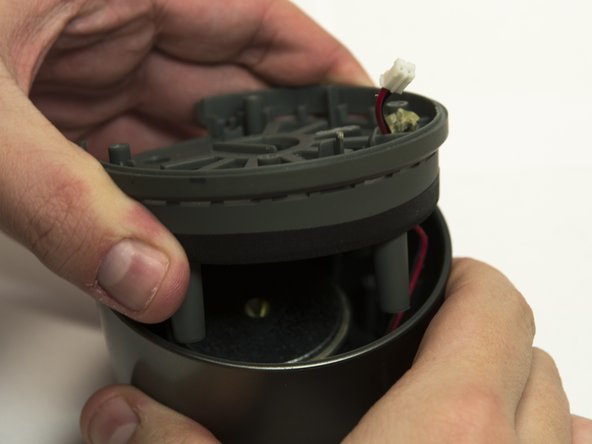
To reassemble your device, follow these instructions in reverse order.

Una persona más ha completado esta guía.

Maxwell Erickson

Miembro Desde 10/22/15

587 Reputación

4 Guías creadas

Equipo

Montana Tech, Team 10-3, Shirk Fall 2015 Miembro de Montana Tech, Team 10-3, Shirk Fall 2015

MTUM-SHIRK-F15S10G3

4 Miembros

4 Guías creadas

0 comentarios

Agregar Comentario

Ver Estadísticas:

Ultimas 24 horas: 0

Ultimos 7 días: 5

Ultimos 30 días: 11

Todo El Tiempo: 1,373