Saltar al contenido principal

Grip Tape Application

Qué necesitas

  1. Grip Tape Application, Grip Tape Application: paso 1, imagen 1 de 1
    • Peel off the paper backing from the sheet of grip tape.

    • Make sure you do not fold or wrinkle the grip tape.

  2. Grip Tape Application: paso 2, imagen 1 de 1
    • Center the sheet of grip tape evenly over the top of the skateboard deck.

  3. Grip Tape Application: paso 3, imagen 1 de 2 Grip Tape Application: paso 3, imagen 2 de 2
    • Starting from the very middle and moving outward, firmly press down on the grip tape while smoothing out any air bubbles that start to form.

  4. Grip Tape Application: paso 4, imagen 1 de 2 Grip Tape Application: paso 4, imagen 2 de 2
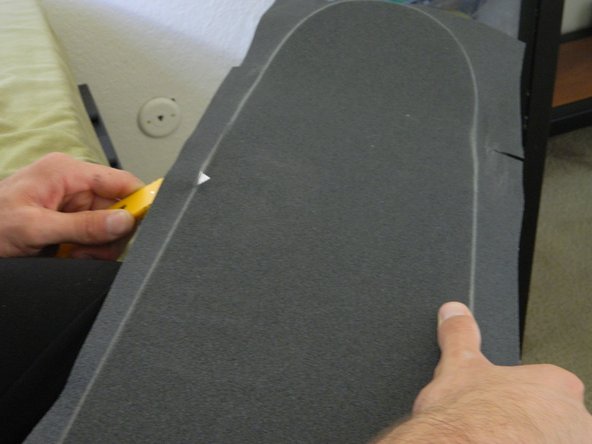
    • Use a screwdriver to scrape along the edges of the skateboard. This will remove some of the grip around the edges making the trimming process easier on you and your equipment.

    • You can use the utility knife to cut a perpendicular line in the excess grip tape if it is resisting the screwdriver too much.

  5. Grip Tape Application: paso 5, imagen 1 de 3 Grip Tape Application: paso 5, imagen 2 de 3 Grip Tape Application: paso 5, imagen 3 de 3
    • Use a utility knife to begin cutting around the edge of your skateboard to remove excess grip tape.

    • Angle your knife towards the inside of the skateboard to make it easier to cut a straight line.

    • Be careful when using the utility knife and always keep it pointed away from yourself and others.

  6. Grip Tape Application: paso 6, imagen 1 de 1
    • Once you have removed all of the excess grip tape, you can use the scraps to sand the edges of your cut to smooth out any small inconsistencies.

    • Use caution when sanding as the grip tape can become heated.

  7. Grip Tape Application: paso 7, imagen 1 de 1
    • If air bubbles persist, gently use a utility knife to poke a small hole in the grip tape at the center of the bubble and press out the air.

    • Be careful when using the utility knife and always keep it pointed away from yourself and others.

  8. Grip Tape Application: paso 8, imagen 1 de 2 Grip Tape Application: paso 8, imagen 2 de 2
    • After you have finished applying your grip tape, you can use a small screwdriver to poke holes where your truck hardware will be installed.

Conclusión

The next logical step in the assembly of a skateboard is to install skateboard trucks, please reference the Truck Installation guide.

4 personas más completaron esta guía.

Jared Stine

Miembro Desde 10/05/12

800 Reputación

3 Guías creadas

Equipo

Cal Poly, Team 6-32, Regan Fall 2012 Miembro de Cal Poly, Team 6-32, Regan Fall 2012

CPSU-REGAN-F12S6G32

5 Miembros

6 Guías creadas

0 comentarios

Agregar Comentario

Ver Estadísticas:

Ultimas 24 horas: 0

Ultimos 7 días: 3

Ultimos 30 días: 9

Todo El Tiempo: 7,945