Saltar al contenido principal

Google Pixelbook Go Right Charging Port Replacement

Qué necesitas

  1. Google Pixelbook Go Right Charging Port Replacement, Back Panel: paso 1, imagen 1 de 2 Google Pixelbook Go Right Charging Port Replacement, Back Panel: paso 1, imagen 2 de 2
    • Flip the device so that the back is facing up.

    • Peel the rubber stoppers off the top and bottom of the device.

  2. Google Pixelbook Go Right Charging Port Replacement: paso 2, imagen 1 de 2 Google Pixelbook Go Right Charging Port Replacement: paso 2, imagen 2 de 2
    • Remove ten 3 mm screws from around the edge of the back panel using a T5 Torx screwdriver.

  3. Google Pixelbook Go Right Charging Port Replacement: paso 3, imagen 1 de 3 Google Pixelbook Go Right Charging Port Replacement: paso 3, imagen 2 de 3 Google Pixelbook Go Right Charging Port Replacement: paso 3, imagen 3 de 3
    • Use an iFixit opening tool to pry up the back panel cover.

    • There is an orange ribbon cable that connects the cover to the base, so don't separate the two pieces completely.

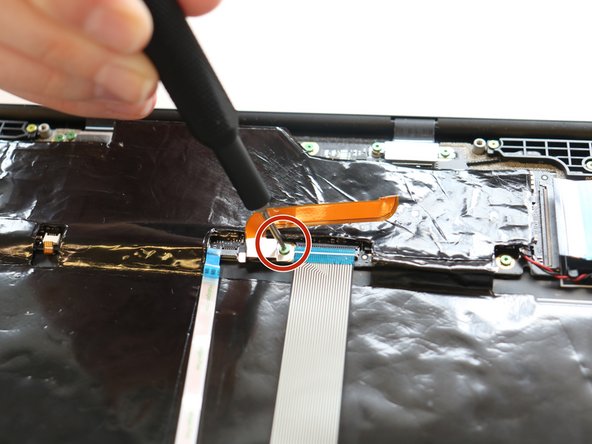
    • Remove the single 2 mm screw using a Torx T3 screwdriver.

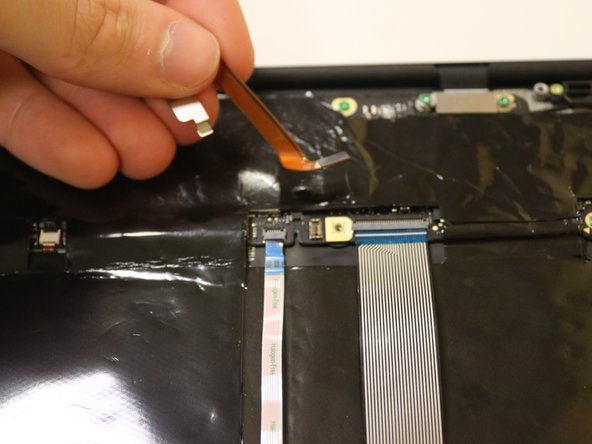
    • Disconnect the orange cable from the base of the device.

  4. Google Pixelbook Go Right Charging Port Replacement: paso 4, imagen 1 de 1
    • Insert wisdom here.

  5. Google Pixelbook Go Right Charging Port Replacement, Right Charging Port: paso 5, imagen 1 de 1
    • Remove the three pink screws from the right charging port using a T3 Torx screwdriver.

  6. Google Pixelbook Go Right Charging Port Replacement: paso 6, imagen 1 de 2 Google Pixelbook Go Right Charging Port Replacement: paso 6, imagen 2 de 2
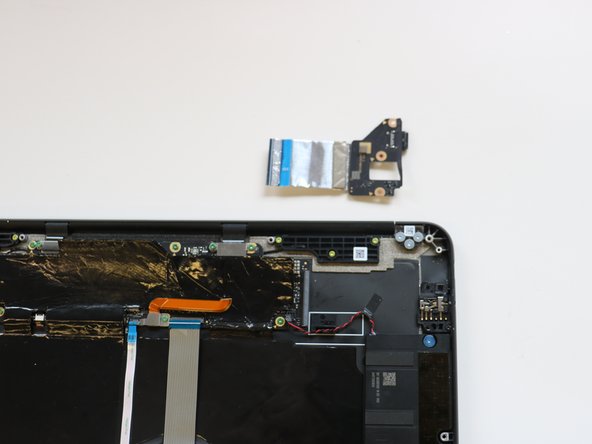
    • Remove the right charging port by picking it up and lifting it from the computer.

Conclusión

To reassemble your device, follow these instructions in reverse order.

Katie Brennan

Miembro Desde 03/01/23

85 Reputación

1 Guía escrita

0 comentarios

Agregar Comentario

Ver Estadísticas:

Ultimas 24 horas: 0

Ultimos 7 días: 4

Ultimos 30 días: 7

Todo El Tiempo: 158