Saltar al contenido principal

Google Pixelbook Display Replacement

Qué necesitas

  1. Google Pixelbook Display Replacement, Battery (Back Panel): paso 1, imagen 1 de 3 Google Pixelbook Display Replacement, Battery (Back Panel): paso 1, imagen 2 de 3 Google Pixelbook Display Replacement, Battery (Back Panel): paso 1, imagen 3 de 3
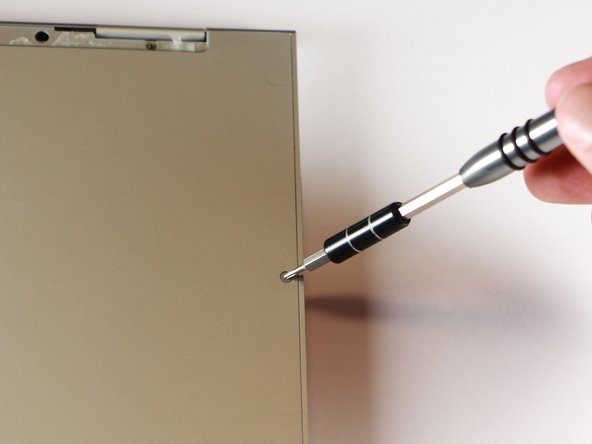
    • Use the iFixit opening tools or a metal spudger to pry the rubber covers off the back of your Pixelbook.

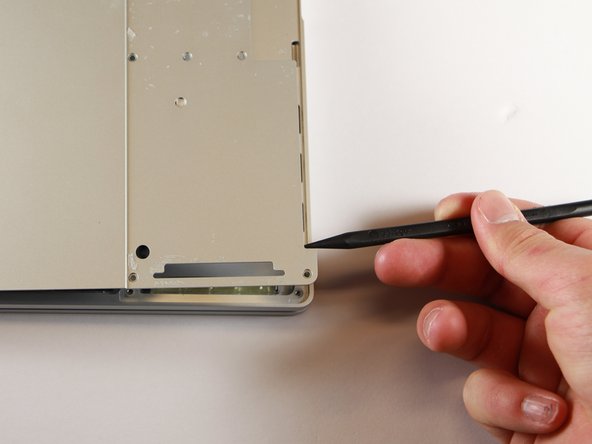
    • Peel the linings off completely until the back of the Pixelbook looks bare.

  2. Google Pixelbook Display Replacement: paso 2, imagen 1 de 2 Google Pixelbook Display Replacement: paso 2, imagen 2 de 2
    • Remove the two yellow 2.0mm screws by using a T3 Torx screwdriver.

  3. Google Pixelbook Display Replacement: paso 3, imagen 1 de 3 Google Pixelbook Display Replacement: paso 3, imagen 2 de 3 Google Pixelbook Display Replacement: paso 3, imagen 3 de 3
    • Remove the seventeen 3.0mm T5 Torx screws from the bottom panel.

  4. Google Pixelbook Display Replacement: paso 4, imagen 1 de 3 Google Pixelbook Display Replacement: paso 4, imagen 2 de 3 Google Pixelbook Display Replacement: paso 4, imagen 3 de 3
    • Use the nylon spudger to pry the edge of the Pixelbook up until you can grab the edge with your fingers.

    • Open the back panel completely and lay it flat so you see the whole inside of the computer.

  5. Google Pixelbook Display Replacement: paso 5, imagen 1 de 2 Google Pixelbook Display Replacement: paso 5, imagen 2 de 2
    • Remove the yellow 2.0mm screw from the middle of the panel by using the T3 Torx screwdriver to turn the screw counterclockwise.

  6. Google Pixelbook Display Replacement: paso 6, imagen 1 de 2 Google Pixelbook Display Replacement: paso 6, imagen 2 de 2
    • Remove the small, black casing by using the spudger to lift it up from its place.

  7. Google Pixelbook Display Replacement: paso 7, imagen 1 de 1
    • Disconnect the flat, black cord from the main component by using a spudger to push it out of the slot, or by using your hand to carefully pull it out.

    • Your back panel is now free from the main component.

  8. Google Pixelbook Display Replacement, Display Board: paso 8, imagen 1 de 1
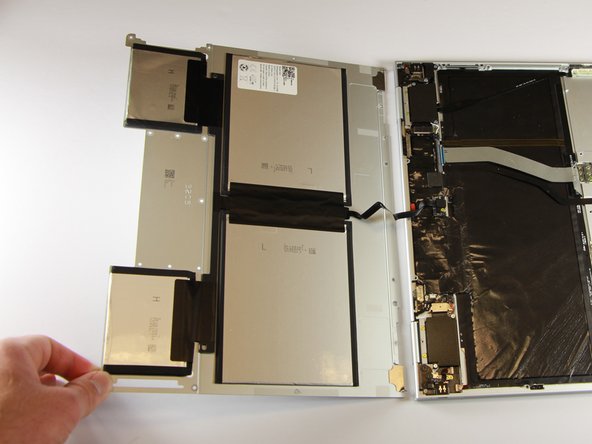
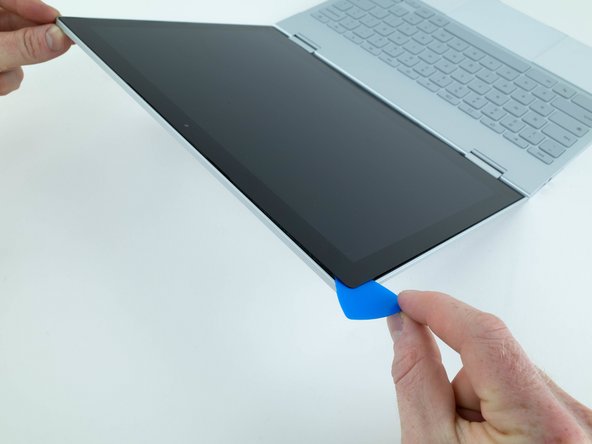
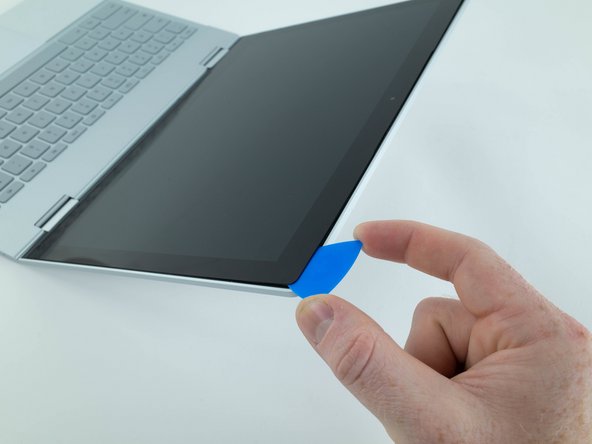
    • Use an iSclack, or suction cup, to lift up the corner of the display from the case.

  9. Google Pixelbook Display Replacement: paso 9, imagen 1 de 3 Google Pixelbook Display Replacement: paso 9, imagen 2 de 3 Google Pixelbook Display Replacement: paso 9, imagen 3 de 3
    • Insert an opening pick into the gap between the display and case.

    • Repeat this procedure on other side.

  10. Google Pixelbook Display Replacement: paso 10, imagen 1 de 1
    • Using an opening pick, slowly pry up on the display until it separates.

    • Don't completely remove the display as ribbon cables connect it to the case.

  11. Google Pixelbook Display Replacement: paso 11, imagen 1 de 3 Google Pixelbook Display Replacement: paso 11, imagen 2 de 3 Google Pixelbook Display Replacement: paso 11, imagen 3 de 3
    • Use the pointed end of spudger to flip up the small locking flap on the ZIF connector.

    • Remove the display ribbon cable from the socket.

  12. Google Pixelbook Display Replacement: paso 12, imagen 1 de 3 Google Pixelbook Display Replacement: paso 12, imagen 2 de 3 Google Pixelbook Display Replacement: paso 12, imagen 3 de 3
    • Use the pointed end of a spudger to flip up the small locking flap on the ZIF connector.

    • Remove the display ribbon cable from the socket.

  13. Google Pixelbook Display Replacement: paso 13, imagen 1 de 3 Google Pixelbook Display Replacement: paso 13, imagen 2 de 3 Google Pixelbook Display Replacement: paso 13, imagen 3 de 3
    • Flip the display over and lay it flat on the keyboard.

  14. Google Pixelbook Display Replacement: paso 14, imagen 1 de 3 Google Pixelbook Display Replacement: paso 14, imagen 2 de 3 Google Pixelbook Display Replacement: paso 14, imagen 3 de 3
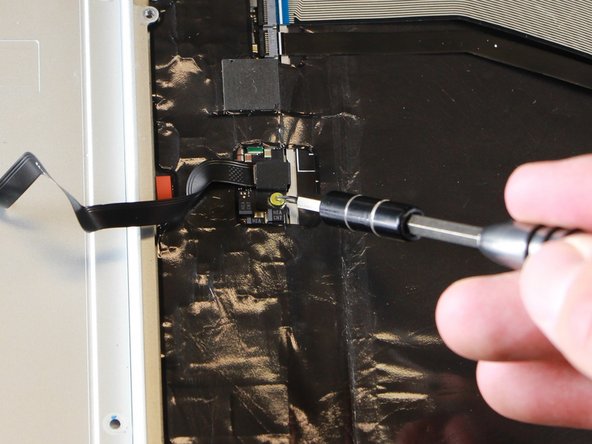
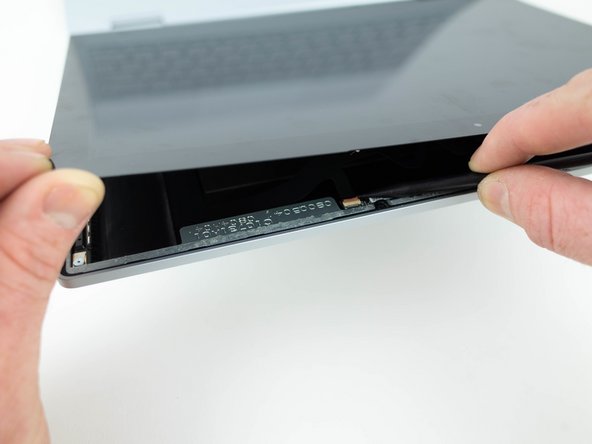
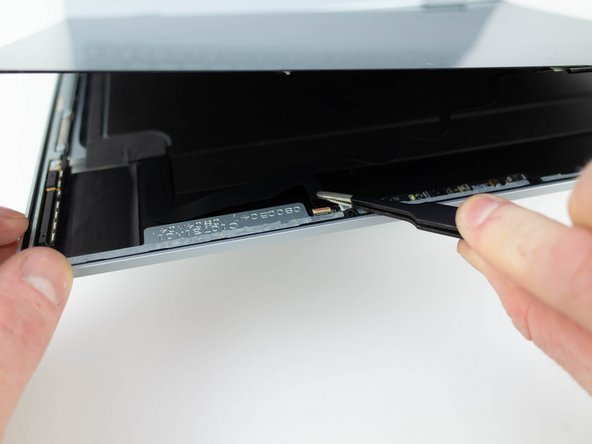
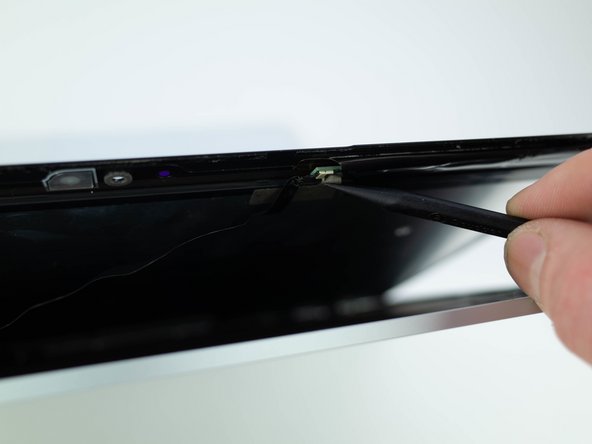
    • Use a pair of tweezers to grab the clip on the display connector and swing it over to the other side of the socket.

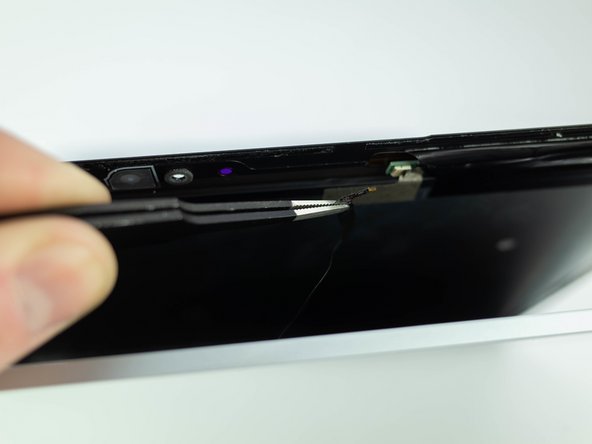
    • Pull on the clip to disconnect the display.
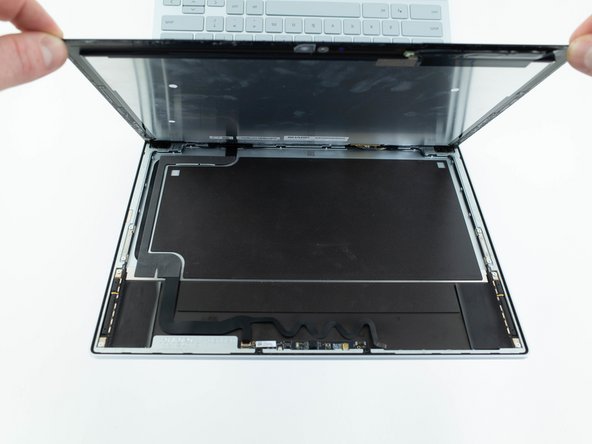
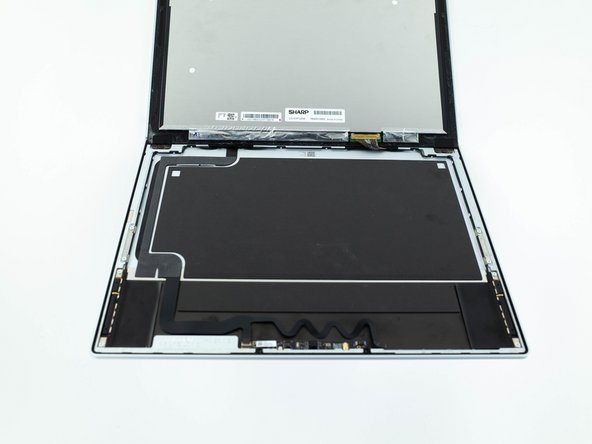
    • Remove the display.

Conclusión

To reassemble your device, follow these instructions in reverse order.

11 personas más completaron esta guía.

Blake Klein

Miembro Desde 01/29/17

70,510 Reputación

50 Guías creadas

9 comentarios

Where would you find a replacement display?

Carlos Garcia - Contestar

Any idea on where to get a display replacement for the Pixelbook?

Nicolas - Contestar

Is it necessary to remove the back in order to remove the screen? I cant see any connection between the two?

Thanks

Stevie B - Contestar

You remove the back to disconnect the battery.

Sergio B -

any idea how to remove the glass shade on the back panel?

jon - Contestar

Agregar Comentario

Ver Estadísticas:

Ultimas 24 horas: 3

Ultimos 7 días: 34

Ultimos 30 días: 106

Todo El Tiempo: 10,398