Introducción
Esta guía de reparación fue creada por el personal de iFixit y no ha sido respaldada por Google. Obtén más información sobre nuestras guías de reparación aquí.
Sigue esta guía para remplazar una pantalla rota o agrietada de un Google Pixel 5.
A diferencia de modelos anteriores de Google Pixel, la pantalla del Pixel 5 esta reforzada con un marco de metal. El altavoz del auricular esta pegado en la parte de atrás de la pantalla.
Qué necesitas
-
-
Calienta un iOpener y aplícalo en el borde inferior de la pantalla durante un minuto
-
-
-
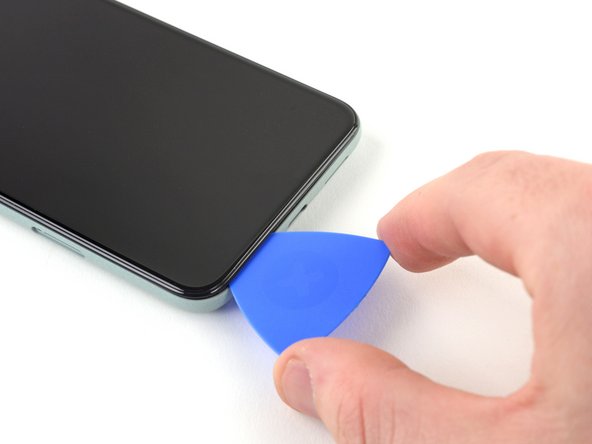
Costura de la pantalla: esta costura separa la pantalla del resto del teléfono. No hagas palanca en esta costura.
-
Costura del bisel: aquí es donde el bisel de plástico diseñado para proteger la pantalla se encuentra con el marco. Se mantiene en su lugar mediante clips de plástico. Aquí es donde debes hacer palanca.
Please remove the image of the pick in the bottom of the phone in Step 2. This led me to place a pick there BEFORE step 5 which damaged my digitizer. Now I have to replace the entire screen as a result.
Alternatively, add the image from step 5 with the suction cup in place, or just draw an arrow digitally to the seam you're referring to in step 2. Or call "Step 2" "Important Note" instead of a step.
Wow, I'm glad I read this first. I too assumed this step was about inserting the pick, but wasn't sure because it wasn't clearly written that way.
Agreed with the "important note" idea, along with combining this with step 5 where the context is actually relevant.
-
-
-
Tira de la manija azul hacia la bisagra para desactivar el modo de apertura.
-
Coloca las ventosas cerca del borde inferior de la pantalla, una en el frente y otra en la parte posterior.
-
Empuja hacia abajo las copas para aplicar succión en el área deseada.
-
-
-
Empuja la manija azul lejos de la bisagra para activar el modo de apertura.
-
Gira el mango en el sentido de las agujas del reloj hasta que veas que las copas comienzan a estirarse.
-
Espera un minuto para que el adhesivo tenga la oportunidad de soltarse y presentar un espacio de apertura.
-
Inserta una púa de apertura debajo de la pantalla y su marco biselado cuando Anti-Clamp cree un espacio lo suficientemente grande.
-
Omite el siguiente paso.
-
-
-
Con una ventosa en la pantalla, lo más cerca posible del borde calentado.
-
Tira hacia arriba de la ventosa fuerte y constante para crear un espacio.
-
Inserta la púa de apertura.
"Insert the opening pick into the gap." NOT the gap under the glass, the second gap... If not you will probably break your screen, at least I did. Especially important if your pixel 5 shipped with the screen gap :(
-
-
-
-
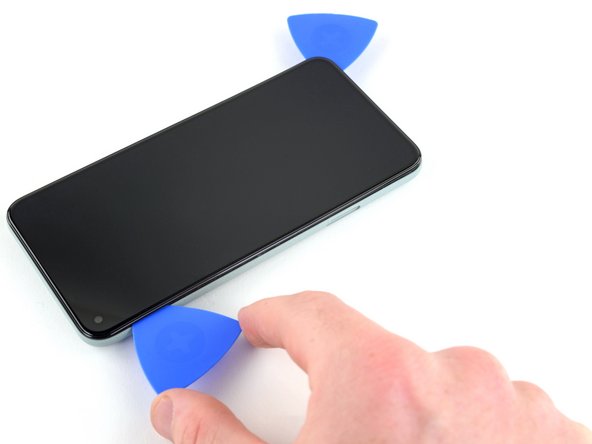
Desliza la púa de apertura hacia adelante y hacia atrás a lo largo de la parte inferior de la pantalla para cortar el adhesivo.
-
Deja la púa o uñeta insertada en la esquina inferior derecha para prevenir que el adhesivo se selle nuevamente
-
-
-
Utiliza un iOpener precalentado en el borde izquierdo de la pantalla por un minuto.
-
-
-
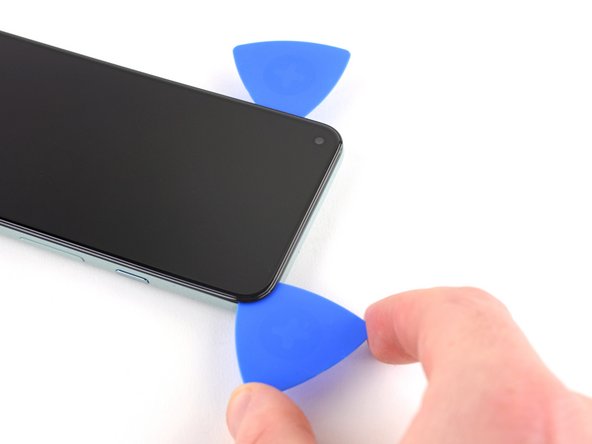
Inserta otra púa o uñeta en la esquina inferior izquierda de la pantalla.
-
Desliza la púa o uñeta alrededor de la esquina izquierda.
-
Continúa deslizando la púa o uñeta hacia la cámara frontal para cortar el adhesivo en el borde izquierdo de la pantalla.
-
Deja la púa o uñeta insertada para evitar que el adhesivo se vuelva a sellar.
I suggest placing an orientation sticker on the screen so you don't lose track of where that delicate ribbon cable is. I gently bent one, immediately after doing a successful one, resulting in a costly screen replacement. It's important to know that it's incredibly delicate.
-
-
-
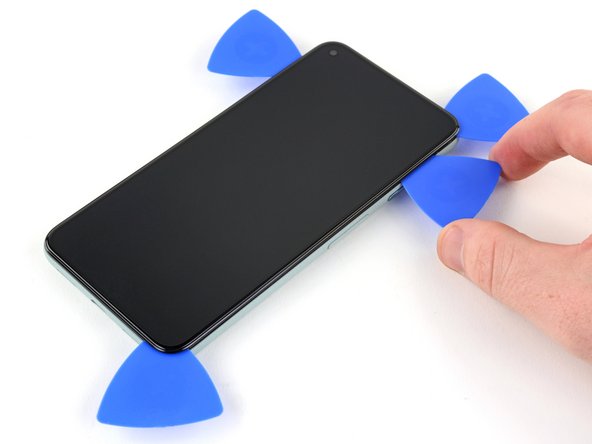
Usa la púa de apertura desde la esquina superior izquierda para levantar el borde izquierdo de la pantalla unos milímetros. Esto evitará que los clips se vuelvan a encajar en la carcasa.
-
Levanta el lado derecho de la pantalla y abre el teléfono como si fuese un libro.
-
-
-
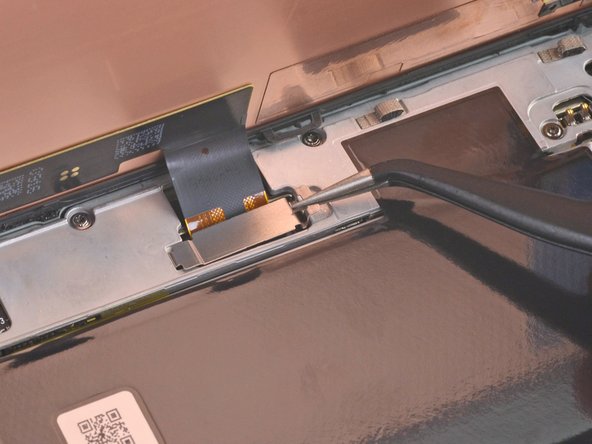
Utiliza unas pinzas para sujetar la cubierta del conector de la pantalla que asegura el cable flexible de la pantalla.
-
Empuja el clip hacia el conector para desbloquearlo.
I found it easier to use the spudger here rather than the tweezers (which have sharp ends that could damage something if you happen to slip).
some 5a models will have a screw instead of clip , here's a photo https://imgur.com/a/9dZG5pQ
-
-
-
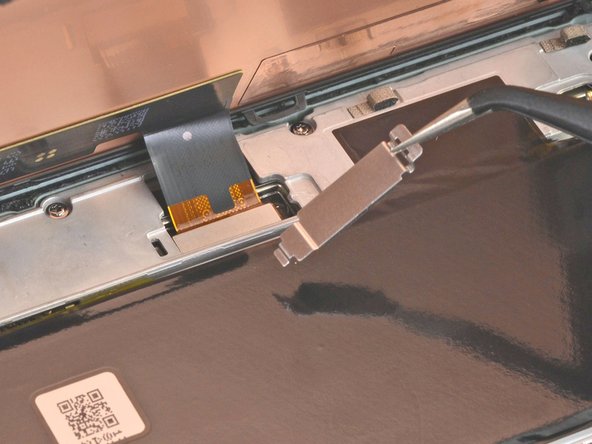
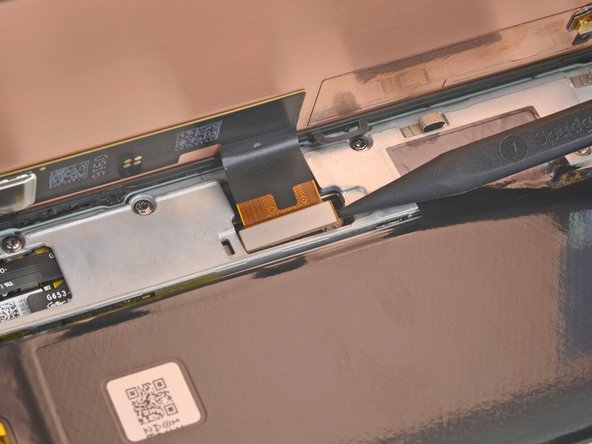
Usa la punta del spudger para levantar y desconectar el cable flexible de la pantalla.
The curved ends of the blue iFixit Opening Tool helped me reseat the connector when installing the new screen.
So hard to get this thing reseated to test the screen, even before putting the adheasive round the phone edge to finish the job. What made it particularly hard was that the flex cable on mine seemed very short compared to video's i've seen online.
-
-
-
Quita la pantalla
Where from we can buy the screen. Thanks
the screen does not fit
After reconnecting the screen, is it necessary to remove a screen protector (if installed) for the a proper screen calibration?
Yes. Remove the screen protector when installing the screen.
-


Compara tu nueva pieza de repuesto con la pieza original
—puedes necesitar transferir los componentes restantes o quitar los soportes adhesivos de la nueva parte después de instalarlo.
Para rearmar tu dispositivo, sigue los pasos anteriores en el orden contrario.
Lleva tu basura electrónica a R2 o reciclador certificado por e-Stewards.
¿La reparación no fue como planeabas? Intenta solucionar algunos problemas básicos, o pide ayuda a nuestra Comunidad de Respuestas.
Cancelar: No complete esta guía.
51 personas más completaron esta guía.
Un agradecimiento especial a estos traductores:
100%


Estos traductores nos están ayudando a reparar el mundo! ¿Quieres contribuir?
Empezar a traducir ›

29 comentarios
if i want only screen (lcd display) of pixel 5 from where can i get the screen. sudhri@gmail.com my mail address
Hello! This tutorial is well explained and seems ok to realize, but the problem i’m facing is to find the right spare part… Once contacted, google assistance said the only option is to send it back to them for 138€ and 7-10 days… Can you recommand a trustworsthy website for that?
Usually i look on amazon (sent by amazon) to get the warranty if i got any problem.
Check out the iFixit store. We stock some parts for the Pixel 5, including the screen and battery.
Zac Hall -
The screen that I ordered has a cable that runs the wrong way. It would need to be twisted to make it fit my Pixel 5. Any suggestions?
Get a refund and send it back and order a different display.
unless you’re a super pro, better with frame, It is not easy to glue up to the frame, and if that frame is damaged or gets damaged during tear down, can be a problem.
Hi,
I just replaced the screen with a new one, but now I have problems with the proximity sensor, When i press on one side of the screen it works, so I guess it is because it may be not glued strongly wnough? wich glue do you recommend?
I had the same problem -- the proximity sensor was unreliable after replacing the screen, and pressing down on the top of the screen helped. In my case, I used pre-cut adhesive both between the screen and the thin plastic frame and between the frame and the lower case. With this adhesive, the screen sat a little further away from the sensor and it's likely that the original calibration of the sensor was no longer correct.
I fixed it by heating the top of the phone, firmly clamping it, and leaving it overnight. The top of the screen sits flush now and the proximity sensor works reliably.
There is no info here about transferring the speaker. How is that done? Is adhesive needed? If so, what type?
I just use one or two strips of adhesive tape if I need to use new adhesive. Not much, though. If possible, get the earpiece speaker nice and warm to soften the adhesive. Apply lots of heat to the old display on the touchscreen side, not heating the earpiece directly. If you can heat it up enough, it should come off pretty cleanly. Then warm it up again and seat it well onto the new display with the original adhesive still attached the the earpiece speaker.
Hello! Just foolishly cracked my Google Pixel 5 screen and have no idea where to get the replacement. Based on your experience, could you please suggest where to order Pixel 5 screen replacement so that it would be as sharp and bright as the original? Ideally – THE original. Thank you in advance!
i bought a screen on ebay. supposedly oem. it seems just the same as the original.
Mike K -
Rounded.com expensive but 100% new and original parts straight from manufacturer
Simon -
I have to say I found this to be one of the easiest repairs I've ever done, I bought the complete original screen assembly from rounded.com and the manufacturer adhesive tape which gives the phone its IP rating seal back. Cost me about £160 all in. But I learnt skills at the same time. I used my nails and a guitar plectrum working from bottom end of the phone up. As good as new, well chuffed
Thanks ifixit. my pixel 5 lives again. screen replacement kit surprised me with some excellent tools provided. adhesive i thought would be the tricky part but you guys made it very easy to put on. cheers
My Google Pixel screen was replaced because it was accidentally broken while replacing another part. The screen put on it worked just fine until we tried to put the case back on the phone. Now I can't use the phone. Is there any way I can fix it myself without having to get a whole new screen or phone?
replacement screen works but has a green tint on low brightness? how can I fix this? (old screen works fine color wise, 2 other replacements also have green tint )
some 5a models will have a screw instead of clip , here's a photo https://imgur.com/a/9dZG5pQ
Ok for those that do not know, The pixel 5 you need the model number from it to be sure the part you get is for that phone, you can find the model number in about section, regulatory labels, yes it's a pixel 5 but it still has a model number for it and they a different from carrier to carrier and what not so be sure you got the right model of your pixel 5 that will solve most of your problems getting wrong parts
I completed the screen replacement, but when I turned the smartphone on, the selfie camera showed a black screen. I had to take the screen off the phone all over again to figure out what was wrong. Turns out there was a protective thin black film covering the lens hole. This wasn't mentioned in the guide.
Seems like there should be a step added where one powers the phone on and tests that the screen and front camera are working before pressing down the adhesive to seal the phone. Now I have to buy another adhesive template to seal the phone again. Grrr...
Also, the holding tabs for the adhesive are on the clear disposed film (contrary to the adhesive installation guide), which is peeled off first. Once peeled off, there are no longer tabs to use to hold the adhesive film, so it's awkward to position it without bending the colored adhesive film, distorting its shape, or inadvertantly touching adhesive.
Cómo aplicar tiras adhesivas cortadas a medida
Good guide, otherwise.
Good morning...
Replaced my cracked screen with the genuine google replacement part. The issue is the replacement adhesive sucks. It's terrible and worthless. The screen doesn't stay connected to the case. Does anyone have any recommendations for how to keep the screen adhered to the case?
An issue I had was that when I took off the old screen, the bezel was still stuck to the phone and came off the screen. I didn't understand it was supposed to come off as well and it was not well documented here. I would suggest adding it to this tutorial.
As other comments have mentioned, the genuine part comes with a black sticker over the front camera, and a blue transparent sheet that covers at least the proximity sensor. Test both the front facing camera and the proximity sensor (The knock knock to wake relies on the proximity sensor) in addition to your other checks before fixing the screen on permanently.
The bottom right corner of my screen will not close- it is coming up off of the case. My old screen did this too in the same spot (and my previous replacement was done by professionals at UBreakIFix).
Anyone have any idea why this is happening or how to fix it?
A white line with a thickness of 1 cm appeared in the screen of my phone, knowing the screen is intact and there is no breakage, I turned on and reset the phone to factory settings to no avail (google pexil 5 )
It would be helpful to know for how long ally the heated pad
Yuri Deglin - Contestar
Agreed, my friend from the past.
Albert Einstein -
If you click on the "iOpener" link, it tells you to heat it up for 30 seconds, and if you're using a microwave with a carousel, make sure it moves freely.
Azurina Schalk-Smith - Contestar
How long do you think it would take with a hair dryer?
Gen L. - Contestar