Saltar al contenido principal

Google Home Motherboard Replacement

Qué necesitas

  1. Google Home Motherboard Replacement, Interconnect Cable: paso 1, imagen 1 de 3 Google Home Motherboard Replacement, Interconnect Cable: paso 1, imagen 2 de 3 Google Home Motherboard Replacement, Interconnect Cable: paso 1, imagen 3 de 3
    • Removing the lid too quickly could cause you to tear the interconnect cable that attaches the base to the top of the lid.

    • Pull off the Google Home’s magnetically attached base and set it aside.

    • Using a Torx T6 screwdriver head, unscrew the four 1.7mm Torx screws deep in the speaker recess so that you can remove the lid.

    • After all four screws are out, pop the lid off the device to open the capsule.

  2. Google Home Motherboard Replacement: paso 2, imagen 1 de 1
    • Carefully remove the interconnect cable using a pair of tweezers.

  3. Google Home Motherboard Replacement, Mute Button Switch: paso 3, imagen 1 de 2 Google Home Motherboard Replacement, Mute Button Switch: paso 3, imagen 2 de 2
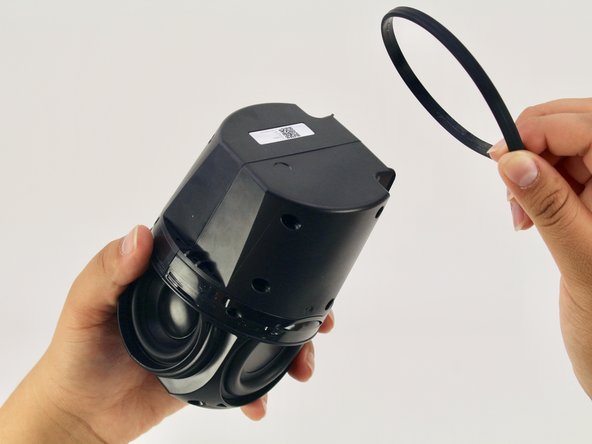
    • Remove the ‘O-ring’ that wraps around the device holding the switch panel in place.

  4. Google Home Motherboard Replacement: paso 4, imagen 1 de 2 Google Home Motherboard Replacement: paso 4, imagen 2 de 2
    • Using a Torx T6 screwdriver head, unscrew the four black 1.7mm Torx screws.

    • Remove the panel and the mute button switch. If done correctly you should now be able to see the device’s guitar-shaped motherboard.

  5. Google Home Motherboard Replacement, Motherboard: paso 5, imagen 1 de 2 Google Home Motherboard Replacement, Motherboard: paso 5, imagen 2 de 2
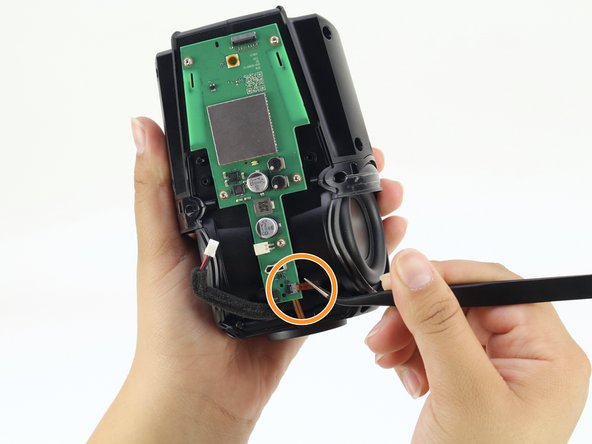
    • Disconnect the foam-padded, red and black cable that connects the motherboard to the sound driver, by squeezing and pulling on the tab

    • Disconnect the orange interconnect cable that connects the bottom of the device to the motherboard by pulling straight out on the orange tab.

  6. Google Home Motherboard Replacement: paso 6, imagen 1 de 2 Google Home Motherboard Replacement: paso 6, imagen 2 de 2
    • Using a Torx T6 screwdriver head, unscrew the five silver 1.7mm Torx screws keeping the motherboard in place.

    • Remove the motherboard.

Conclusión

To reassemble your device, follow these instructions in reverse order.

3 personas más completaron esta guía.

Maya Wharton

Miembro Desde 04/17/18

175 Reputación

1 Guía escrita

Equipo

Cal Poly, Team S24-G11, Maness Spring 2018 Miembro de Cal Poly, Team S24-G11, Maness Spring 2018

CPSU-MANESS-S18S24G11

4 Miembros

5 Guías creadas

2 comentarios

Where can one purchase a replacement motherboard?

Jim Pflasterer - Contestar

Most likely the only place to do so would be through contacting Google, as there is no parts sold at retail, only full units

Nick Bergstrom -

Agregar Comentario

Ver Estadísticas:

Ultimas 24 horas: 1

Ultimos 7 días: 5

Ultimos 30 días: 25

Todo El Tiempo: 3,150