Saltar al contenido principal

Gateway SA1 Cooling Fan Replacement

Qué necesitas

  1. Gateway SA1 Cooling Fan Replacement, Battery: paso 1, imagen 1 de 1
    • Move the latch to the right of the battery to unlock.

  2. Gateway SA1 Cooling Fan Replacement: paso 2, imagen 1 de 1
    • Slide the latch on the left directly below the battery to unlock and pull out the battery as shown.

    • The latch must be held in position to remove the battery.

  3. Gateway SA1 Cooling Fan Replacement, Cooling Fan: paso 3, imagen 1 de 2 Gateway SA1 Cooling Fan Replacement, Cooling Fan: paso 3, imagen 2 de 2
    • Unscrew the indicated Philips screw.

    • Screw cannot be completely removed from cover.

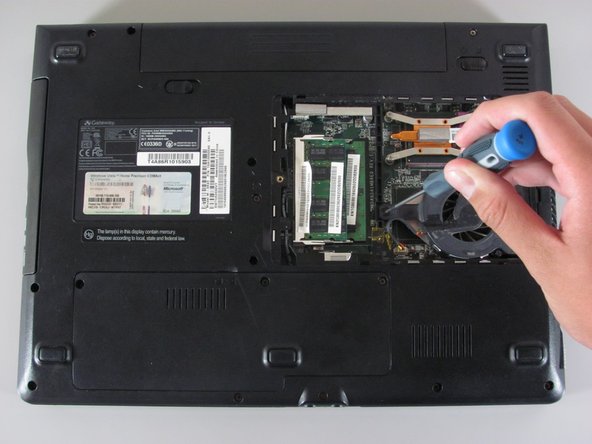
  4. Gateway SA1 Cooling Fan Replacement: paso 4, imagen 1 de 1
    • Use the spudger to pry open the cover.

    • There will be three tabs on each side except for the side with the screw.

  5. Gateway SA1 Cooling Fan Replacement: paso 5, imagen 1 de 2 Gateway SA1 Cooling Fan Replacement: paso 5, imagen 2 de 2
    • Unscrew the six indicated Philips screws.

    • These screws cannot be completely removed from the cooling fan component.

  6. Gateway SA1 Cooling Fan Replacement: paso 6, imagen 1 de 1
    • Unplug the shown cable attaching the cooling fan to the computer.

  7. Gateway SA1 Cooling Fan Replacement: paso 7, imagen 1 de 1
    • You are now able to remove the cooling fan.

Conclusión

To reassemble your device, follow these instructions in reverse order.

6 personas más completaron esta guía.

Diego Carteno

Miembro Desde 04/15/10

258 Reputación

7 Guías creadas

Equipo

Cal Poly, Team 24-20, Regan Spring 2010 Miembro de Cal Poly, Team 24-20, Regan Spring 2010

CPSU-REGAN-S10S24G20

4 Miembros

14 Guías creadas

0 comentarios

Agregar Comentario

Ver Estadísticas:

Ultimas 24 horas: 1

Ultimos 7 días: 1

Ultimos 30 días: 3

Todo El Tiempo: 13,429