Saltar al contenido principal

Gateway NV53A24u Keyboard Replacement

Qué necesitas

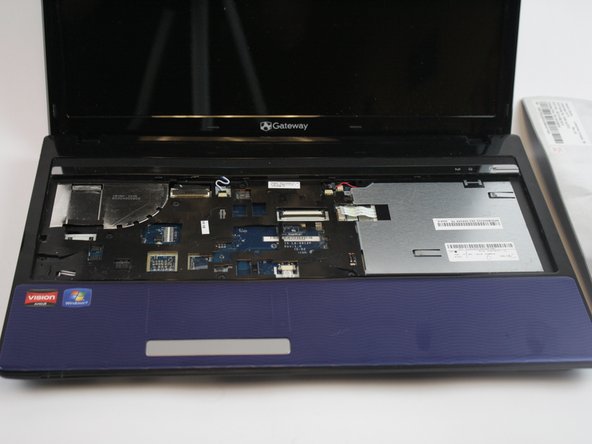
  1. Gateway NV53A24u Keyboard Replacement, Keyboard: paso 1, imagen 1 de 1
    • Before removing the keyboard, turn off the computer and open it.

  2. Gateway NV53A24u Keyboard Replacement: paso 2, imagen 1 de 2 Gateway NV53A24u Keyboard Replacement: paso 2, imagen 2 de 2
    • Use a spudger to gently pry out the keyboard.

    • When working with electronics, it's important to choose a tool that's ESD-safe to avoid accidental damage to the device. The metal spudger is great when you need serious prying power, but a regular black nylon spudger should be used whenever possible.

    • There are small metal tabs holding it in place beneath the bezel. Using your tool, you should be able to easily pop the keyboard out.

  3. Gateway NV53A24u Keyboard Replacement: paso 3, imagen 1 de 2 Gateway NV53A24u Keyboard Replacement: paso 3, imagen 2 de 2
    • Once the keyboard is removed, you may have to remove the connecting ribbon cable, but it easily pulls out.

Conclusión

To reassemble your device, follow these instructions in reverse order.

Una persona más ha completado esta guía.

tannerroan

Miembro Desde 10/11/16

333 Reputación

2 Guías creadas

Equipo

USF Tampa, Team 1-5, Leahy Fall 2016 Miembro de USF Tampa, Team 1-5, Leahy Fall 2016

USFT-LEAHY-F16S1G5

3 Miembros

10 Guías creadas

0 comentarios

Agregar Comentario

Ver Estadísticas:

Ultimas 24 horas: 0

Ultimos 7 días: 4

Ultimos 30 días: 11

Todo El Tiempo: 499