Saltar al contenido principal

Gateway KAV60 LT2016U Netbook Cooling Fan Replacement

Guía Archivada
Esta guía se mantiene únicamente para fines históricos. Utiliza la última versión de la guía para llevar a cabo tu reparación.

Qué necesitas

  1. Gateway KAV60 LT2016U Netbook Cooling Fan Replacement, Battery: paso 1, imagen 1 de 1
    • Unlock the button in the top left on the back of the laptop (So the red is showing).

  2. Gateway KAV60 LT2016U Netbook Cooling Fan Replacement: paso 2, imagen 1 de 1
    • The battery should be able to be removed easily now.

  3. Gateway KAV60 LT2016U Netbook Cooling Fan Replacement, Cooling Fan: paso 3, imagen 1 de 1
    • Start by first removing the battery of the device.

  4. Gateway KAV60 LT2016U Netbook Cooling Fan Replacement: paso 4, imagen 1 de 1
    • Next remove the RAM, hard drive, and wifi card before continuing so they aren't damaged.

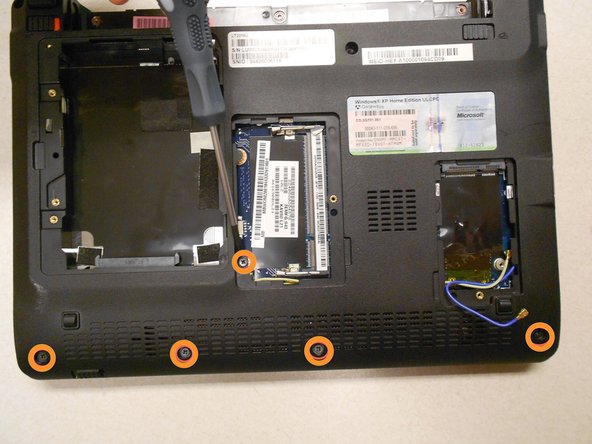
  5. Gateway KAV60 LT2016U Netbook Cooling Fan Replacement: paso 5, imagen 1 de 2 Gateway KAV60 LT2016U Netbook Cooling Fan Replacement: paso 5, imagen 2 de 2
    • Remove all 11 of the screw shown on the bottom of the lap top using the specified screw driver.

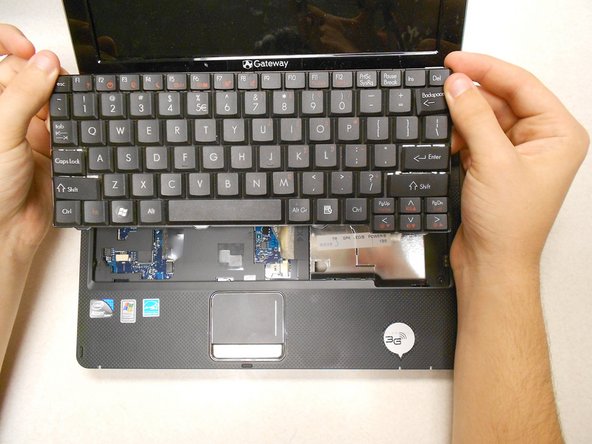
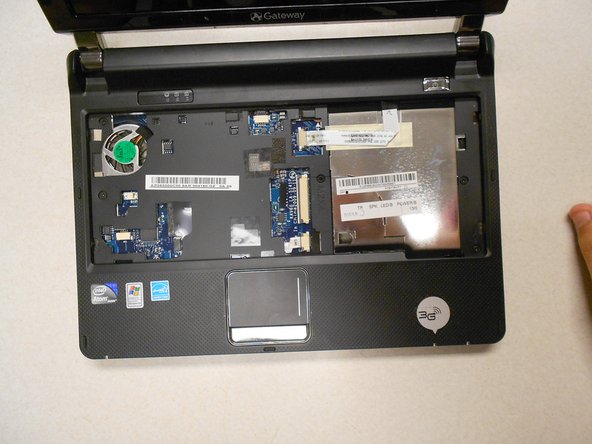
  6. Gateway KAV60 LT2016U Netbook Cooling Fan Replacement: paso 6, imagen 1 de 3 Gateway KAV60 LT2016U Netbook Cooling Fan Replacement: paso 6, imagen 2 de 3 Gateway KAV60 LT2016U Netbook Cooling Fan Replacement: paso 6, imagen 3 de 3
    • Lift off the keyboard by doing exactly what is shown in the first picture. Get the head of the plastic opening tool under and then wedge it out.

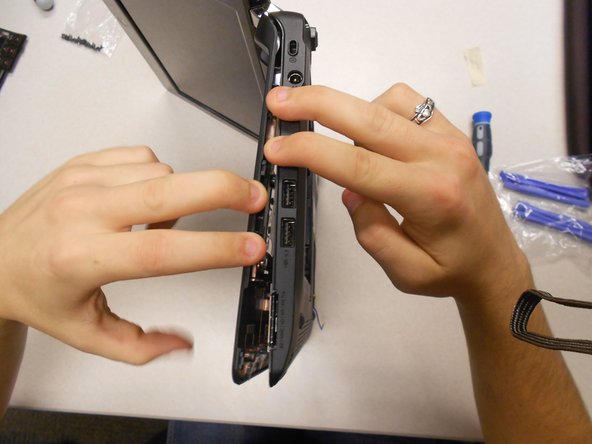
  7. Gateway KAV60 LT2016U Netbook Cooling Fan Replacement: paso 7, imagen 1 de 3 Gateway KAV60 LT2016U Netbook Cooling Fan Replacement: paso 7, imagen 2 de 3 Gateway KAV60 LT2016U Netbook Cooling Fan Replacement: paso 7, imagen 3 de 3
    • Remove the 5 circled screws with the Phillips #0 screw driver.

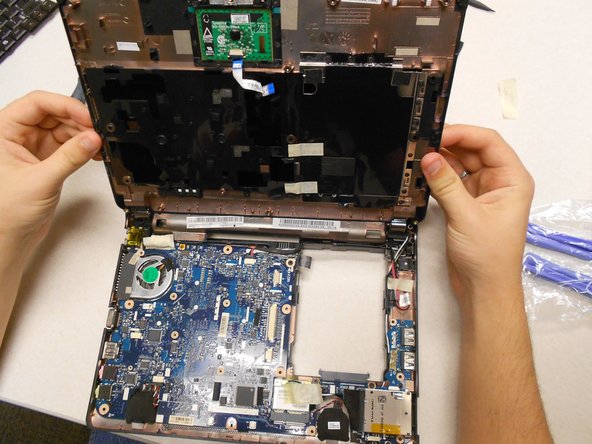
    • Carefully separate the back cover from the front either using your hands or a plastic opening tool.

  8. Gateway KAV60 LT2016U Netbook Cooling Fan Replacement: paso 8, imagen 1 de 2 Gateway KAV60 LT2016U Netbook Cooling Fan Replacement: paso 8, imagen 2 de 2
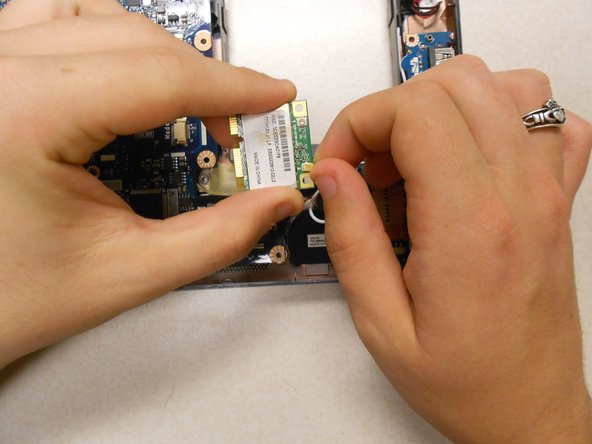
    • Unscrew this 1 screw to remove the wifi card.

    • Then unplug the wires it is attached to and take it out.

  9. Gateway KAV60 LT2016U Netbook Cooling Fan Replacement: paso 9, imagen 1 de 2 Gateway KAV60 LT2016U Netbook Cooling Fan Replacement: paso 9, imagen 2 de 2
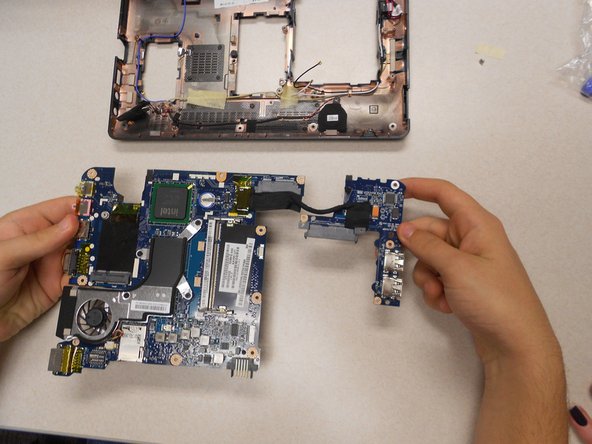
    • Use the phillps #00 screw driver to remove these 3 small scows so the motherboard can be removed.

    • Then remove it from the base of th computer.

  10. Gateway KAV60 LT2016U Netbook Cooling Fan Replacement: paso 10, imagen 1 de 1
    • Use the Phillips #00 screw driver to remove the 4 circled screws.

  11. Gateway KAV60 LT2016U Netbook Cooling Fan Replacement: paso 11, imagen 1 de 1
    • Disconnect the wires from the motherboard.

    • The fan should now be fully disconnected and ready to replace.

Conclusión

To reassemble your device, follow these instructions in reverse order.

Una persona más ha completado esta guía.

Kyle

Miembro Desde 03/11/14

622 Reputación

3 Guías creadas

Equipo

0 comentarios

Agregar Comentario

Ver Estadísticas:

Ultimas 24 horas: 0

Ultimos 7 días: 3

Ultimos 30 días: 5

Todo El Tiempo: 114