Saltar al contenido principal

Gateway GWTC116-2BL Display Replacement

Qué necesitas

  1. Gateway GWTC116-2BL Display Replacement, Back Panel: paso 1, imagen 1 de 1
    • Ground yourself before disassembling and handling the computer.

    • Remove the ten 3.0 mm Phillips #00 screws from the back panel of the laptop.

  2. Gateway GWTC116-2BL Display Replacement: paso 2, imagen 1 de 2 Gateway GWTC116-2BL Display Replacement: paso 2, imagen 2 de 2
    • Use the spudger to pry the back panel away from the body of the laptop.

  3. Gateway GWTC116-2BL Display Replacement, Battery: paso 3, imagen 1 de 1
    • Remove the five 3.0 mm Phillips #00 screws.

  4. Gateway GWTC116-2BL Display Replacement: paso 4, imagen 1 de 2 Gateway GWTC116-2BL Display Replacement: paso 4, imagen 2 de 2
    • Using your fingers, flick open the battery connector bracket.

    • Remove the connector from bracket.

  5. Gateway GWTC116-2BL Display Replacement: paso 5, imagen 1 de 1
    • Pull up the battery to remove from the base.

  6. Gateway GWTC116-2BL Display Replacement, Motherboard: paso 6, imagen 1 de 1
    • Using your fingers, flick the cable connector bracket open.

    • Remove the cable from the connector.

  7. Gateway GWTC116-2BL Display Replacement: paso 7, imagen 1 de 2 Gateway GWTC116-2BL Display Replacement: paso 7, imagen 2 de 2
    • Using your fingers, disconnect the black and white connector brackets underneath the gray cable.

  8. Gateway GWTC116-2BL Display Replacement: paso 8, imagen 1 de 2 Gateway GWTC116-2BL Display Replacement: paso 8, imagen 2 de 2
    • Remove the four 3.0 mm Phillips #00 screws located on the motherboard casing.

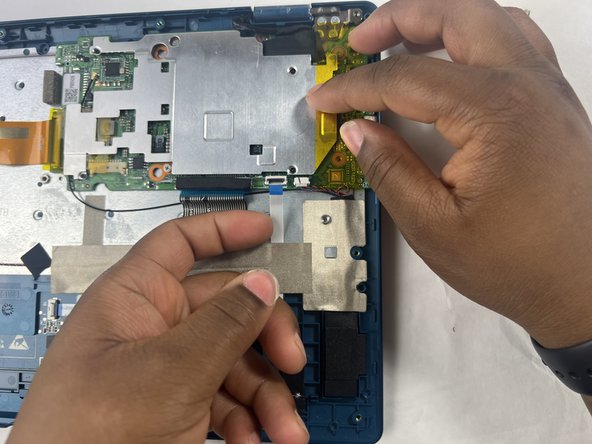
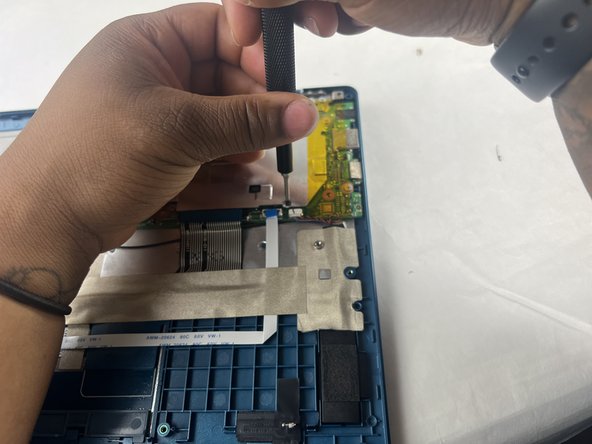
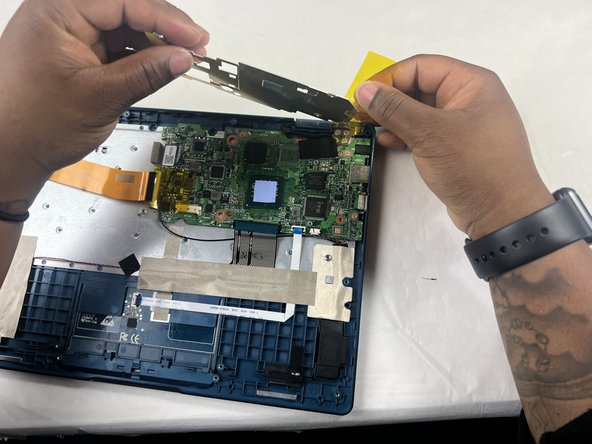
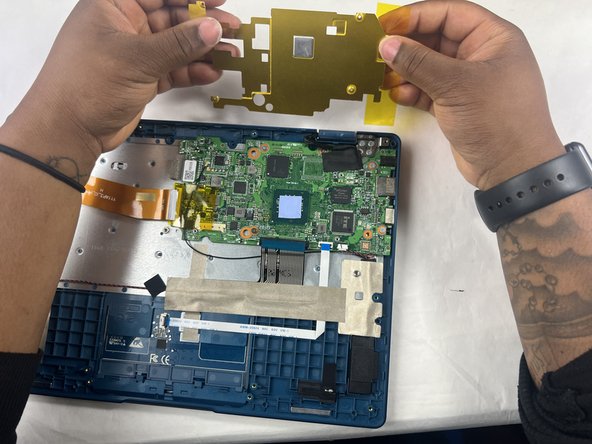
  9. Gateway GWTC116-2BL Display Replacement: paso 9, imagen 1 de 3 Gateway GWTC116-2BL Display Replacement: paso 9, imagen 2 de 3 Gateway GWTC116-2BL Display Replacement: paso 9, imagen 3 de 3
    • Peel the yellow tape off of the casing.

    • Lift the casing off of the motherboard.

  10. Gateway GWTC116-2BL Display Replacement: paso 10, imagen 1 de 2 Gateway GWTC116-2BL Display Replacement: paso 10, imagen 2 de 2
    • Peel off the yellow tape.

    • Remove four 3.0 mm Phillips #00 screws.

  11. Gateway GWTC116-2BL Display Replacement: paso 11, imagen 1 de 2 Gateway GWTC116-2BL Display Replacement: paso 11, imagen 2 de 2
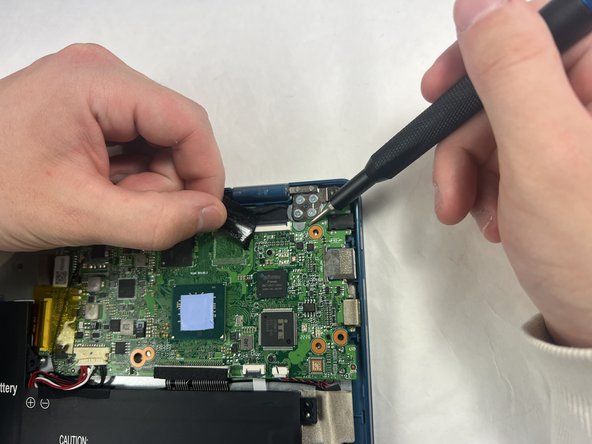
    • Peel off the black piece of tape covering the display cable.

  12. Gateway GWTC116-2BL Display Replacement: paso 12, imagen 1 de 2 Gateway GWTC116-2BL Display Replacement: paso 12, imagen 2 de 2
    • Flick open the bracket securing the display cable and disconnect the cable from the motherboard.

  13. Gateway GWTC116-2BL Display Replacement: paso 13, imagen 1 de 1
    • Remove the motherboard from the device.

  14. Gateway GWTC116-2BL Display Replacement, Display: paso 14, imagen 1 de 1
    • Remove seven 3.0 mm Phillips #00 screws from the laptop.

  15. Gateway GWTC116-2BL Display Replacement: paso 15, imagen 1 de 1
    • Applying some force, use your hands to pry the display of the laptop away from the base.

Conclusión

To reassemble your device, follow these instructions in reverse order.

Kailey Sousa

Miembro Desde 03/22/24

459 Reputación

4 Guías creadas

Equipo

0 comentarios

Agregar Comentario

Ver Estadísticas:

Ultimas 24 horas: 0

Ultimos 7 días: 10

Ultimos 30 días: 37

Todo El Tiempo: 72