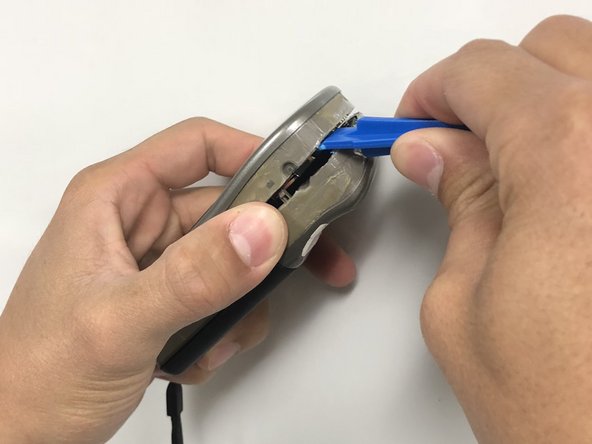
Saltar al contenido principal

Garmin etrex Vista Cx Joy Stick Replacement

Qué necesitas

  1. Garmin etrex Vista Cx Joy Stick Replacement, Battery: paso 1, imagen 1 de 1
    • Place the device with the back cover facing up and the metal ring visible.

  2. Garmin etrex Vista Cx Joy Stick Replacement: paso 2, imagen 1 de 2 Garmin etrex Vista Cx Joy Stick Replacement: paso 2, imagen 2 de 2
    • Lift the metal ring and rotate it counter-clockwise as shown. This will unlock the cover.

  3. Garmin etrex Vista Cx Joy Stick Replacement: paso 3, imagen 1 de 1
    • Remove the cover by lifting straight up to insert or remove 2 AA batteries.

  4. Garmin etrex Vista Cx Joy Stick Replacement, Joy Stick: paso 4, imagen 1 de 1
    • Remove the rubber grip that goes around the side of the device.

  5. Garmin etrex Vista Cx Joy Stick Replacement: paso 5, imagen 1 de 1
    • Underneath the rubber grip will also be a piece of tape over the plastic seam. You will need to take the metal spudger and break the tape along the seam.

  6. Garmin etrex Vista Cx Joy Stick Replacement: paso 6, imagen 1 de 1
    • Next you will have to use the plastic opening tool and pry at the bottom of the GPS. This will separate the front and the back of the device.

  7. Garmin etrex Vista Cx Joy Stick Replacement: paso 7, imagen 1 de 1
    • After the front and back are separated, there will be a small ribbon cable holding them together. You will need to pull straight back on the cable with fingers. This cable will pull straight out.

  8. Garmin etrex Vista Cx Joy Stick Replacement: paso 8, imagen 1 de 2 Garmin etrex Vista Cx Joy Stick Replacement: paso 8, imagen 2 de 2
    • When looking at the motherboard you will notice there is one screw. To remove this, you will need a T4 bit in a nut driver. After you locate this screw you will need to remove it. The screw is 5 mm long.

    • After the screw is removed, the motherboard will lift out of the plastic case.

  9. Garmin etrex Vista Cx Joy Stick Replacement: paso 9, imagen 1 de 1
    • Locate the joystick on the motherboard.

    • Use a solder iron to remove the joystick from the motherboard.

    • In order to replace the joystick you have to purchase a new motherboard.

Conclusión

To reassemble your device, follow these instructions in reverse order.

2 personas más completaron esta guía.

Evan Borgman

Miembro Desde 08/28/18

304 Reputación

2 Guías creadas

Equipo

IUPUI, Team S1-G6, Arle Fall 2018 Miembro de IUPUI, Team S1-G6, Arle Fall 2018

IUPUI-ARLE-F18S1G6

4 Miembros

3 Guías creadas

Un comentario

I took my etrex Venture apart following your process. I was able to get the rubber grip off without damaging it or it’s adhesive. I was also able to remove the adhesive sealing tape without damaging it as well. Allowing me to reassemble the entire thing using the original parts!!.

Also worth noting, in my case the joy stick worked in 3 of the 4 directions. It turns out that there is a small plastic sleeve that goes in the rubber joystick boot and onto the joystick when it’s all assembled. In my case this plastic sleeve was broken, not the actual joystick switch. I was able to use a small section of a Bic pen refill cut to the proper length. I had to go through several pen refills before I found a diameter that fit on the joystick switch properly. It now works like new!!

Robert Angelini - Contestar

Agregar Comentario

Ver Estadísticas:

Ultimas 24 horas: 0

Ultimos 7 días: 0

Ultimos 30 días: 13

Todo El Tiempo: 1,399