Introducción
If you need to replace the silicon buttons in a Garmin STRIKER 4, access them with this guide. Some reasons you may be replacing the buttons include the button pegs being worn down.
Qué necesitas
-
-
-
Slide out the screen cable from the motherboard using the iFixit opening tool or your fingernail.
-
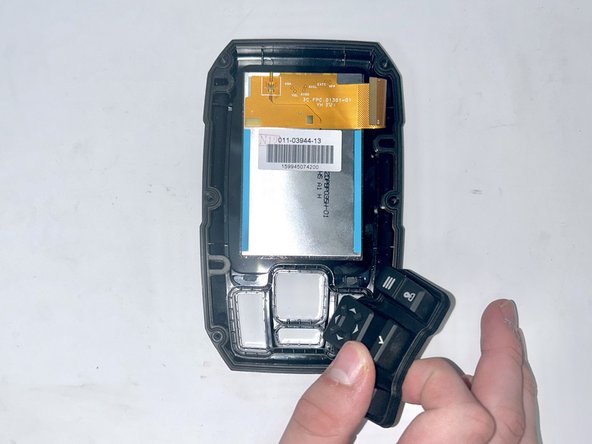
Remove the motherboard from the device.
-
-
-
Use the iFixit opening tool to lift the silicon buttons from their original casing.
-


To reassemble your device, follow these instructions in reverse order.
To reassemble your device, follow these instructions in reverse order.
Cancelar: No complete esta guía.
2 personas más completaron esta guía.

Equipo

Utah Tech University, Team 1-5, McMurrin Fall 2023 Miembro de Utah Tech University, Team 1-5, McMurrin Fall 2023
UTAHTECH-MCMURRIN-F23S1G5
3 Miembros
4 Guías creadas