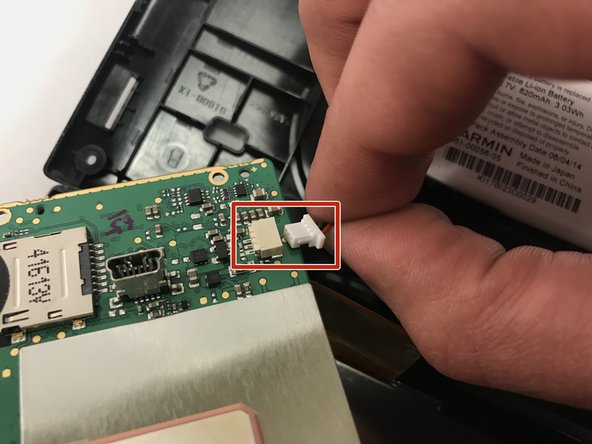
Saltar al contenido principal

Garmin Nuvi 42LM Motherboard Replacement

Qué necesitas

  1. Garmin Nuvi 42LM Motherboard Replacement, Back Cover: paso 1, imagen 1 de 3 Garmin Nuvi 42LM Motherboard Replacement, Back Cover: paso 1, imagen 2 de 3 Garmin Nuvi 42LM Motherboard Replacement, Back Cover: paso 1, imagen 3 de 3
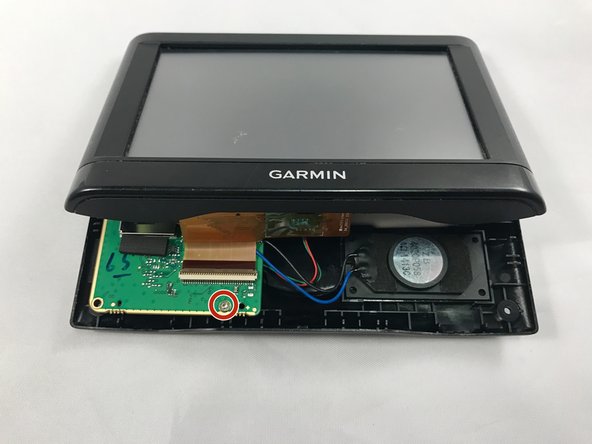
    • Remove the four screws on the back of the GPS using the T5 Torx screwdriver.

  2. Garmin Nuvi 42LM Motherboard Replacement: paso 2, imagen 1 de 3 Garmin Nuvi 42LM Motherboard Replacement: paso 2, imagen 2 de 3 Garmin Nuvi 42LM Motherboard Replacement: paso 2, imagen 3 de 3
    • Pry the GPS open using a plastic opening tool.

    • When prying open the device, use caution to avoid damaging the motherboard.

  3. Garmin Nuvi 42LM Motherboard Replacement, Motherboard: paso 3, imagen 1 de 3 Garmin Nuvi 42LM Motherboard Replacement, Motherboard: paso 3, imagen 2 de 3 Garmin Nuvi 42LM Motherboard Replacement, Motherboard: paso 3, imagen 3 de 3
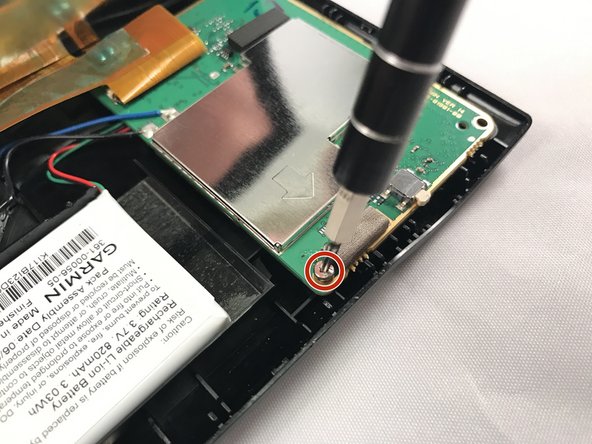
    • Using the T5 Torx screwdriver, remove the two screws located on the motherboard.
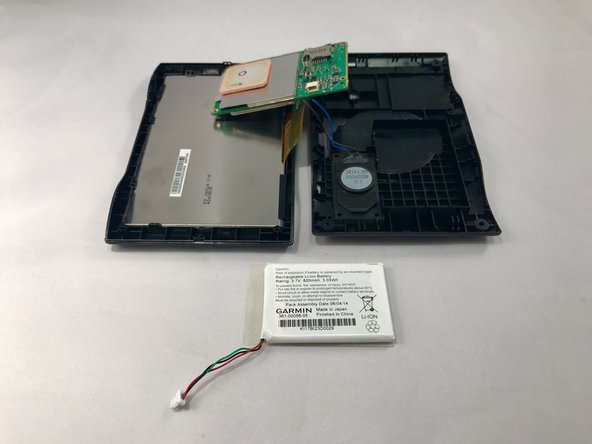
    • There are two screws - one in the back and one in the front.

  4. Garmin Nuvi 42LM Motherboard Replacement: paso 4, imagen 1 de 1
    • Move the motherboard from from its designated location on the GPS.

    • Do not pull on red, green, and black cables when repositioning the motherboard.

  5. Garmin Nuvi 42LM Motherboard Replacement: paso 5, imagen 1 de 2 Garmin Nuvi 42LM Motherboard Replacement: paso 5, imagen 2 de 2
    • Gently unplug the red, green, and black bundled cable to remove the battery.

  6. Garmin Nuvi 42LM Motherboard Replacement: paso 6, imagen 1 de 2 Garmin Nuvi 42LM Motherboard Replacement: paso 6, imagen 2 de 2
    • Use blue plastic opening tool to carefully pry the battery from the GPS.

    • You might need to use additional force when prying because there is adhesive glue on the back of the battery.

  7. Garmin Nuvi 42LM Motherboard Replacement: paso 7, imagen 1 de 1
    • Using a soldering iron, desolder the black and blue wires connected to the motherboard.

    • Once the black and blue wires are desoldered, llift the motherboard out and away from the device.

    • Check out this awesome guide on how to solder and desolder connections.

Conclusión

To reassemble your device, follow these instructions in reverse order.

0 comentarios

Agregar Comentario

Ver Estadísticas:

Ultimas 24 horas: 1

Ultimos 7 días: 3

Ultimos 30 días: 12

Todo El Tiempo: 379