Esta versión puede contener ediciones incorrectas. Cambie a la última instantánea verificada.
Qué necesitas
-
Este paso está sin traducir. Ayuda a traducirlo
-
After following the instructions in the main dis-assembly guide, you should have the screen detached from the motherboard.
-
-
Este paso está sin traducir. Ayuda a traducirlo
-
Use the tweezers or the spudger to lift the tan latch off the ribbon cable (ZIF connector)and gently pull out the ZIF connector and cable from underneath the opened latch.
-
-
-
Este paso está sin traducir. Ayuda a traducirlo
-
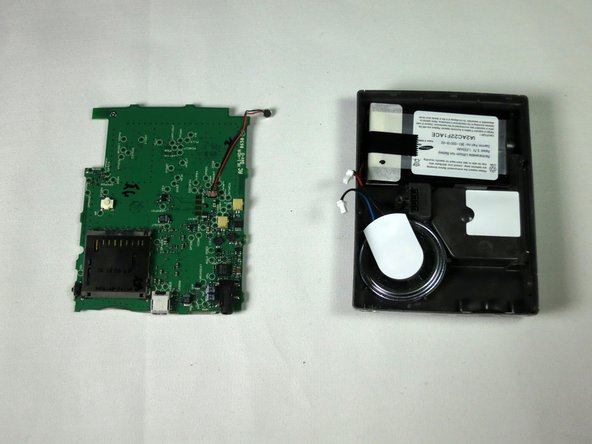
The motherboard will now freely separate from the back casing; lay it flat next to the housing.
-
-
Este paso está sin traducir. Ayuda a traducirlo
-
Disconnect the speaker and battery from their terminals on the motherboard. This should disconnect the motherboard completely from the back panel.
-
It is recommended that you use tweezers or the spudger for precision.
-
-
Este paso está sin traducir. Ayuda a traducirlo
-
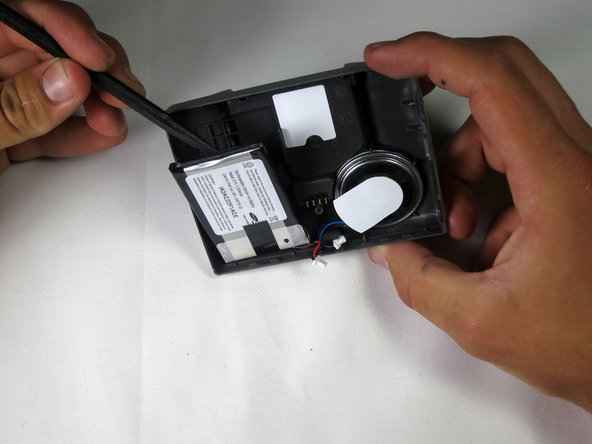
Using the flat edge of the spudger from above, gently pry the battery away from the plastic.
-
-
Este paso está sin traducir. Ayuda a traducirlo
-
The battery should now be completely separated from the other components.
-
Insert new, functional battery.
-


Cancelar: No complete esta guía.
3 personas más completaron esta guía.

Equipo

Cal Poly, Team 13-65, Johann Spring 2013 Miembro de Cal Poly, Team 13-65, Johann Spring 2013
CPSU-JOHANN-S13S13G65
3 Miembros
6 Guías creadas