Saltar al contenido principal

Garmin Approach S2 Motherboard Replacement

Qué necesitas

  1. Garmin Approach S2 Motherboard Replacement, Back Cover: paso 1, imagen 1 de 2 Garmin Approach S2 Motherboard Replacement, Back Cover: paso 1, imagen 2 de 2
    • Remove the six T5 Torx 6.32mm screws securing the back cover to the watch.

  2. Garmin Approach S2 Motherboard Replacement: paso 2, imagen 1 de 1
    • Remove the back cover carefully.

    • Even after the screws have been removed, the back cover can still be quite difficult to take off. Moderate to extensive prying may be required. Be gentle, but firm.

  3. Aviso: el paso 3 proviene de una guía que está marcada como "En progreso".

    Garmin Approach S2 Motherboard Replacement, Water Proof Gasket: paso 3, imagen 1 de 1
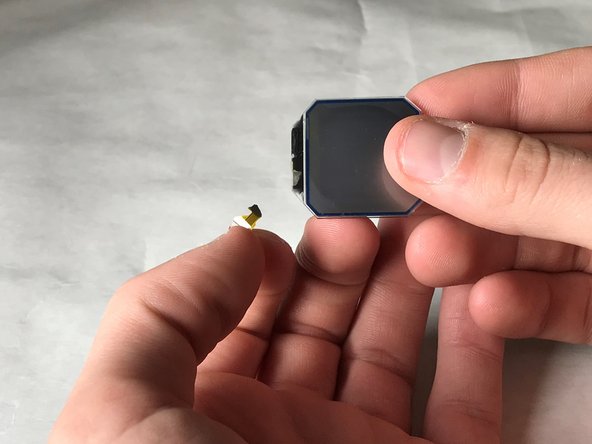
    • Remove the orange gasket.

  4. Garmin Approach S2 Motherboard Replacement, Screen: paso 4, imagen 1 de 1
    • Remove the screen and motherboard assembly from the case.

  5. Garmin Approach S2 Motherboard Replacement: paso 5, imagen 1 de 1
    • Use a metal spudger to remove the golden retaining clip from the screen. There will be some adhesive to break.

  6. Garmin Approach S2 Motherboard Replacement: paso 6, imagen 1 de 1
    • Remove the screen from the golden metal clip.

  7. Garmin Approach S2 Motherboard Replacement: paso 7, imagen 1 de 1
    • Unhinge the black retaining hinge by prying it open with the metal spudger; Your fingernails will work as well.

  8. Garmin Approach S2 Motherboard Replacement: paso 8, imagen 1 de 2 Garmin Approach S2 Motherboard Replacement: paso 8, imagen 2 de 2
    • Remove the connector from the motherboard by pulling it free at the base.

    • Make sure to pull from the base of the connector wire, as it is very easy to rip the wire from the screen.

  9. Garmin Approach S2 Motherboard Replacement: paso 9, imagen 1 de 1
    • Remove the screen from the motherboard.

    • Notice our tape retaining the connector to the screen. This is so easy to rip!

  10. Garmin Approach S2 Motherboard Replacement, Motherboard: paso 10, imagen 1 de 1
    • Remove the motherboard from the screen.

Conclusión

To reassemble your device, follow these instructions in reverse order.

Evan Miller

Miembro Desde 03/21/18

250 Reputación

2 Guías creadas

Equipo

IUPUI, Team S4-G1, Baechle Spring 2018 Miembro de IUPUI, Team S4-G1, Baechle Spring 2018

IUPUI-BAECHLE-S18S4G1

3 Miembros

4 Guías creadas

0 comentarios

Agregar Comentario

Ver Estadísticas:

Ultimas 24 horas: 1

Ultimos 7 días: 5

Ultimos 30 días: 10

Todo El Tiempo: 684