Saltar al contenido principal

G'z One Boulder Camera Replacement

Qué necesitas

  1. G'z One Boulder Camera Replacement, Inside Screen Cover: paso 1, imagen 1 de 1
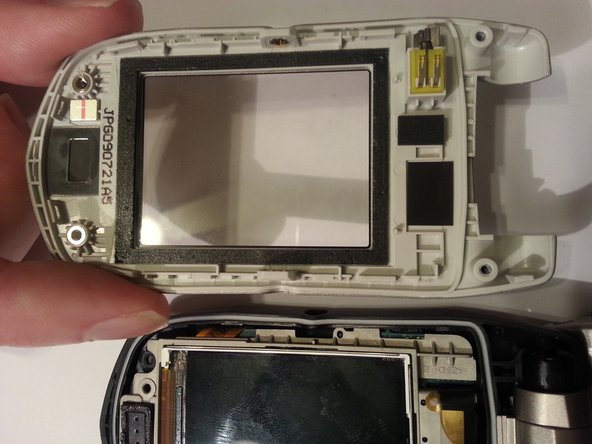
    • There are 4 black screws that need to be removed on the top of the lid. A 1.5mm flathead screwdriver will work on the star shaped screw heads.

    • Make note that two of the screws closest to the hinge are longer than the other two.

  2. G'z One Boulder Camera Replacement: paso 2, imagen 1 de 2 G'z One Boulder Camera Replacement: paso 2, imagen 2 de 2
    • Remove the two side screws.

    • When reassembling you may need to press the front and back of the lid together when inserting these side screws so that the holes align.

  3. G'z One Boulder Camera Replacement: paso 3, imagen 1 de 2 G'z One Boulder Camera Replacement: paso 3, imagen 2 de 2
    • Use a plastic opening tool to remove the screen cover from the rest of the lid.

  4. G'z One Boulder Camera Replacement: paso 4, imagen 1 de 2 G'z One Boulder Camera Replacement: paso 4, imagen 2 de 2
    • Your phone should look like the picture to the left.

    • If reassembling from a previous step make sure the ribbon cable is properly situated before securing the front cover.

  5. G'z One Boulder Camera Replacement, Front Logic Board: paso 5, imagen 1 de 3 G'z One Boulder Camera Replacement, Front Logic Board: paso 5, imagen 2 de 3 G'z One Boulder Camera Replacement, Front Logic Board: paso 5, imagen 3 de 3
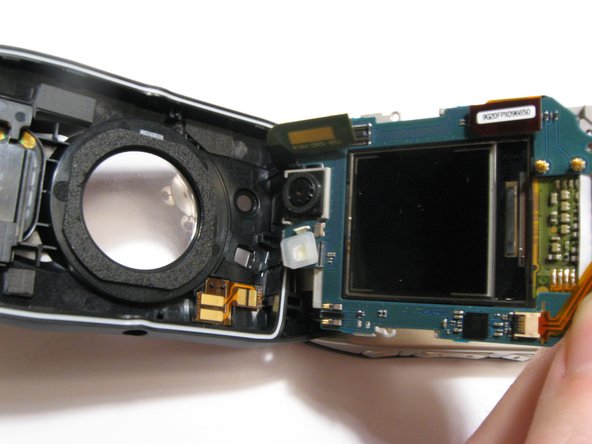
    • Remove one screw located on the left side of the phone with the pictured orientation in mind.

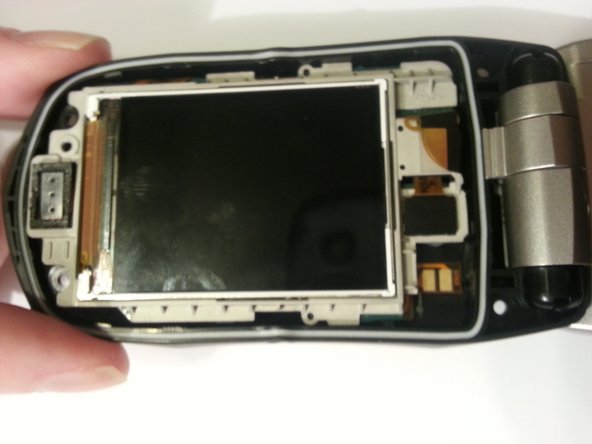
    • This will release the logic board from the back case.

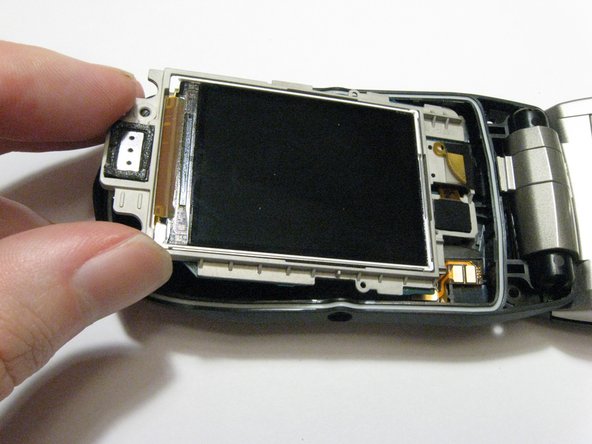
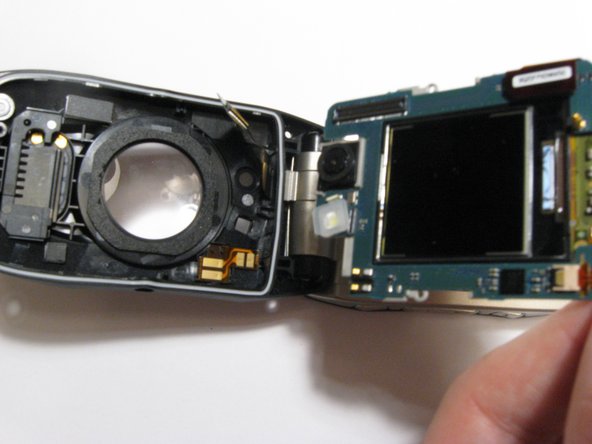
    • Lift the board out of the case starting with the top. Continue to fold it forwards to access the ribbon cable still connecting it.

  6. G'z One Boulder Camera Replacement: paso 6, imagen 1 de 3 G'z One Boulder Camera Replacement: paso 6, imagen 2 de 3 G'z One Boulder Camera Replacement: paso 6, imagen 3 de 3
    • Pull the logic board out with a pry stick gently from bottom to top at the current orientation.

    • The ribbon cable will be connected underneath the logic board. A small amount of force is required to disconnect them.

    • Although some force is required to lift up the board, be careful as to not bend any of the pins on either side.

  7. G'z One Boulder Camera Replacement, Camera: paso 7, imagen 1 de 2 G'z One Boulder Camera Replacement, Camera: paso 7, imagen 2 de 2
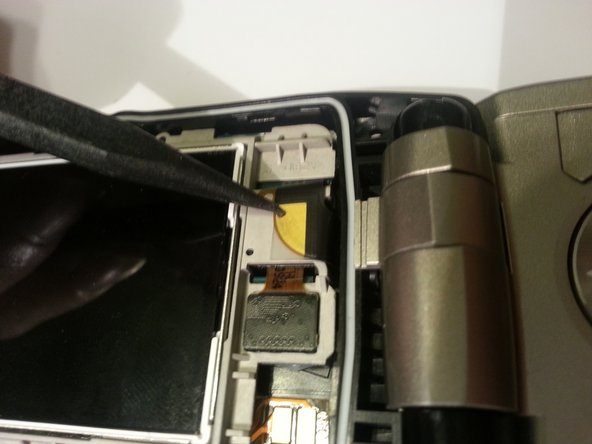
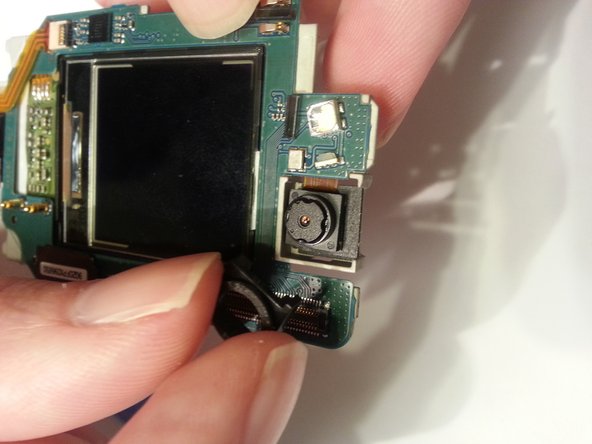
    • There is a plastic square that surrounds the camera and keeps it in place. Pry this up first making note of the orientation of the part and how there is a tab pointing in the same direction as the ribbon cable.

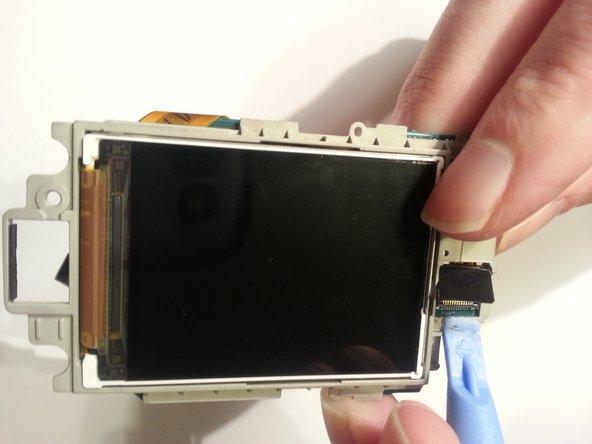
    • Once it is loosened the surround can be removed and set aside. The next step is to detach the ribbon cable.

  8. G'z One Boulder Camera Replacement: paso 8, imagen 1 de 2 G'z One Boulder Camera Replacement: paso 8, imagen 2 de 2
    • Now turn the phone over so that you are looking at the inside LCD and the back of the camera.

    • Use a pry stick to disconnect the ribbon cable from the rest of the PCB board.

    • Gently feed the ribbon cable through the hole to completely remove the camera from the phone. The connector pulls straight through, do not bend or twist the ribbon cable.

  9. G'z One Boulder Camera Replacement: paso 9, imagen 1 de 1
    • These are the parts you should have now.

Conclusión

To disassemble your device, follow these instructions in reverse order.

Equipo

Clemson, Team 13-3, Benson Spring 2013 Miembro de Clemson, Team 13-3, Benson Spring 2013

CLEM-BENSON-S13S13G3

3 Miembros

14 Guías creadas

0 comentarios

Agregar Comentario

Ver Estadísticas:

Ultimas 24 horas: 0

Ultimos 7 días: 0

Ultimos 30 días: 3

Todo El Tiempo: 588