Esta versión puede contener ediciones incorrectas. Cambie a la última instantánea verificada.
Qué necesitas
-
Este paso está sin traducir. Ayuda a traducirlo
-
Flip your laptop so that the bottom of the laptop is facing up and the hinges of the screen are closest to you.
-
-
Este paso está sin traducir. Ayuda a traducirlo
-
To remove the battery, place your fingers underneath the two clips and simultaneously lift them up while pulling the cover towards you.
-
-
Este paso está sin traducir. Ayuda a traducirlo
-
Position the laptop like you would if you were to use it. Open the screen to a 180 degrees angle. The screen and the keyboard needs to face up before proceeding.
-
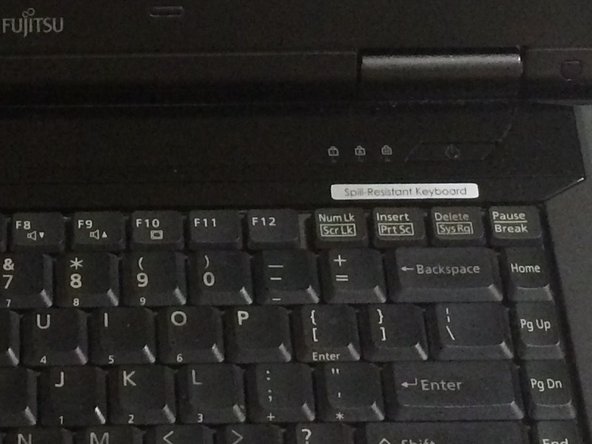
Using a flat edge of the plastic spudger, gently lift the piece of plastic located in the red square. Carefully insert the spudger between the inner edge marked by the arrow.
-
-
-
Este paso está sin traducir. Ayuda a traducirlo
-
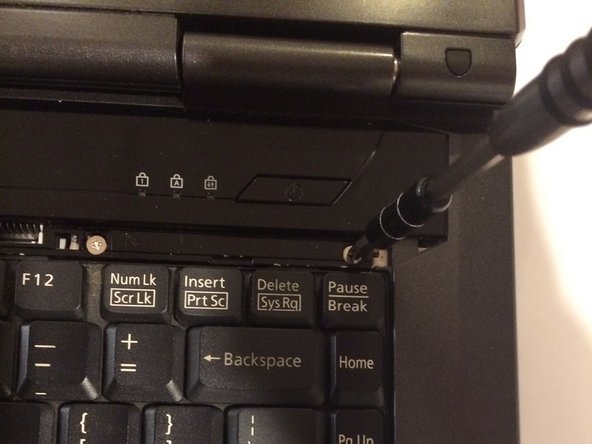
With a Phillips #1 screwdriver, unscrew the four-six mm screws that were hidden under the plastic piece you removed.
-
-
Este paso está sin traducir. Ayuda a traducirlo
-
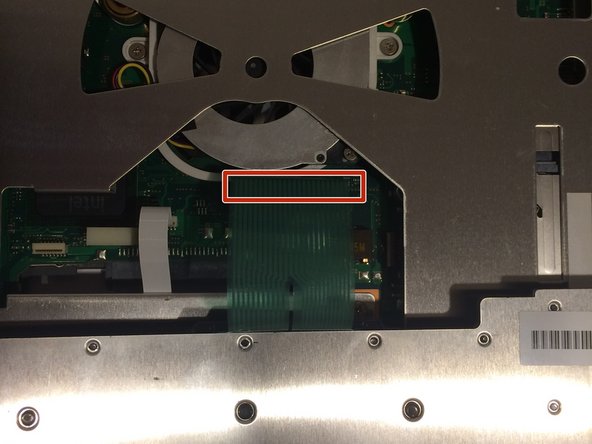
Lift up on the inner edges of the hinges for the screen. This will detach the face-plate from the computer. Use a spudger to make this process easier.
-
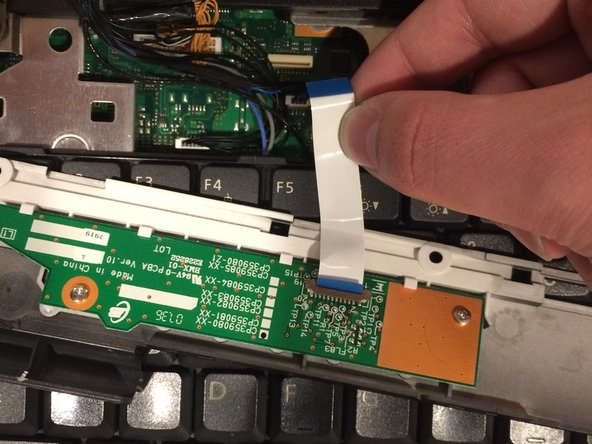
The ribbon is located in the top left-hand corner and needs to carefully disconnected from the motherboard, as shown in the next step.
-
-
Este paso está sin traducir. Ayuda a traducirlo
-
Detach the ribbon from the motherboard, which will allow you to finish removing the face-plate from the computer.
-
To detach the ribbon, grip the ribbon at the base that is attached to the motherboard, which is the large green circuit-board in the body of the computer.
-
-
Este paso está sin traducir. Ayuda a traducirlo
-
Detatch the ribbon from the motherboard
-
To detach the ribbon, grip the ribbon at the base that is attached to the motherboard, which is the large green circuit-board in the body of the computer.
-


Cancelar: No complete esta guía.
Una persona más ha completado esta guía.
Equipo

UMass Dartmouth, Team 3-2, Isaacson Fall 2016 Miembro de UMass Dartmouth, Team 3-2, Isaacson Fall 2016
UMASSD-ISAACSON-F16S3G2
3 Miembros
10 Guías creadas