Saltar al contenido principal

Esta versión puede contener ediciones incorrectas. Cambiar a la última instantánea verificada.

Qué necesitas

  1. Este paso está sin traducir. Ayuda a traducirlo

    : paso 1, imagen 1 de 1
    • Locate the two clips on the bottom of the computer that support the battery.

  2. Este paso está sin traducir. Ayuda a traducirlo

    : paso 2, imagen 1 de 1
    • Using your fingers, push the clips inward and then upward.

    • Lift the battery out of the computer.

  3. Este paso está sin traducir. Ayuda a traducirlo

    : paso 3, imagen 1 de 3 : paso 3, imagen 2 de 3 : paso 3, imagen 3 de 3
    • Use a spudger to lift the back of the hinge cover on the left and right sides of the computer.

  4. Este paso está sin traducir. Ayuda a traducirlo

    : paso 4, imagen 1 de 1
    • Lay the computer flat on a stable surface with the monitor pointing away from you.

  5. Este paso está sin traducir. Ayuda a traducirlo

    : paso 5, imagen 1 de 3 : paso 5, imagen 2 de 3 : paso 5, imagen 3 de 3
    • Use a spudger to partially lift the hinge cover.

  6. Este paso está sin traducir. Ayuda a traducirlo

    : paso 6, imagen 1 de 2 : paso 6, imagen 2 de 2
    • The hinge cover has a ribbon cable that is attached to the motherboard. To prevent damage, lift the hinge cover slowly.

    • Lift the hinge cover enough to expose the ribbon cable.

  7. Este paso está sin traducir. Ayuda a traducirlo

    : paso 7, imagen 1 de 2 : paso 7, imagen 2 de 2
    • Disconnect the ribbon cable from the motherboard and remove the hinge cover from the computer.

  8. Este paso está sin traducir. Ayuda a traducirlo

    : paso 8, imagen 1 de 3 : paso 8, imagen 2 de 3 : paso 8, imagen 3 de 3
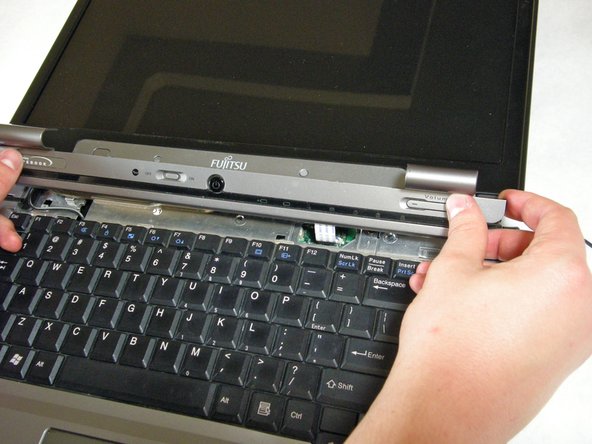
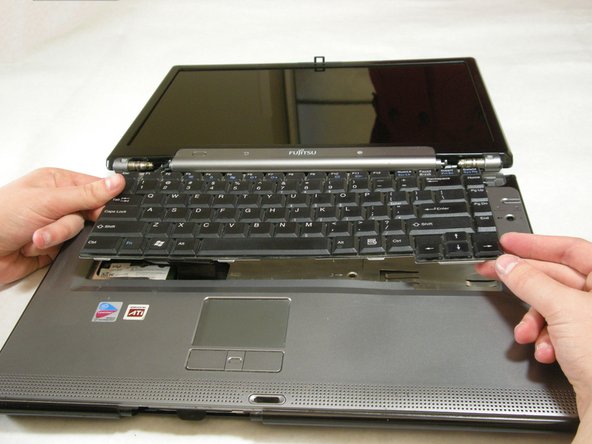
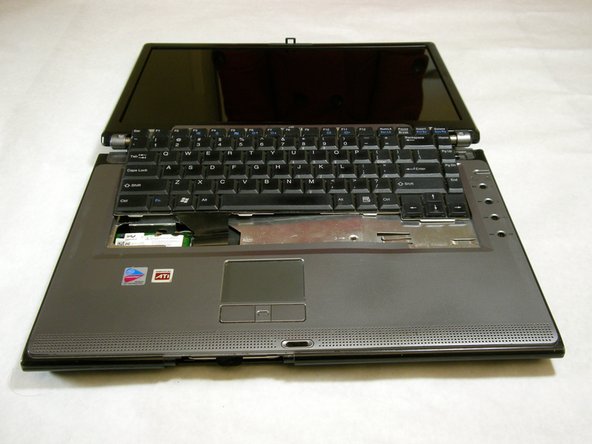
    • The keyboard has a ribbon cable that is attached to the motherboard. To prevent damage, lift keyboard slowly.

    • Lift the keyboard enough to expose the ribbon cable.

  9. Este paso está sin traducir. Ayuda a traducirlo

    : paso 9, imagen 1 de 2 : paso 9, imagen 2 de 2
    • Use a spudger to release the ribbon cable from the motherboard.

  10. Este paso está sin traducir. Ayuda a traducirlo

    : paso 10, imagen 1 de 2 : paso 10, imagen 2 de 2
    • After the ribbon has been detached, carefully remove the keyboard.

  11. Este paso está sin traducir. Ayuda a traducirlo

    : paso 11, imagen 1 de 1
    • Remove the following screws, all labeled "3."

    • Two 8.63mm screws.

    • One 7.65mm screw.

    • One 5.74mm screw.

    • Remove the following screw, labeled "15."

    • One 17.81mm screw.

  12. Este paso está sin traducir. Ayuda a traducirlo

    : paso 12, imagen 1 de 3 : paso 12, imagen 2 de 3 : paso 12, imagen 3 de 3
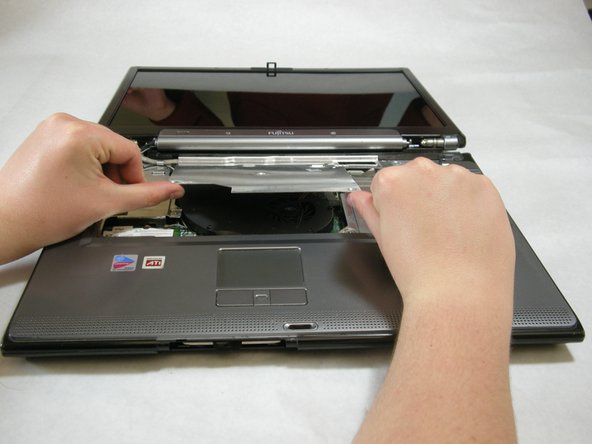
    • Lift the cover with fingers and remove.

Linea de Meta

Neil Daniels

Miembro Desde 01/17/11

1,411 Reputación

11 Guías creadas

Equipo

Cal Poly, Team 5-18, Amido Winter 2011 Miembro de Cal Poly, Team 5-18, Amido Winter 2011

CPSU-AMIDO-W11S5G18

3 Miembros

22 Guías creadas

0 comentarios

Agregar Comentario

Ver Estadísticas:

Ultimas 24 horas: 1

Ultimos 7 días: 1

Ultimos 30 días: 3

Todo El Tiempo: 3,613