Saltar al contenido principal

Fujifilm XP20 Rear Case Replacement

Qué necesitas

  1. Fujifilm XP20 Rear Case Replacement, Rear Case: paso 1, imagen 1 de 3 Fujifilm XP20 Rear Case Replacement, Rear Case: paso 1, imagen 2 de 3 Fujifilm XP20 Rear Case Replacement, Rear Case: paso 1, imagen 3 de 3
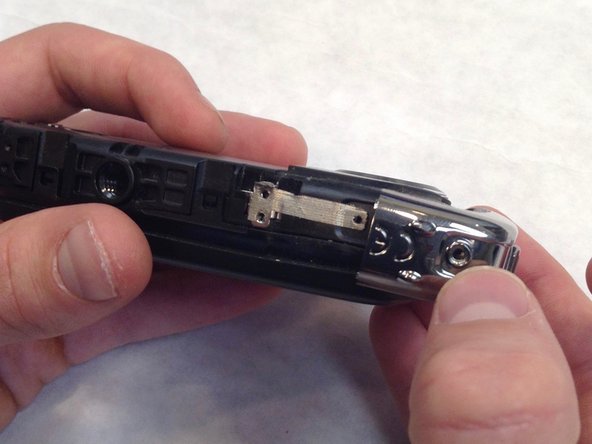
    • Using a 1.5mm Hex Screwdriver, remove the two 3.0 mm hex screws on the front of the camera.

    • Using a Phillips #00 screwdriver, remove the two 3.0 mm screws on the bottom of the front face.

  2. Fujifilm XP20 Rear Case Replacement: paso 2, imagen 1 de 3 Fujifilm XP20 Rear Case Replacement: paso 2, imagen 2 de 3 Fujifilm XP20 Rear Case Replacement: paso 2, imagen 3 de 3
    • Using a Phillips #00 screwdriver, remove the 3.0 mm screws on the bottom of the camera closer to the back.

    • Using a Phillips #00 screwdriver remove the two 3.0 mm screws on the back of the camera. This will remove the eyelet for the camera strap and the rear cover.

  3. Fujifilm XP20 Rear Case Replacement: paso 3, imagen 1 de 1
    • Using a Phillips #00 screwdriver, remove the two 3.0 mm screws.

  4. Fujifilm XP20 Rear Case Replacement: paso 4, imagen 1 de 3 Fujifilm XP20 Rear Case Replacement: paso 4, imagen 2 de 3 Fujifilm XP20 Rear Case Replacement: paso 4, imagen 3 de 3
    • Using a 1.5mm Hex screwdriver, remove the 3.0 mm hex screw on top edge of silver panel.

    • Using a Phillips #00 screwdriver, remove the 3.0 mm screw on bottom edge.

    • Once both screws are removed the silver side casing will slide off.

  5. Fujifilm XP20 Rear Case Replacement: paso 5, imagen 1 de 3 Fujifilm XP20 Rear Case Replacement: paso 5, imagen 2 de 3 Fujifilm XP20 Rear Case Replacement: paso 5, imagen 3 de 3
    • Unlatch the four clasps located on each side of the camera by hand.

    • The fourth clasp is concealed by the battery door. To reach the clasp see Fujifilm XP20 Battery Replacement for instructions.

  6. Fujifilm XP20 Rear Case Replacement: paso 6, imagen 1 de 3 Fujifilm XP20 Rear Case Replacement: paso 6, imagen 2 de 3 Fujifilm XP20 Rear Case Replacement: paso 6, imagen 3 de 3
    • Using a Phillips #00 screwdriver, remove the seven 3.0 mm screws.

    • Remove the remaining five 3.0 mm screws which hold the rear case and the control panel together.

    • The rear panel is now free from the camera.

Conclusión

To reassemble your device, follow these instructions in reverse order.

Stephen Harden

Miembro Desde 10/08/16

243 Reputación

2 Guías creadas

Equipo

IUPUI, Team 1-1, Wilson Fall 2016 Miembro de IUPUI, Team 1-1, Wilson Fall 2016

IUPUI-WILSON-F16S1G1

3 Miembros

6 Guías creadas

0 comentarios

Agregar Comentario

Ver Estadísticas:

Ultimas 24 horas: 0

Ultimos 7 días: 1

Ultimos 30 días: 1

Todo El Tiempo: 582