Introducción
La carcasa de la cámara es la carcasa de plástico que forma el exterior de la Fujifilm Instax Mini 8; que está diseñada para ocultar cables, proteger la película y mantener unidos los componentes principales de esta cámara de manera compacta. Una carcasa dañada pondrá en peligro la integridad del dispositivo y puede provocar el mal funcionamiento de otras partes de la cámara.
Qué necesitas
-
-
Comienza mirando tu cámara y girándola para ubicar todos los tornillos. Debería haber nueve tornillos en total.
-
Un tornillo está oculto debajo de la cubierta de plástico ovalada de la abertura de la impresora. Retira la cubierta para descubrir el noveno tornillo.
-
-
-
Presiona la lengüeta hacia abajo para abrir la tapa del compartimiento de la película.
-
Quita la película del compartimento (si hay alguna).
-
Retira la tapa del compartimiento por completo.
-
Comienza usando el destornillador pequeño de cabeza Philips n.° 00 y gíralo en el sentido contrario a las agujas del reloj para quitar los tornillos.
How do i remove the compartment cover?
With the film door closed, try inserting the opener tool into the seam between the camera front and back plates on the side closest to the film door hinge, and start working your way around the camera.
Remember there’s another screw under the small oval plate covering where the pictures pop out.
-
-
-
-
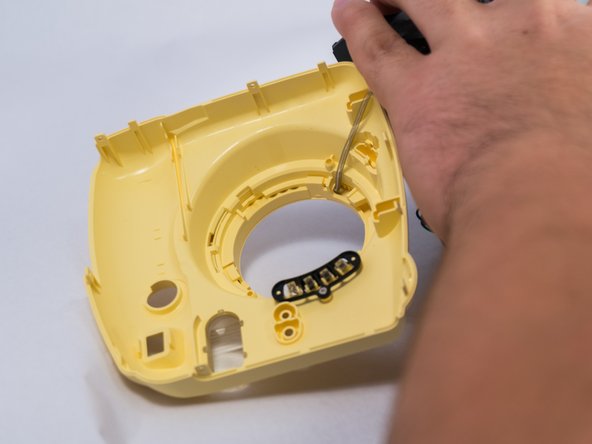
Levanta la parte frontal de la carcasa, asegurándote de no tirar demasiado fuerte debido a un resorte que está conectado a la carcasa y al interior de la cámara.
-
Con cuidado, con un destornillador pequeño de cabeza Philips n.º 00, retira el resorte del componente interior de la cámara.
-
Para este punto, la carcasa debe estar quitada por completo. ¡Felicidades! Repite los pasos hacia atrás para volver a colocar la carcasa en la unidad de la cámara.
-


Para volver a ensamblar tu dispositivo, sigue estas instrucciones en orden inverso.
Para volver a ensamblar tu dispositivo, sigue estas instrucciones en orden inverso.
Cancelar: No complete esta guía.
12 personas más completaron esta guía.
Un agradecimiento especial a estos traductores:
100%


Estos traductores nos están ayudando a reparar el mundo! ¿Quieres contribuir?
Empezar a traducir ›

Equipo

USF Tampa, Team 4-1, Meier Fall 2015 Miembro de USF Tampa, Team 4-1, Meier Fall 2015
USFT-MEIER-F15S4G1
4 Miembros
24 Guías creadas
18 comentarios
For removing initial screws, there are 9 screws. The 9th screw is under the cover overlying the exit of the Polaroid film area. (hidden under the cover)
but where near the exit? i cannot find it
It's at the top of the camera where you get picture.
xxx -
I need the circular yellow plastic piece that goes around the lens. How can I obtain that? How do I attach?
I've drop my instax mini 8 at the airport and it looks perfectly fine at first until I realized that the film compartment has broken and it can't close its 'door', but the instax still can be use just need to press the door against the film everytime I used which is annoying. Does anyone know how to fix it?
Did you find the replacement part?
where do i find the circular plastic piece online how do i find it? what website? what shop?
pls help. battry leak. corrossion. forgot to remove. 1x use palang. what can i do?
you can use vingear and cotton buds to clean the white stuff and then wipe with alcohol; goog;e clean battery leak in youtube then you will know what to do
kit kat -
That final spring is broken on my camera. Do you know what the specs of it are so that I could get a replacement?
HI Jack, I have the same issue, where did you find the spring at the end and what are the specs?
kit kat -
A few missing parts in the assembly that might help if your camera "explodes" on opening:
- The metal flat spring goes under the shot button. As for the button, there are different diameter holes, so is easy to fit properly. Just test clicking feels
- The "black square" part goes under the strap holes, clipped between shell and chassis (you can place it after fitting the front shell)
- The long spring can "disappear" hidden in the front shell after you unclip it from the lens. No panic, you can easily find it opening from the inside of the shell, the front ring cover with the lettering (it has 3 adhesive pads, plus the tabs). With the cover out is very easy to assemble, fitting the spring first in the lens and letting it go straight into the front (youtube video "FUJIFILM instax mini9./error prob. very easy.").
Please, be very careful manipulating the motherboard. This capacitor has high voltage and keeps charge for ages, it can shock you several times and it is quite unpleasant (don't ask how I found it).
Just posting this to thank you. Could not figure out where the black square went after the camera "exploded".
Jamato -
Hello!
When removing the case, two parts fell out:
a black plasicc part and a metal part.
Has anyone an idea where to fit these?
This doesnt show it but there is a screw under a plastic "pop out" cover where the photo comes out at the top
Margaret Compton - Contestar