Introducción
Procedure to troubleshoot and repair non working icemaker on this (and likely similar) models of refrigerator
-
-
Frigidaire makes many similar models and has many updates so if your fridge looks something like this and was build around 2020. This should be useful to you
-
I found a video for a similar model that is very helpful: https://www.youtube.com/watch?v=-BkbGoUk...
-
This model, MDR-22 has some significant changes and this guide is a supplement to that video explaining those. Watch the video first, then look through this guide and you should be on your way to having ice again. For while at least...
-
-
-
Before removing ice compartment box you should remove the flip up shelf attached to it. Don't do what I did and remove the white screws on the bottom. Instead just slide the white covers up to reveal the screws attaching the shelf assembly to the ice compartment box.
-
If remove the white screws you will find the detent mechanism which consists of a translucent white peg and two small stiff springs which will fly out and be hard to find...
-
-
-
-
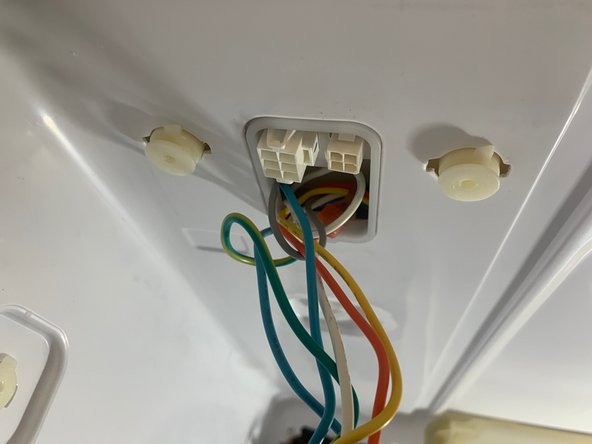
That guide includes an outer trim this model lacks, but is correct for removing the wire cover, connectors and ice tray assembly.
-
After removing the ice tray, this model changes: there is only a single screw on the side with a 5/16" hex head and two dovetail pegs at the top holding the "ice maker compartment" in
-
In the photo you can see the pegs and in the corner you can see the insert where the hex head screw is inserted. Once that screw is removed you should be able to just pull straight out (towards you) and the box will come out. Be mindful of the wires coming through the top of the box
-
NOTE: it can take some serious force to remove the compartment. Mine was frozen to the back panel. I used a heat gun in my removal process because it did not come easily, I was unsure what was holding it and didn't want to damage parts
-
-
-
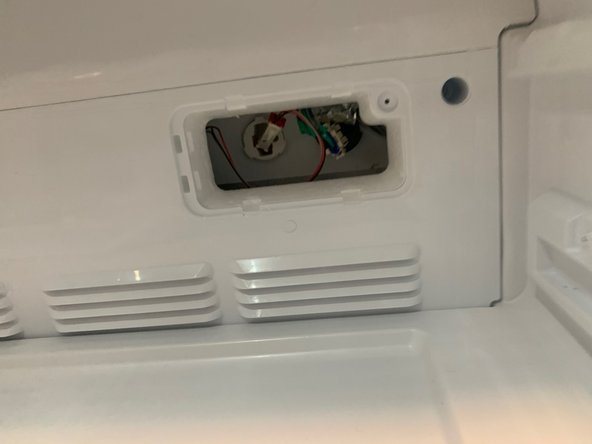
With the ice maker box out of the way you'll be looking at the mechanical box in the back. This contains the motor for the auger/crusher and a solenoid for the door flap.
-
This assembly has four 5/16" hex head screws in the corners. The top two will require a socket and extension(s) to reach.
-
Before removing the screws I recommend removing the tape holding the wiring harness together, the black cable needs to be released to give room to set the assembly aside. I slit the black wire grommet to release the black cable from it and pushed the grommet and two connectors back through.
-
One connector on the coil assembly needs to be undone as well. Then you should have the slack to set the box down. If your shelves are in place that'll be easier for you than it was for me.
-
With this set aside you will likely have discovered a lot of ice on the coil, on the sensors, stuck in the mechanical assembly and likely in the fill tube for the ice tray.
-
Carefully remove this ice. A heat gun or blow dryer will be very helpful. Just be careful not to melt any of the plastics here.
-
NOTE: I removed all the shelves as well as the back panel. This is not necessary.
-
-
-
If you lost a part or need to go deeper in your unit for a different issue here is some additional info on how to do that even though it isn't strictly necessary for this job
-
The shelves pop out pretty easily. once the draws are removed the top of them is held on with four flexing clips to the center support
-
the center support has some more dovetail pegs you can slide it forward on to remove.
-
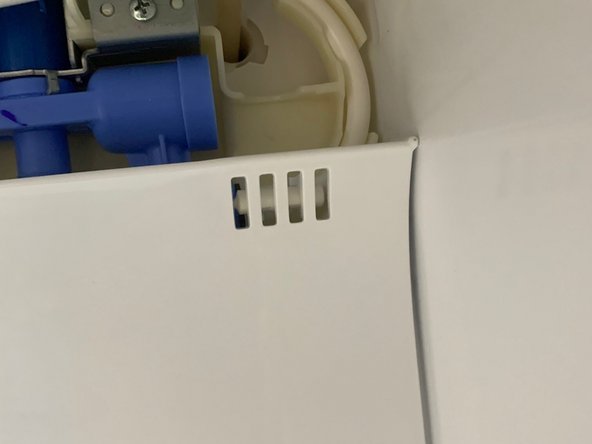
The back panel has two screws in pockets on its lower third and 2 hiden screws. one in the air filter cover and the other in the lower cover. the lower cover also contains the connector for the circulation fan which is attached to the rear cover. Remove thic connecor before removing the panel.
-
the panel also has a temp sensor clipped in on the top right corner. you can see it behind the louvers in the photo.
-
With all that removed there are just some plastic snap clips that will come loose with a firm tug holding the back panel on. I recommend starting at the top right corner.
-
With that panel removed there are 2 more screws on the bottom edge of the topmost back panel which also holds the water filter cover. With the screws and that cover loose the panel can just be pulled out of place.
-
NOTE: it must be done in this order. Reassembly is reverse of removal
-
-
-
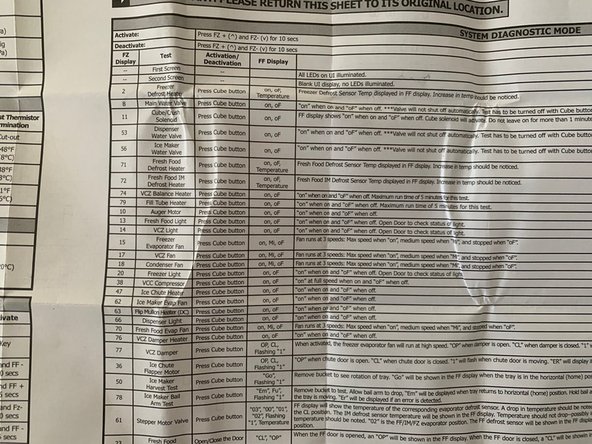
Your refrigerator has a diagnostic mode. This can be used to force states of components and verify the state of others.
-
On my unit I located a datasheet hidden under the hinge cover on the top of the unit. This contains a wiring schematic as also a table of the diagnostic functions. The font is small and hard to read, the fact this is hidden also suggests there are likely many revisions. All that is to say I recommend pulling your sheet to reference.
-
Useful video demonstrating function: https://youtu.be/B3p-LwYWGTo?si=fRRvgkj0...
-
For me I used function 56 to test the IM water valve ( verify supply line unfrozen) function 50 to test harvest motor
-


To reassemble your device, follow these instructions in reverse order. From searching online it seems this is likely to be an ongoing issue, but there doesn't seem to be a whole lot that can be done to improve the situation. Likely the situation can be mitigated somewhat by ensuring the ice maker compartment is kept sealed as well as possible. Unfortunately this is likely to become ongoing maintenance.
To reassemble your device, follow these instructions in reverse order. From searching online it seems this is likely to be an ongoing issue, but there doesn't seem to be a whole lot that can be done to improve the situation. Likely the situation can be mitigated somewhat by ensuring the ice maker compartment is kept sealed as well as possible. Unfortunately this is likely to become ongoing maintenance.
