Esta versión puede contener ediciones incorrectas. Cambie a la última instantánea verificada.
Qué necesitas
-
Este paso está sin traducir. Ayuda a traducirlo
-
Take off the back panel by unscrewing the four Phillips head screws on the back of the amplifier. You will find the six preamp tubes are the smaller ones on the right. (The picture only shows five of the six.)
-
-
Este paso está sin traducir. Ayuda a traducirlo
-
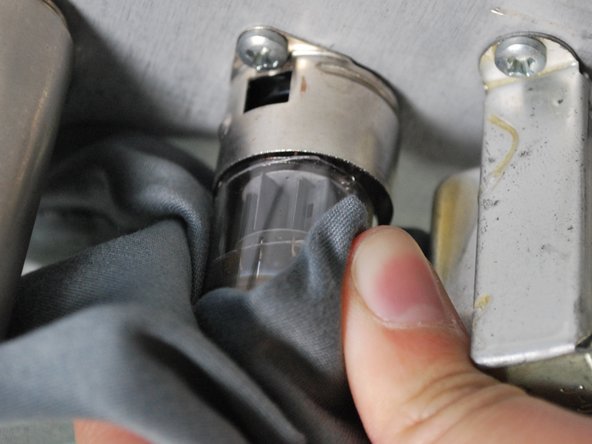
Remove the metal casing by gently pressing up against the case and twisting to the right.
-
-
-
Este paso está sin traducir. Ayuda a traducirlo
-
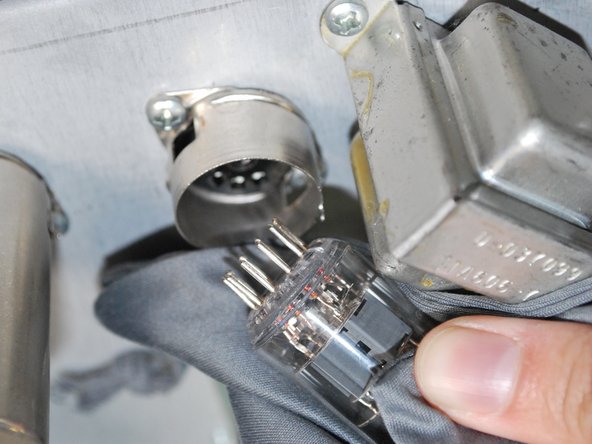
Using the cloth, remove one tube by firmly grasping and gently pulling downwards.
-
Pulling directly downwards prevents damage to the hookup prongs at the bottom of the tube.
-
-
Este paso está sin traducir. Ayuda a traducirlo
-
Check the tube for any cracks in the glass. Also check to make sure the filaments are not burnt out.
-
If the tube is still functioning or to insert the replacement or, proceed to step five.
-
-
Este paso está sin traducir. Ayuda a traducirlo
-
Take the new replacement tube and insert it into the appropriate slot, making sure that the prongs at the end line up with the correct holes.
-
You should hear a click when the tube is secured in place.
-
Repeat these steps with the other three tubes if necessary.
-


Cancelar: No complete esta guía.
2 personas más completaron esta guía.

Equipo

Cal Poly, Team 9-27, Maness Winter 2014 Miembro de Cal Poly, Team 9-27, Maness Winter 2014
CPSU-MANESS-W14S9G27
5 Miembros
7 Guías creadas