Saltar al contenido principal

Eton FRX3 FM Radio Antenna Replacement

Qué necesitas

  1. Eton FRX3 FM Radio Antenna Replacement, Rechargeable Battery Pack: paso 1, imagen 1 de 1
    • Pull the plastic tab on the battery compartment cover panel to loosen it, then pull the panel off.

  2. Eton FRX3 FM Radio Antenna Replacement: paso 2, imagen 1 de 1
    • Disconnect the battery pack wires from the device and remove the battery pack.

  3. Eton FRX3 FM Radio Antenna Replacement, Case Assembly: paso 3, imagen 1 de 1
    • On the bottom of the device case's face are two T10 screws. Use a T10 Torx screwdriver to remove the two screws.

  4. Eton FRX3 FM Radio Antenna Replacement: paso 4, imagen 1 de 1
    • While using the T10 screwdriver, remove the two T10 screws on the back of the device's case.

  5. Eton FRX3 FM Radio Antenna Replacement: paso 5, imagen 1 de 1
    • Remove the two Phillips #00 screws located in the center of the back of the device.

    • You will need to use a thin shafted screwdriver or a female hexagonal bit that is found in the iFixit 54 bit toolkit to extend the reach of the Phillips #00 bit.

  6. Eton FRX3 FM Radio Antenna Replacement: paso 6, imagen 1 de 1
    • On the bottom of the device's case there are two rubber feet. Pry the rubber feet off of the case.

    • Try to keep the adhesive on the rubber feet as clean as possible to insure that they can be reattached during reassembly.

  7. Eton FRX3 FM Radio Antenna Replacement: paso 7, imagen 1 de 1
    • Pull the two halves of the device's case apart.

    • Take care when pulling the two halves apart. There are three cables that connect components of the device to the motherboard. Disconnect these cables in order to separate the two halves of the device's case.

  8. Eton FRX3 FM Radio Antenna Replacement, FM Radio Antenna: paso 8, imagen 1 de 1
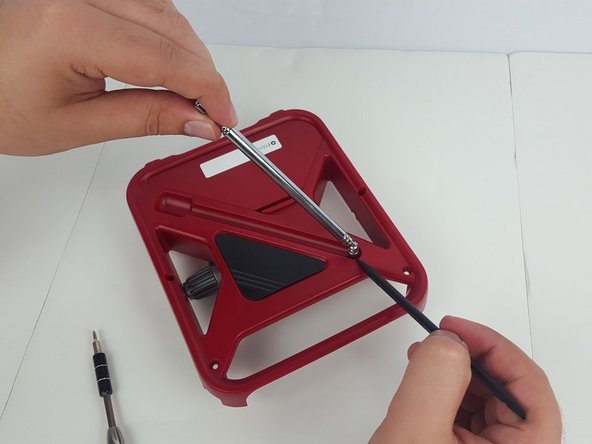
    • Remove the Philips #1 screw, securing the FM radio antenna to the case.

  9. Eton FRX3 FM Radio Antenna Replacement: paso 9, imagen 1 de 1
    • From the back of the device, gently pull the antenna out of the device case.

Conclusión

To reassemble your device, follow these instructions in the reverse order.

Una persona más ha completado esta guía.

Md Siamul Islam

Miembro Desde 02/10/16

423 Reputación

4 Guías creadas

Equipo

USF Tampa, Team 1-6, Nance Spring 2016 Miembro de USF Tampa, Team 1-6, Nance Spring 2016

USFT-NANCE-S16S1G6

4 Miembros

13 Guías creadas

3 comentarios

I bought 2 of these overpriced made in China crap and antenna broke off easily on both. Truly disappointed . Want to replace them with better heavy duty antenna. What brand and model and company do you recommend U buy the antennas from?

Olga Limkin - Contestar

where can I get the antenna?

Claude Raasch - Contestar

This helps when you leave it within reach of a 5 yr old who swears he did it when "he was little"

Joseph - Contestar

Agregar Comentario

Ver Estadísticas:

Ultimas 24 horas: 1

Ultimos 7 días: 2

Ultimos 30 días: 7

Todo El Tiempo: 1,996