Saltar al contenido principal

Esta guía ha sufrido modificaciones. Revisa la última versión sin revisar.

Epson Stylus NX230 Scanner Motor Replacement

Qué necesitas

  1. Epson Stylus NX230 Scanner Motor Replacement, Scanner Motor: paso 1, imagen 1 de 1
    • Check that the printer is unplugged to prevent shock.

    • Turn the printer so the front buttons are facing away from you.

  2. Epson Stylus NX230 Scanner Motor Replacement: paso 2, imagen 1 de 1
    • Locate the 3mm Phillips #0 screw in the top left corner of the printer.

    • Remove the screw using a Phillips head screwdriver.

    • Store the screw in a safe place where you can access them later.

  3. Epson Stylus NX230 Scanner Motor Replacement: paso 3, imagen 1 de 1
    • Flip the top of the printer up so that you can see the inside of the printer.

    • There is a white ribbon cable in the right top corner of the printer.

    • Make sure that the white ribbon does not come detached from the right side of the printer.

  4. Epson Stylus NX230 Scanner Motor Replacement: paso 4, imagen 1 de 1
    • Lay the scanner face up so you can access the under side, and place something, such as a piece of Styrofoam, underneath of it so that the white tape does not become detached.

    • Locate the four 3mm Phillips #2 screws along the edge, and remove all of them.

    • Store the screws in a safe place where you can access them later.

  5. Epson Stylus NX230 Scanner Motor Replacement: paso 5, imagen 1 de 2 Epson Stylus NX230 Scanner Motor Replacement: paso 5, imagen 2 de 2
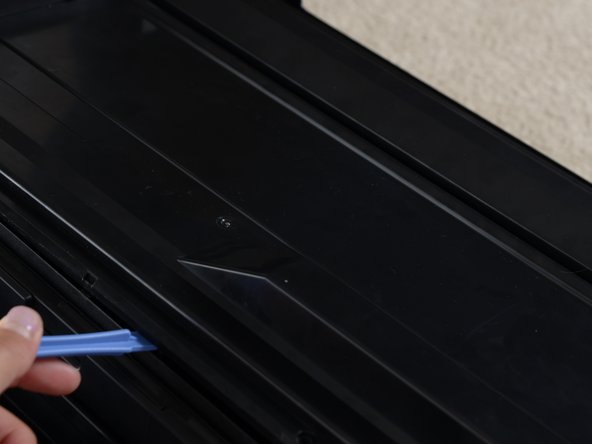
    • Locate the seam on between outer shell of the printer and the inside of the printer.

    • Starting from the top of the printer, use the plastic opening tool to slowly pry the scanner apart along the seam.

  6. Epson Stylus NX230 Scanner Motor Replacement: paso 6, imagen 1 de 2 Epson Stylus NX230 Scanner Motor Replacement: paso 6, imagen 2 de 2
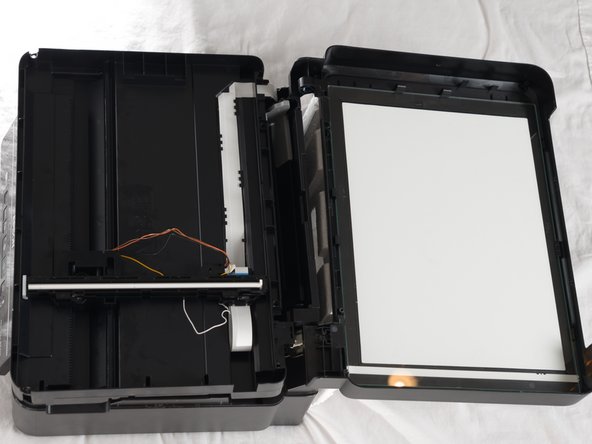
    • Detach the bottom of the scanner.

    • Flip the bottom of the scanner over so that it rests on top of the printer.

    • This gives you access to the motor.

  7. Epson Stylus NX230 Scanner Motor Replacement: paso 7, imagen 1 de 1
    • Gently lift the scanner bar in order to remove it from the scanner.

    • Detach the white ribbon cable from the scanner bar.

  8. Epson Stylus NX230 Scanner Motor Replacement: paso 8, imagen 1 de 1
    • Remove the two 3mm Phillips #2 screws on the underside of the scanner bar attached to the silver motor.

    • Remove the motor from the scanner bar by gently pulling the motor upwards.

Conclusión

To reassemble your device, follow these instructions in reverse order.

Kimberly Pugel

Miembro Desde 04/07/14

404 Reputación

3 Guías creadas

Equipo

Cal Poly, Team 6-1, Forte Spring 2014 Miembro de Cal Poly, Team 6-1, Forte Spring 2014

CPSU-FORTE-S14S6G1

4 Miembros

10 Guías creadas

0 comentarios

Agregar Comentario

Ver Estadísticas:

Ultimas 24 horas: 1

Ultimos 7 días: 2

Ultimos 30 días: 6

Todo El Tiempo: 919