Saltar al contenido principal
Únete a la Comunidad de Reparación - Crear Cuenta

Ematic Genesis Battery Replacement

Qué necesitas

  1. Ematic Genesis Battery Replacement, Ematic Genesis Casing: paso 1, imagen 1 de 3 Ematic Genesis Battery Replacement, Ematic Genesis Casing: paso 1, imagen 2 de 3 Ematic Genesis Battery Replacement, Ematic Genesis Casing: paso 1, imagen 3 de 3
    • Unscrew the two (2) 1.3mm Phillips #00 screws found on the bottom edge of the tablet, where the power and volume buttons are located.

    Pregunta a FixBot
  2. Ematic Genesis Battery Replacement: paso 2, imagen 1 de 3 Ematic Genesis Battery Replacement: paso 2, imagen 2 de 3 Ematic Genesis Battery Replacement: paso 2, imagen 3 de 3
    • Insert plastic opening tool into the edge between the screen plate and the back plate to create a separation between the casings.

    • Insert the flat end of the spudger next to the plastic opening tool and carefully pry the edges apart. Continue this all around the edges until the casings separate.

    • There may be cracking sounds when prying them apart. If carefully done, this is only the locks coming apart and is not harmful.

    • Be careful when separating the two plates as they are connected by the speaker wires and could be disconnected during this process.

    Pregunta a FixBot
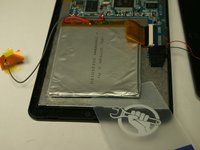
  3. Ematic Genesis Battery Replacement: paso 3, imagen 1 de 1
    • Remove back plate from screen plate and lay both down flat next to each other.

    • Be careful when separating the two plates as they are connected by the speaker wires and could be disconnected during this process.

    Pregunta a FixBot
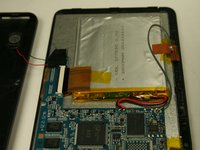
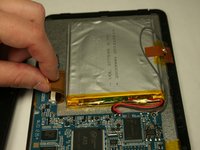
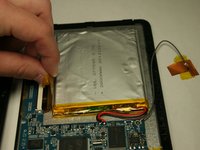
  4. Ematic Genesis Battery Replacement, Battery: paso 4, imagen 1 de 3 Ematic Genesis Battery Replacement, Battery: paso 4, imagen 2 de 3 Ematic Genesis Battery Replacement, Battery: paso 4, imagen 3 de 3
    • Lift up the two pieces of tape holding the copper plate and the connector ribbon to the battery. Gently hold or place away from the battery.

    Pregunta a FixBot
  5. Ematic Genesis Battery Replacement: paso 5, imagen 1 de 3 Ematic Genesis Battery Replacement: paso 5, imagen 2 de 3 Ematic Genesis Battery Replacement: paso 5, imagen 3 de 3
    Herramienta utilizada en este paso:
    Plastic Cards
    $2.99
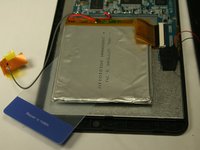
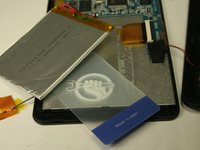
    • Using a plastic card, gently break the adhesive that holds the battery to the metal screen plate.

    • The battery is very bendable. Although it may not be working, there are still dangerous contents inside batteries.

    Pregunta a FixBot
  6. Ematic Genesis Battery Replacement: paso 6, imagen 1 de 1
    • If replacing the battery, disconnect the wires that connect the battery to the motherboard.

    • If not replacing the battery, do NOT disconnect the wires.

    • To reconnect the new battery, a soldering kit will be necessary. Use the iFixit soldering guide to gain further information on how to complete this step.

    • Cómo soldar y desoldar conexiones

    Pregunta a FixBot
Conclusión

To reassemble your device, follow these instructions in reverse order.

Equipo

Baylor, Team 4-3, Williams Spring 2015 Miembro de Baylor, Team 4-3, Williams Spring 2015

BU-WILLIAMS-S15S4G3

Miembros de 3

12 Guías creadas

1Guía Comentario

tienen el firmware disponible?

Danny Abreu Victoriano - Contestar Compartir

Agregar Comentario

Ver Estadísticas:

Ultimas 24 horas: 3

Ultimos 7 días: 13

Ultimos 30 días: 76

Todo El Tiempo: 1,433