Saltar al contenido principal

Ematic FunTab 3 Speaker Replacement

Qué necesitas

  1. Ematic FunTab 3 Speaker Replacement, Back Panel: paso 1, imagen 1 de 3 Ematic FunTab 3 Speaker Replacement, Back Panel: paso 1, imagen 2 de 3 Ematic FunTab 3 Speaker Replacement, Back Panel: paso 1, imagen 3 de 3
    • Turn off the device before starting

    • To prevent damage, open the device on the side without the buttons.

    • Insert the hooked end of the plastic opening tool in the gap between the screen and the back panel on the edge of the device.

    • Slide the plastic opening tool down the long side of the device.

    • Insert tool again and slide it down the long slide of the case a second time.

  2. Ematic FunTab 3 Speaker Replacement: paso 2, imagen 1 de 1
    • Pull the back panel away from the screen.

  3. Ematic FunTab 3 Speaker Replacement, Speaker: paso 3, imagen 1 de 2 Ematic FunTab 3 Speaker Replacement, Speaker: paso 3, imagen 2 de 2
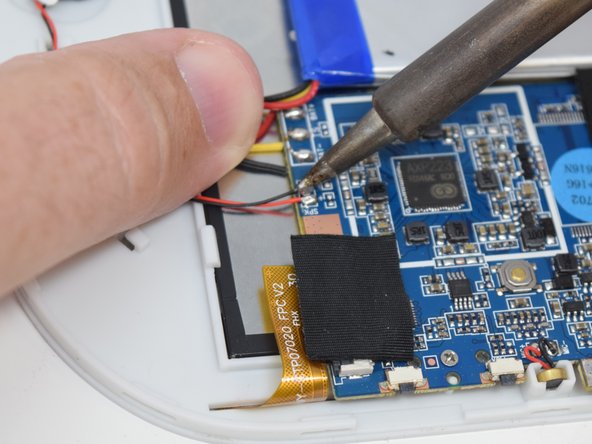
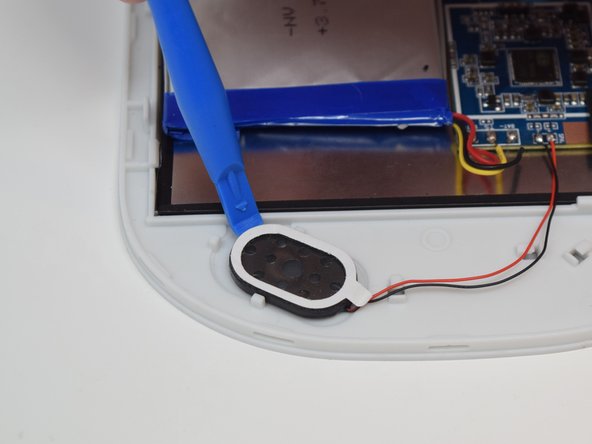
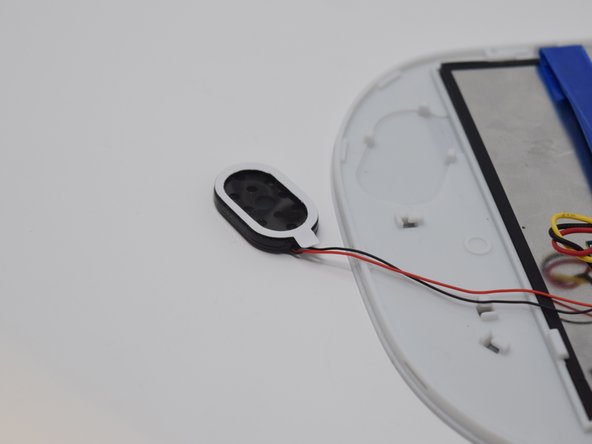
  4. Ematic FunTab 3 Speaker Replacement: paso 4, imagen 1 de 3 Ematic FunTab 3 Speaker Replacement: paso 4, imagen 2 de 3 Ematic FunTab 3 Speaker Replacement: paso 4, imagen 3 de 3
    • After the connections are desoldered, remove the speaker by prying it up using a plastic opening tool.

    • There is glue on the back of the speaker. Some more force may be required.

Conclusión

To reassemble your device, follow these instructions in reverse order.

Amanda Davis

Miembro Desde 07/11/18

581 Reputación

5 Guías creadas

Equipo

UW Tacoma, Team S1-G5, Cardinal Summer 2018 Miembro de UW Tacoma, Team S1-G5, Cardinal Summer 2018

UWT-CARDINAL-SU18S1G5

4 Miembros

12 Guías creadas

0 comentarios

Agregar Comentario

Ver Estadísticas:

Ultimas 24 horas: 0

Ultimos 7 días: 0

Ultimos 30 días: 1

Todo El Tiempo: 175