Saltar al contenido principal

Ematic FunTab 2 Motherboard Replacement

Qué necesitas

  1. Ematic FunTab 2 Motherboard Replacement, Motherboard: paso 1, imagen 1 de 1
    • Remove back of Ematic FunTab by using the plastic opening tool to pry the back open.

  2. Ematic FunTab 2 Motherboard Replacement: paso 2, imagen 1 de 3 Ematic FunTab 2 Motherboard Replacement: paso 2, imagen 2 de 3 Ematic FunTab 2 Motherboard Replacement: paso 2, imagen 3 de 3
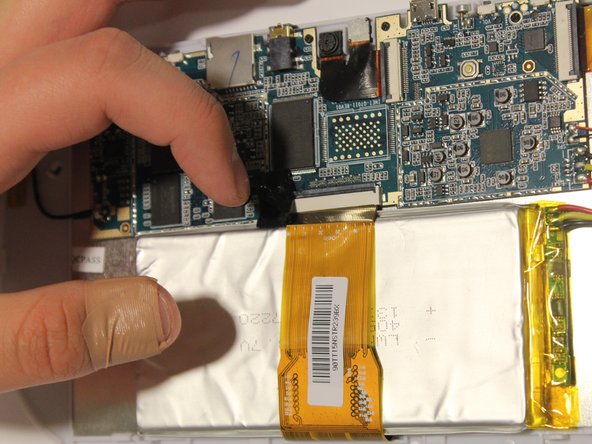
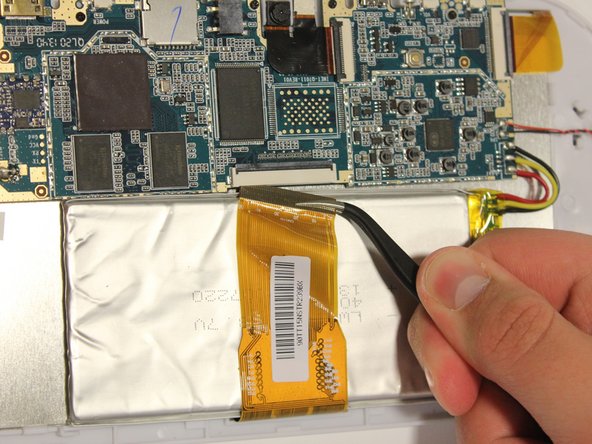
    • Next, you need to remove all connections to the motherboard and the device.

    • Start by first removing the tape from all the connections.

    • Be careful not to remove the camera.

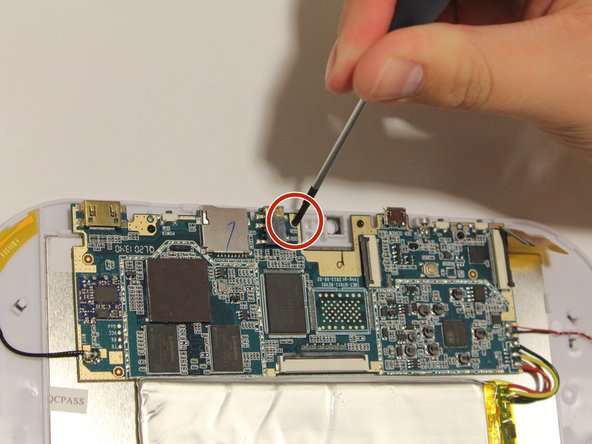
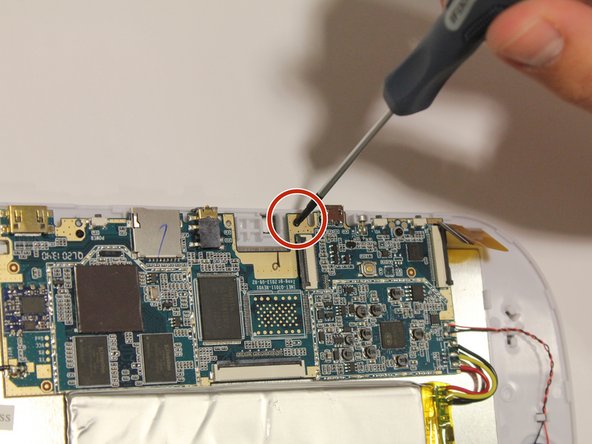
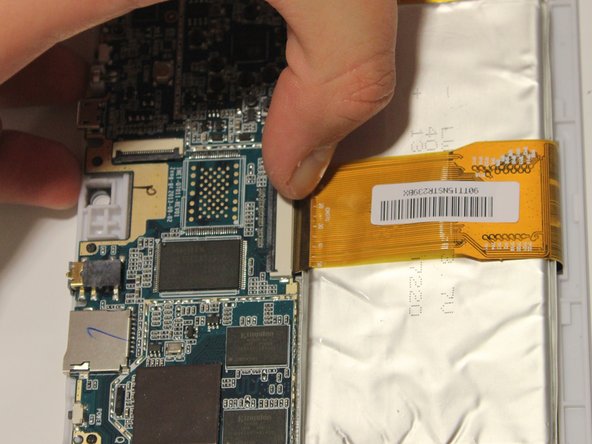
  3. Ematic FunTab 2 Motherboard Replacement: paso 3, imagen 1 de 3 Ematic FunTab 2 Motherboard Replacement: paso 3, imagen 2 de 3 Ematic FunTab 2 Motherboard Replacement: paso 3, imagen 3 de 3
    • Remove LCD connector from the LCD.

    • Be sure to flip up the retaining tabs before pulling the LCD connector out. (It is the black tab on the connection port).

  4. Ematic FunTab 2 Motherboard Replacement: paso 4, imagen 1 de 1
    • Remove camera connection from camera with tweezers.

    • Again, be sure to flip up the retaining tab before pulling the connector.

  5. Ematic FunTab 2 Motherboard Replacement: paso 5, imagen 1 de 1
    • Remove speaker connection from speaker with tweezers.

    • Before pulling the speaker connection make sure the retaining tab is flipped up.

  6. Ematic FunTab 2 Motherboard Replacement: paso 6, imagen 1 de 3 Ematic FunTab 2 Motherboard Replacement: paso 6, imagen 2 de 3 Ematic FunTab 2 Motherboard Replacement: paso 6, imagen 3 de 3
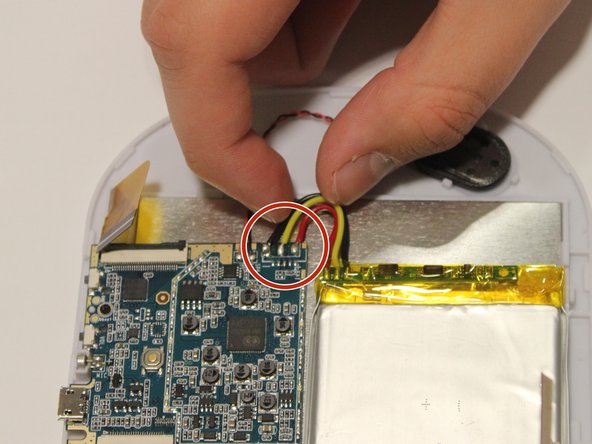
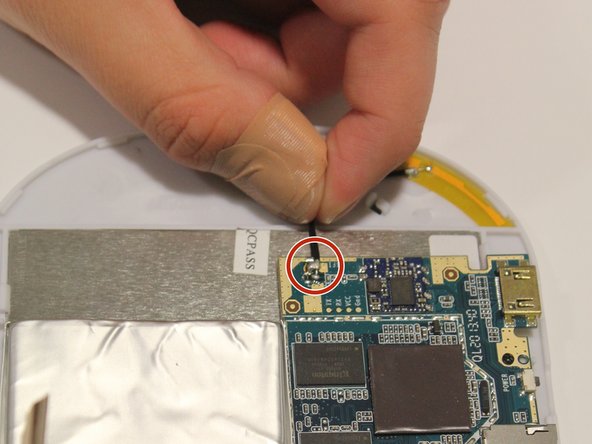
    • Remove wires:

    • Start by removing the black wire on each side.

    • Next, remove the WiFi antenna wire from the motherboard.

    • Finally, remove the yellow, red, and black wires.

    • To put the wires back in their correct locations you will need a soldering iron to solder the wire back in place. You will do this once the motherboard is replaced. Here is a guide on how to solder Cómo soldar y desoldar conexiones

  7. Ematic FunTab 2 Motherboard Replacement: paso 7, imagen 1 de 3 Ematic FunTab 2 Motherboard Replacement: paso 7, imagen 2 de 3 Ematic FunTab 2 Motherboard Replacement: paso 7, imagen 3 de 3
    • Unscrew all four screws on motherboard with the Phillip's head screwdriver.

    • All of the screws are the same size, and should all fit in either corresponding screw location.

  8. Ematic FunTab 2 Motherboard Replacement: paso 8, imagen 1 de 2 Ematic FunTab 2 Motherboard Replacement: paso 8, imagen 2 de 2
    • It is now safe to remove and replace the old motherboard with your new motherboard.

Conclusión

To reassemble your device, follow these instructions in reverse order.

Una persona más ha completado esta guía.

0 comentarios

Agregar Comentario

Ver Estadísticas:

Ultimas 24 horas: 0

Ultimos 7 días: 0

Ultimos 30 días: 0

Todo El Tiempo: 1,105