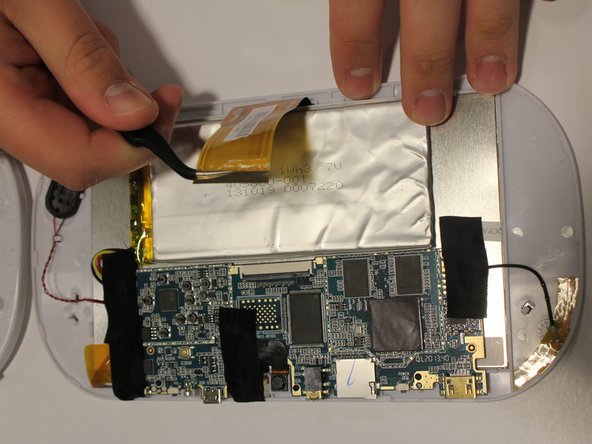
Saltar al contenido principal

Ematic FunTab 2 Battery Replacement

Qué necesitas

  1. Ematic FunTab 2 Battery Replacement, Battery: paso 1, imagen 1 de 2 Ematic FunTab 2 Battery Replacement, Battery: paso 1, imagen 2 de 2
    • Pry open the Ematic FunTab 2 using the plastic opening tool.

  2. Ematic FunTab 2 Battery Replacement: paso 2, imagen 1 de 1
    • Remove tape from the LCD connector.

  3. Ematic FunTab 2 Battery Replacement: paso 3, imagen 1 de 2 Ematic FunTab 2 Battery Replacement: paso 3, imagen 2 de 2
    • Flip up the retaining tab (the black bar on the connector), then pull LCD connector with tweezers. Be careful not to damage the LCD connector.

  4. Ematic FunTab 2 Battery Replacement: paso 4, imagen 1 de 3 Ematic FunTab 2 Battery Replacement: paso 4, imagen 2 de 3 Ematic FunTab 2 Battery Replacement: paso 4, imagen 3 de 3
    • Now remove battery by putting the spudger between the battery and the LCD display and prying apart.

    • Be careful when prying the battery from the display. Wiggle the spudger if necessary.

  5. Ematic FunTab 2 Battery Replacement: paso 5, imagen 1 de 1
    • Remove tape from the yellow, red, and black wires connecting the battery to the LCD.

  6. Ematic FunTab 2 Battery Replacement: paso 6, imagen 1 de 3 Ematic FunTab 2 Battery Replacement: paso 6, imagen 2 de 3 Ematic FunTab 2 Battery Replacement: paso 6, imagen 3 de 3
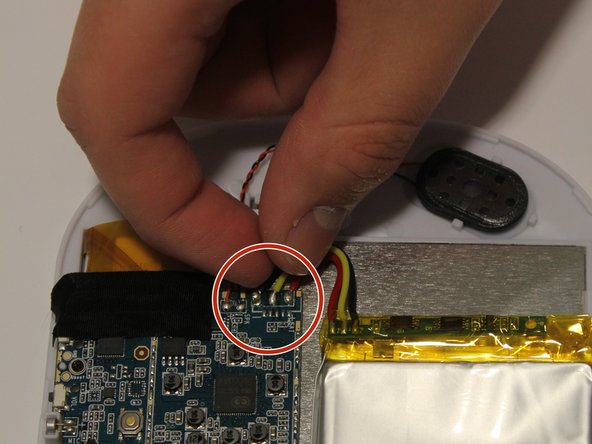
    • Disconnect the yellow, red, and black wires from the motherboard.

    • You will need to solder these wires back after completing the battery replacement. Here is a link on how to solder Cómo soldar y desoldar conexiones.

  7. Ematic FunTab 2 Battery Replacement: paso 7, imagen 1 de 1
    • Now remove battery. The battery should still be pried from the LCD display, if not pry it again.

Conclusión

To reassemble your device, follow these instructions in reverse order.

2 personas más completaron esta guía.

0 comentarios

Agregar Comentario

Ver Estadísticas:

Ultimas 24 horas: 0

Ultimos 7 días: 0

Ultimos 30 días: 3

Todo El Tiempo: 2,408