Saltar al contenido principal

Electrohome EAAC475 Speaker Replacement

Qué necesitas

  1. Electrohome EAAC475 Speaker Replacement, Battery: paso 1, imagen 1 de 2 Electrohome EAAC475 Speaker Replacement, Battery: paso 1, imagen 2 de 2
    • Remove the 10 mm Phillips #1 screw from the battery cover.

    • Remove the battery cover.

  2. Electrohome EAAC475 Speaker Replacement: paso 2, imagen 1 de 1
    • Remove the flat lithium battery.

  3. Electrohome EAAC475 Speaker Replacement, Buttons: paso 3, imagen 1 de 2 Electrohome EAAC475 Speaker Replacement, Buttons: paso 3, imagen 2 de 2
    • Disconnect the radio from all power sources.

    • Remove the two 10 mm Phillips #1 screws from the bottom of the device.

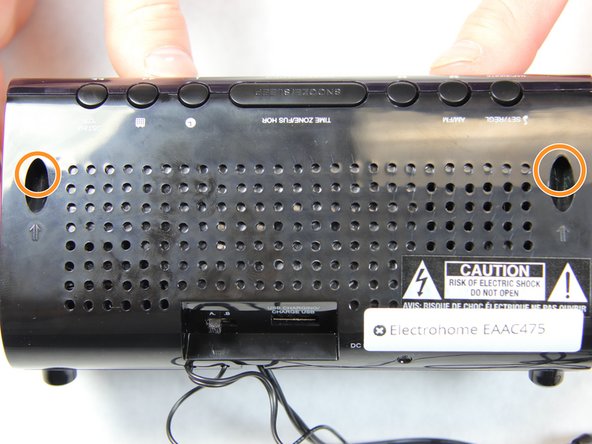
    • Remove two 10 mm Phillips #1 screws from the back side of the device.

  4. Electrohome EAAC475 Speaker Replacement: paso 4, imagen 1 de 3 Electrohome EAAC475 Speaker Replacement: paso 4, imagen 2 de 3 Electrohome EAAC475 Speaker Replacement: paso 4, imagen 3 de 3
    • Carefully and slowly pull the lower case away from the rest of the device.

    • Do not completely separate the lower case. There are several wires connecting the two halves of the device.

    • Flip the device over to access the button assembly.

    • Slowly remove the button contact board from the assembly.

  5. Electrohome EAAC475 Speaker Replacement: paso 5, imagen 1 de 2 Electrohome EAAC475 Speaker Replacement: paso 5, imagen 2 de 2
    • Remove the two 7 mm Phillips # 1 screws holding the buttons.

    • Remove the plastic buttons.

  6. Electrohome EAAC475 Speaker Replacement, Speaker: paso 6, imagen 1 de 2 Electrohome EAAC475 Speaker Replacement, Speaker: paso 6, imagen 2 de 2
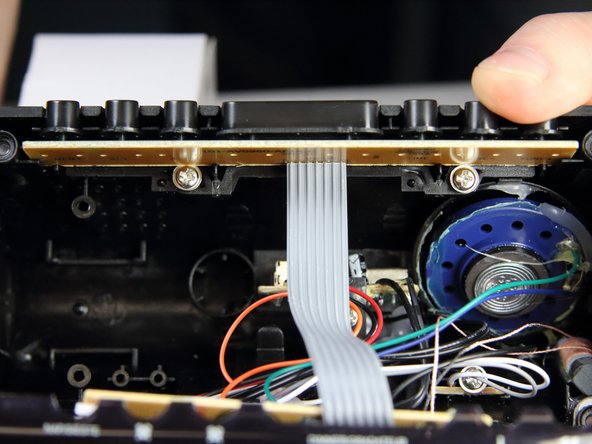
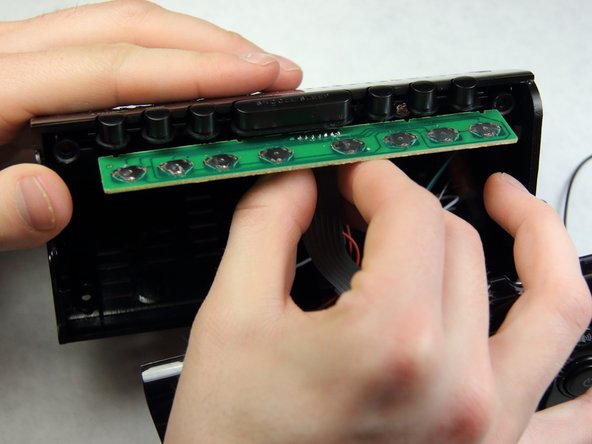
    • Carefully and slowly detach one side from another.

    • Make sure the opposite sides are not separated completely.

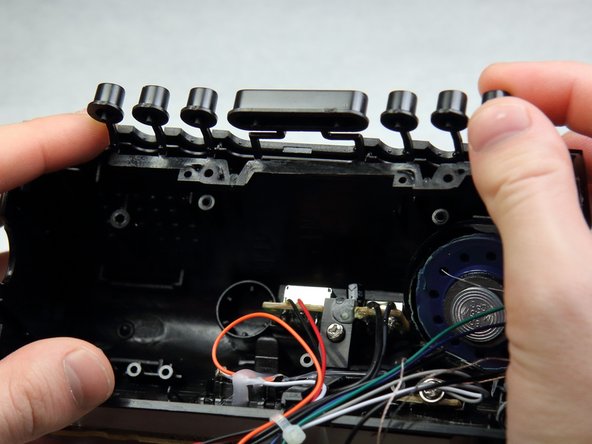
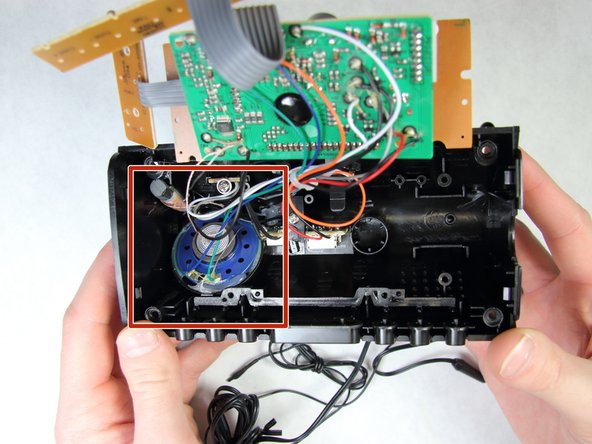
    • Locate the speaker the inside of the back piece of the device

  7. Electrohome EAAC475 Speaker Replacement: paso 7, imagen 1 de 1
    • Use the flat side of the spudger to remove the glue around the speaker.

    • This glue will need replacing when putting back the speaker.

  8. Electrohome EAAC475 Speaker Replacement: paso 8, imagen 1 de 1
    • After removing all the glue around the speaker, slowly take out the speaker.

    • Be careful not to break anything surrounding the speaker while using the spudger since it is sharp.

  9. Electrohome EAAC475 Speaker Replacement: paso 9, imagen 1 de 1
    • Detach the wires on the speaker and replace them with new ones.

Conclusión

To reassemble your device, follow these instructions in reverse order.

Ruolin Cai

Miembro Desde 02/16/16

273 Reputación

2 Guías creadas

Equipo

IUPUI, Team 2-1, Harley Spring 2016 Miembro de IUPUI, Team 2-1, Harley Spring 2016

IUPUI-HARLEY-S16S2G1

4 Miembros

6 Guías creadas

0 comentarios

Agregar Comentario

Ver Estadísticas:

Ultimas 24 horas: 1

Ultimos 7 días: 7

Ultimos 30 días: 10

Todo El Tiempo: 385