Saltar al contenido principal

Eclipse 180BL Battery Replacement

Qué necesitas

  1. Eclipse 180BL Battery Replacement, Battery: paso 1, imagen 1 de 1
    • Remove the two screws located on the bottom of the device with a phillips head screw driver.

    • The two screws can be removed using the PH00 head from the iFixit repair toolkit.

    • Both screws are 1/8 inch in length.

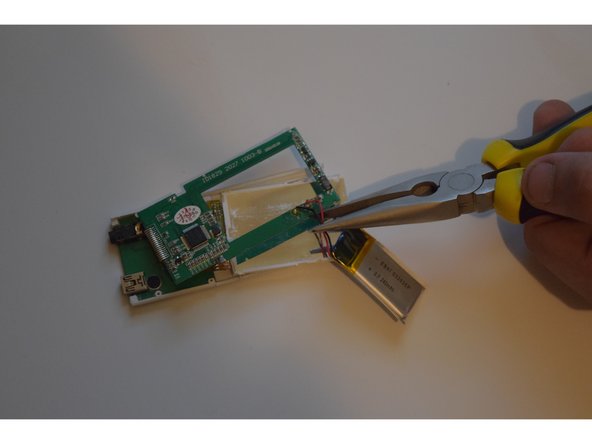
    • The bottom cap will come off to reveal the inside main component.

  2. Eclipse 180BL Battery Replacement: paso 2, imagen 1 de 2 Eclipse 180BL Battery Replacement: paso 2, imagen 2 de 2
    • Remove the main inner component using Spudger, by pushing on the USB port. This will take some force.

    • Hold on the sides with your fingers, and push to release from the top.

  3. Eclipse 180BL Battery Replacement: paso 3, imagen 1 de 3 Eclipse 180BL Battery Replacement: paso 3, imagen 2 de 3 Eclipse 180BL Battery Replacement: paso 3, imagen 3 de 3
    • The plastic LCD cover and the key pad will now be loose; they were held in place by the tension between the case and the internal main component.

    • Locate the large square pack with a black and red wire coming out of it, this is the battery.

    • Cut the red and black wires to remove the old battery.

  4. Eclipse 180BL Battery Replacement: paso 4, imagen 1 de 1
    • To Replace, connect the two new lines ( red and black) between the new battery and the device.

    • You have successfully replaced the battery!

Conclusión

To reassemble your device, follow these instructions in reverse order.

3 personas más completaron esta guía.

Thomas Schwarz

Miembro Desde 09/07/15

499 Reputación

3 Guías creadas

Equipo

0 comentarios

Agregar Comentario

Ver Estadísticas:

Ultimas 24 horas: 0

Ultimos 7 días: 8

Ultimos 30 días: 23

Todo El Tiempo: 1,345