Saltar al contenido principal

EOS Chapstick Repair

Qué necesitas

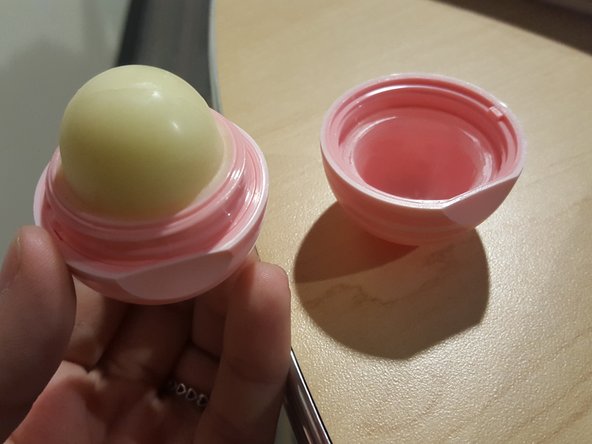
  1. EOS Chapstick Repair, EOS Chapstick Repair: paso 1, imagen 1 de 1
    • Open your broken/melted EOS chapstick.

  2. EOS Chapstick Repair: paso 2, imagen 1 de 1
    • Use a spudger to scrape out the chap stick pieces.

    • Pry out the middle divider.

  3. EOS Chapstick Repair: paso 3, imagen 1 de 1
    • Place the chapstick pieces into a microwavable bowl.

  4. EOS Chapstick Repair: paso 4, imagen 1 de 1
    • Melt the chap stick pieces in a microwave for 30 second increments or until completely liquid.

    • CAUTION: the heated liquid may be hot to the touch.

  5. EOS Chapstick Repair: paso 5, imagen 1 de 1
    • Pour the liquid chapstick into the top of the EOS container and screw on the divider.

  6. EOS Chapstick Repair: paso 6, imagen 1 de 1
    • Freeze the liquid in the EOS container for 20-30 minutes or until solid.

  7. EOS Chapstick Repair: paso 7, imagen 1 de 2 EOS Chapstick Repair: paso 7, imagen 2 de 2
    • Screw the EOS container back together and enjoy your chapstick!

Conclusión

To reassemble your device, follow these instructions in reverse order.

Michaela Alexander

Miembro Desde 01/31/17

101 Reputación

1 Guía escrita

Equipo

0 comentarios

Agregar Comentario

Ver Estadísticas:

Ultimas 24 horas: 0

Ultimos 7 días: 1

Ultimos 30 días: 11

Todo El Tiempo: 553