Saltar al contenido principal

Dyson DC 37 Allergy Gasket Replacement

Qué necesitas

  1. Dyson DC 37 Allergy Gasket Replacement, Tank Removal: paso 1, imagen 1 de 3 Dyson DC 37 Allergy Gasket Replacement, Tank Removal: paso 1, imagen 2 de 3 Dyson DC 37 Allergy Gasket Replacement, Tank Removal: paso 1, imagen 3 de 3
    • Remove the Cyclone block from the rest of the vacuum cleaner (grey button on the main body)

    • Position the tank above a trash can or bag (open) then press the red button to release the bottom of the tank and empty the contents

    • Also remember to remove the fine dust filter which is simply inserted in the center of the cyclone block. It can be cleaned under the tap (see care instructions).

  2. Dyson DC 37 Allergy Gasket Replacement, Separate the Cyclone Block and Reservoir: paso 2, imagen 1 de 3 Dyson DC 37 Allergy Gasket Replacement, Separate the Cyclone Block and Reservoir: paso 2, imagen 2 de 3 Dyson DC 37 Allergy Gasket Replacement, Separate the Cyclone Block and Reservoir: paso 2, imagen 3 de 3
    • Next you will separate the cyclone block from the dust tank

    • As can be seen in the first photo, the red slide that controls the bottom of the tank covers a small grey button

    • The second photo shows the retaining hooks (opposite side of the button) that secure the cyclone unit to the tank

    • Press the grey button to detach the transparent tank from the colored cyclone block.

  3. Dyson DC 37 Allergy Gasket Replacement, Lower Body Removal: paso 3, imagen 1 de 3 Dyson DC 37 Allergy Gasket Replacement, Lower Body Removal: paso 3, imagen 2 de 3 Dyson DC 37 Allergy Gasket Replacement, Lower Body Removal: paso 3, imagen 3 de 3
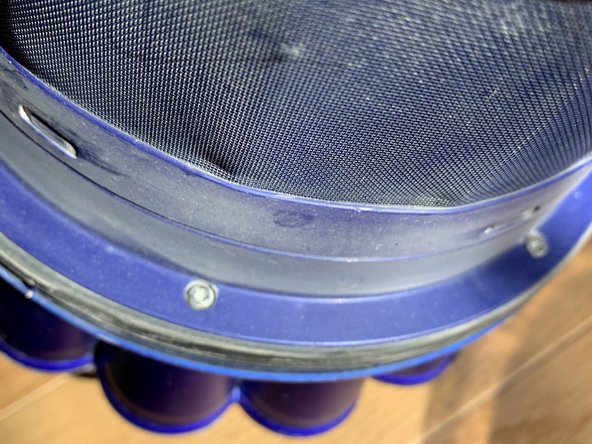
    • Wipe off the outside of the cyclone block before tackling it

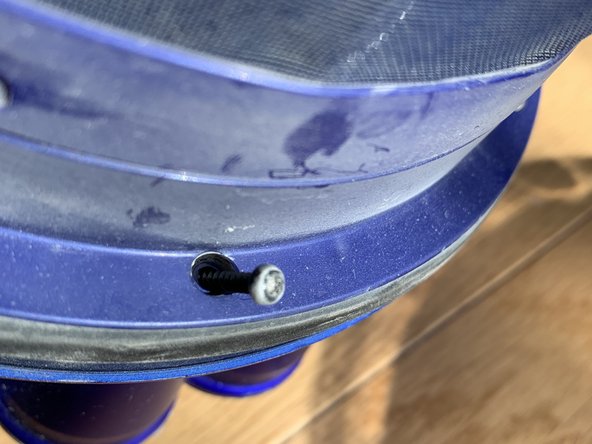
    • Remove the 7 (seven) T8 Torx screws that attach the lower skirt to the upper body using a Torx screwdriver

  4. Dyson DC 37 Allergy Gasket Replacement, Cleaning the Cyclone Block: paso 4, imagen 1 de 3 Dyson DC 37 Allergy Gasket Replacement, Cleaning the Cyclone Block: paso 4, imagen 2 de 3 Dyson DC 37 Allergy Gasket Replacement, Cleaning the Cyclone Block: paso 4, imagen 3 de 3
    • Remove the gasket attached to the lower part of the body, clean it and set it aside

    • The lower part can be cleaned with a cloth and/or water. It is possible to remove the skirt using a thin tool to release the retaining notches, but it is not necessary for this repair.

    • The body is now clearly visible. Get a new rag before continuing

  5. Dyson DC 37 Allergy Gasket Replacement, Removing the Dust Filter Cradle: paso 5, imagen 1 de 3 Dyson DC 37 Allergy Gasket Replacement, Removing the Dust Filter Cradle: paso 5, imagen 2 de 3 Dyson DC 37 Allergy Gasket Replacement, Removing the Dust Filter Cradle: paso 5, imagen 3 de 3
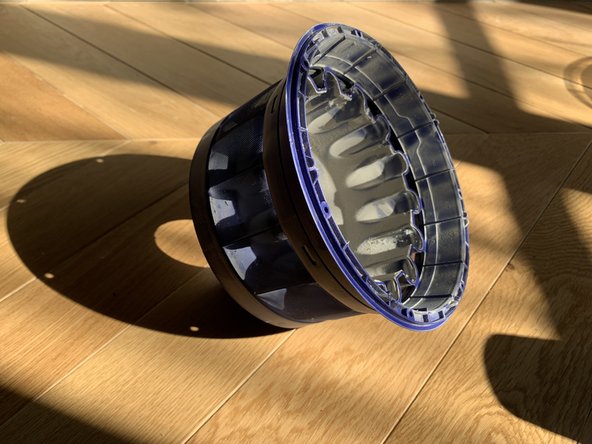
    • You will now remove the cradle that houses the dust filter. This one is simply nested in the top block

    • You will have to gently unclip each of the 14 rings that enclose the cyclone exits

    • Once this operation is done, simply remove the cone by pulling it to extract it from the socket

    • You can clean the cone as well as the inside of the top of the cyclone block

  6. Dyson DC 37 Allergy Gasket Replacement, Disassembling the Upper Part of the Cyclone Block: paso 6, imagen 1 de 3 Dyson DC 37 Allergy Gasket Replacement, Disassembling the Upper Part of the Cyclone Block: paso 6, imagen 2 de 3 Dyson DC 37 Allergy Gasket Replacement, Disassembling the Upper Part of the Cyclone Block: paso 6, imagen 3 de 3
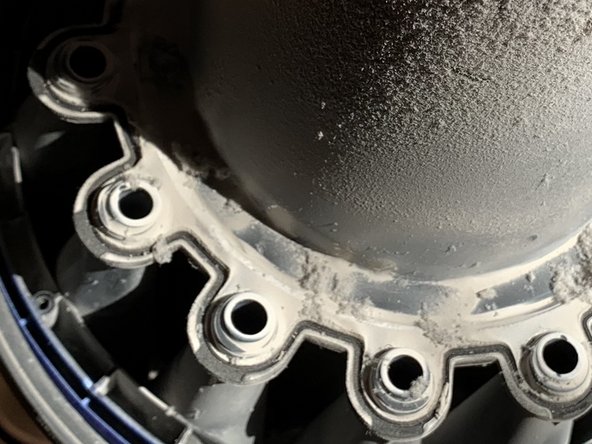
    • Unscrew the last 7 screws using the Torx screwdriver

    • These are visible at the bottom of the block, between the extraction cones. This part is probably very dusty and you may have to scratch a little to find them

  7. Dyson DC 37 Allergy Gasket Replacement, Separate the Cap: paso 7, imagen 1 de 3 Dyson DC 37 Allergy Gasket Replacement, Separate the Cap: paso 7, imagen 2 de 3 Dyson DC 37 Allergy Gasket Replacement, Separate the Cap: paso 7, imagen 3 de 3
    • Once the screws are removed, you can easily separate the cap from the intermediate block

    • A little cleaning is necessary

  8. Dyson DC 37 Allergy Gasket Replacement, Removing the Seal and Disassembling the Cap: paso 8, imagen 1 de 3 Dyson DC 37 Allergy Gasket Replacement, Removing the Seal and Disassembling the Cap: paso 8, imagen 2 de 3 Dyson DC 37 Allergy Gasket Replacement, Removing the Seal and Disassembling the Cap: paso 8, imagen 3 de 3
    • You will need to carefully remove the seal so as not to tear it during the operation, especially if it is damaged

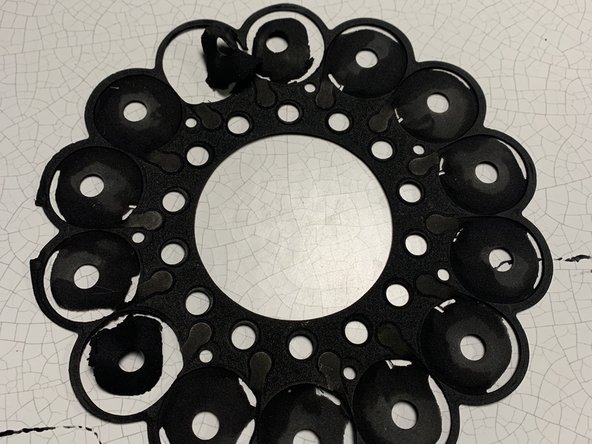
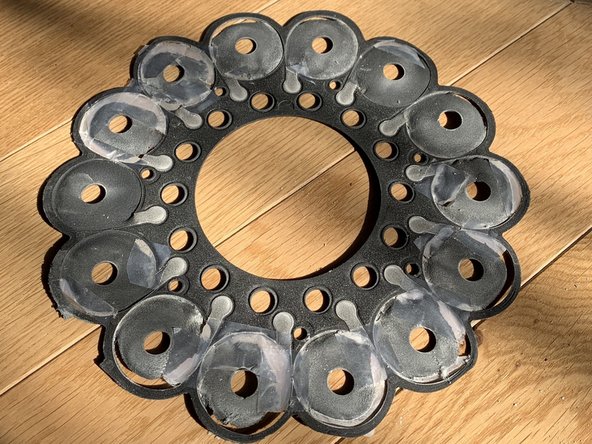
    • The cover is separated into 4 parts: the lid, 2 white pieces, one with moveable guides and the seal

    • Over time, movements and vibrations of moving parts have cut into and damaged the seal

  9. Dyson DC 37 Allergy Gasket Replacement, Repair or Replace the Seal: paso 9, imagen 1 de 3 Dyson DC 37 Allergy Gasket Replacement, Repair or Replace the Seal: paso 9, imagen 2 de 3 Dyson DC 37 Allergy Gasket Replacement, Repair or Replace the Seal: paso 9, imagen 3 de 3
    • We see here the state of wear after fifteen years of faithful service

    • It is possible to make a temporary repair with adhesive tape to seal and reconnect the pieces

    • Be careful not to obstruct the openings for the screws or tubes.

    • The best solution is to buy a new one. They can be found on eBay and Amazon for about $20-30 USD.

    • You can see my temporary repair here while I wait for the replacement part to arrive

  10. Dyson DC 37 Allergy Gasket Replacement: paso 10, imagen 1 de 3 Dyson DC 37 Allergy Gasket Replacement: paso 10, imagen 2 de 3 Dyson DC 37 Allergy Gasket Replacement: paso 10, imagen 3 de 3
    • All that remains is to reassemble with the new or repaired seal.

    • Don't forget to put the tank seal back on

    • That's it, well done

Conclusión

To reassemble your device, follow the instructions in reverse order.

2 personas más completaron esta guía.

Un agradecimiento especial a estos traductores:

fr en

100%

Estos traductores nos están ayudando a reparar el mundo! ¿Quieres contribuir?
Empezar a traducir ›

5 comentarios

bonjour Peut on avoir la ref du joint pour un dc37 Merci

DJ Olive - Contestar

Salut, qu'entendez-vous par joint, pouvez-vous expliquer un aliotle plus pour que je puisse vous aider, merci :-)

HelloMacOS -

Je n'ai pas de référence Dyson. La pièce d'origine est introuvable. Mais il s'agit juste d'une feuille de mousse de caoutchouc coupée à la bonne forme, il y a de nombreux vendeurs de pièces compatibles. Une recherche de 'joint cyclone DC37', ou 'joint d'étanchéité DC37' remontent des vendeurs. On peut aussi chercher en anglais: 'DC37 Gasket' ou 'DC37 Cyclon Gasket' devrait donner de bon résultat.

Cyrille Dupuydauby - Contestar

Bonjour,

Pouvez vous donner la taille du tournevis Torx nécessaire, SVP ?

Merci par avance

Iris Ricci-Deuschle - Contestar

Il s'agit d'un T8 (il est indiqué dans l'en tête). La taille est normalement indiquée sur le tournevis, ou la tête dans le cas de tête interchangeable.

Cyrille Dupuydauby -

Agregar Comentario

Ver Estadísticas:

Ultimas 24 horas: 4

Ultimos 7 días: 27

Ultimos 30 días: 151

Todo El Tiempo: 4,324