Qué necesitas
-
-
Desatornilla los cuatro tornillos de 6,5 mm con un destornillador Phillips.
-
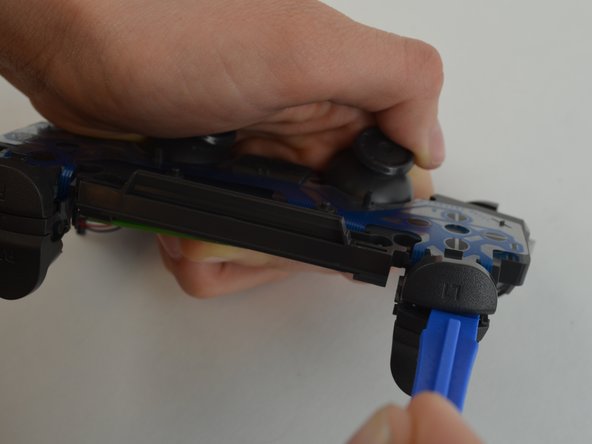
Separa las dos mitades del caparazón con una herramienta de abertura de plástico.
-
-
-
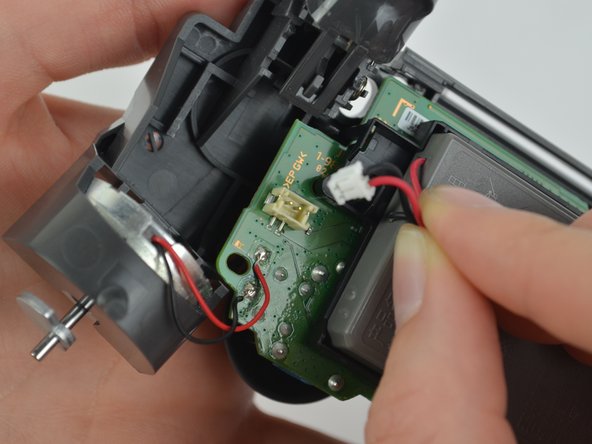
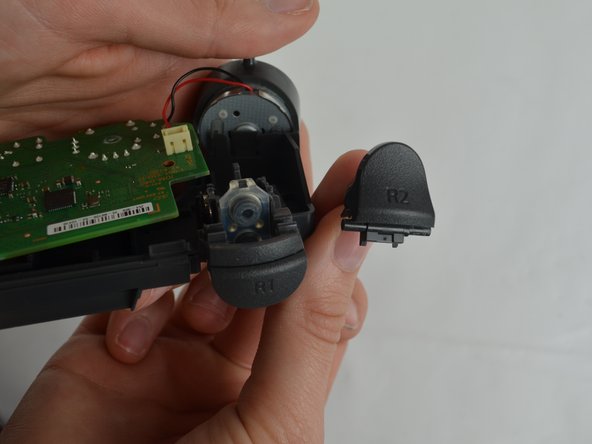
Desenchufa los cables negro y rojo del puerto de alimentación ubicado en la placa base.
-
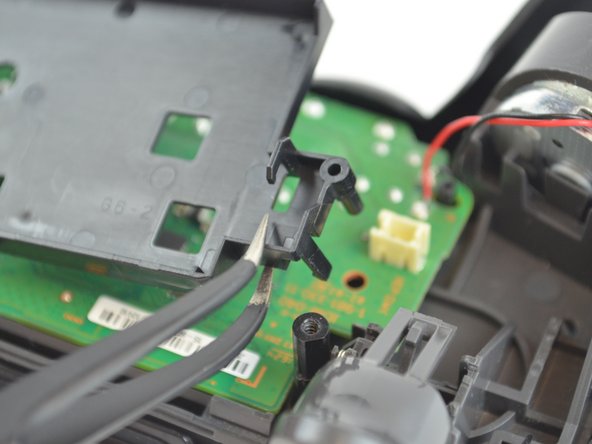
Retira la batería vieja del controlador.
-
-
-
-
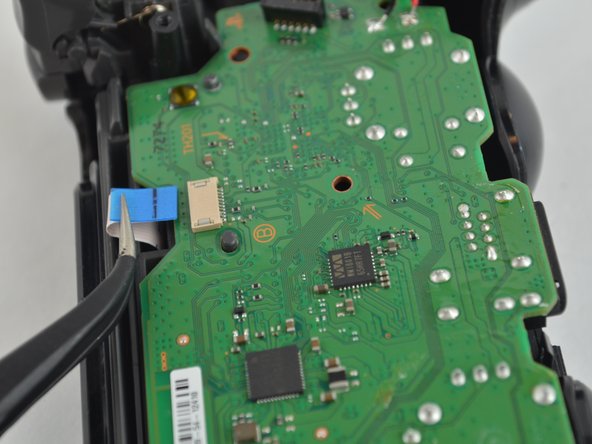
Extrae el segundo cable flexible de la circuitería para separar la carcasa frontal.
-


Para montar tu dispositivo, sigue estas instrucciones en orden inverso.
Para montar tu dispositivo, sigue estas instrucciones en orden inverso.
Cancelar: No complete esta guía.
27 personas más completaron esta guía.
Un agradecimiento especial a estos traductores:
100%
¡ Francisco Sánchez nos está ayudando a reparar el mundo! ¿Quieres contribuir?
Empezar a traducir ›

Equipo

USF Tampa, Team S1-G5, Leahy Fall 2017 Miembro de USF Tampa, Team S1-G5, Leahy Fall 2017
USFT-LEAHY-F17S1G5
3 Miembros
28 Guías creadas
4 comentarios
Is it possible to replace the zct2u triggers with custom 1st gen triggers? It seems like the only major difference is the extra piece on the latest models to prevent losing the trigger.
Does this stops the issue I have that is when I press L2, my character sometimes goes forward, like the L2 would be creating contact with the left directional going forward option.
My controller lost the R1, so I need to buy one to replace it. After pulling apart my controller, I noticed the back of the L1 button looks different (the plastic connection pieces are completely different) than the photos in your directions. Are there different types of shoulder buttons available? Or is it that my controller is a different generation? If so, do you supply the pieces for this controller type?
Hey, can you explain the differences between the V1 and V2 Trigger buttons, they are different. I stepped on the R2 button and it ripped out the R2 button and damaged the housing (my father is the trades guy, obviously).
I don’t know if it’s worth fixing, or if I should just buy a new controller.