Saltar al contenido principal

DualShock 4 CHU-ZCT2U Battery Case Replacement

Guía Archivada
Esta guía se mantiene únicamente para fines históricos. Utiliza la última versión de la guía para llevar a cabo tu reparación.

Qué necesitas

  1. DualShock 4 CHU-ZCT2U Battery Case Replacement, Outer Shell: paso 1, imagen 1 de 3 DualShock 4 CHU-ZCT2U Battery Case Replacement, Outer Shell: paso 1, imagen 2 de 3 DualShock 4 CHU-ZCT2U Battery Case Replacement, Outer Shell: paso 1, imagen 3 de 3
    • Unscrew the four 6.5mm screws, using a Phillips-Head screwdriver.

    • Pry the two halves of the shell apart using a plastic opening tool.

    • Be careful, as there will be a ribbon connecting the inner workings of the controller. It will not separate into two parts just by pulling apart the shell.

  2. DualShock 4 CHU-ZCT2U Battery Case Replacement: paso 2, imagen 1 de 3 DualShock 4 CHU-ZCT2U Battery Case Replacement: paso 2, imagen 2 de 3 DualShock 4 CHU-ZCT2U Battery Case Replacement: paso 2, imagen 3 de 3
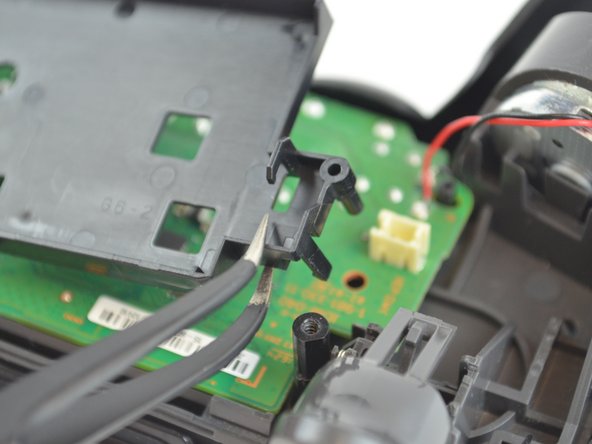
    • Pull the ribbon cable out of the motherboard port to fully separate the two halves, using a pair of tweezers.

  3. DualShock 4 CHU-ZCT2U Battery Case Replacement, Battery: paso 3, imagen 1 de 3 DualShock 4 CHU-ZCT2U Battery Case Replacement, Battery: paso 3, imagen 2 de 3 DualShock 4 CHU-ZCT2U Battery Case Replacement, Battery: paso 3, imagen 3 de 3
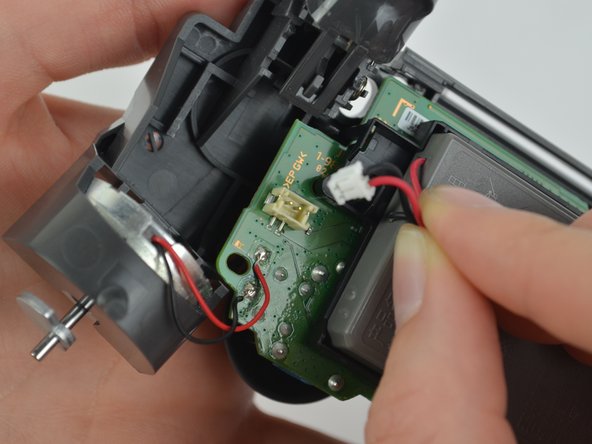
    • Unplug the black and red wires from the power port located on the motherboard.

    • Remove the old battery from the controller.

  4. DualShock 4 CHU-ZCT2U Battery Case Replacement: paso 4, imagen 1 de 2 DualShock 4 CHU-ZCT2U Battery Case Replacement: paso 4, imagen 2 de 2
    • Remove the 6.43mm screw connecting the motherboard to the inner workings of the controller, using a Phillips-Head screwdriver.

  5. DualShock 4 CHU-ZCT2U Battery Case Replacement: paso 5, imagen 1 de 3 DualShock 4 CHU-ZCT2U Battery Case Replacement: paso 5, imagen 2 de 3 DualShock 4 CHU-ZCT2U Battery Case Replacement: paso 5, imagen 3 de 3
    • Unhook the battery case from the motherboard, and pull it off.

Conclusión

To reassemble your device, follow these instructions in reverse order.

19 personas más completaron esta guía.

Michelle Joseph

Miembro Desde 10/09/17

1,762 Reputación

3 Guías creadas

Equipo

USF Tampa, Team S1-G5, Leahy Fall 2017 Miembro de USF Tampa, Team S1-G5, Leahy Fall 2017

USFT-LEAHY-F17S1G5

3 Miembros

22 Guías creadas

0 comentarios

Agregar Comentario

Ver Estadísticas:

Ultimas 24 horas: 2

Ultimos 7 días: 3

Ultimos 30 días: 6

Todo El Tiempo: 12,313