Saltar al contenido principal

Dragon Touch A1x Plus Cameras Replacement

Qué necesitas

  1. Dragon Touch A1x Plus Cameras Replacement, Battery: paso 1, imagen 1 de 1
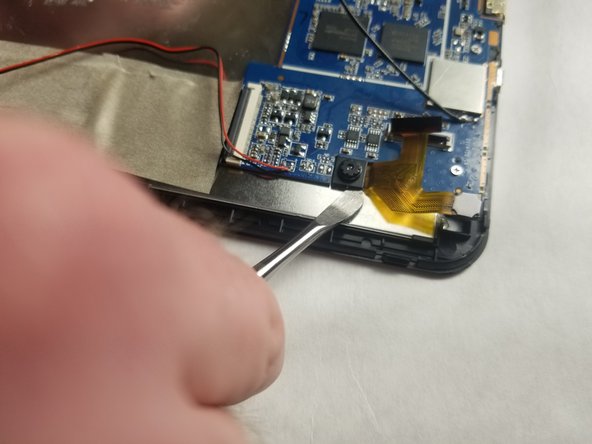
    • Insert the plastic opening tool between the white back cover and black front over.

  2. Dragon Touch A1x Plus Cameras Replacement: paso 2, imagen 1 de 2 Dragon Touch A1x Plus Cameras Replacement: paso 2, imagen 2 de 2
    • Slide the plastic opening tool along the edgeof the device until back cover is detached and remove the cover.

    • You may need to pry the back cover off using the opening tool while moving it along the edge.

  3. Dragon Touch A1x Plus Cameras Replacement: paso 3, imagen 1 de 1
    • Remove the yellow tape holding the battery to the device using your fingers or plastic opening tool if necessary.

  4. Dragon Touch A1x Plus Cameras Replacement: paso 4, imagen 1 de 1
    • Use the hair dryer to melt the glue holding the battery to the device.

    • Be careful not to overheat the battery as it could cause the battery to combust.

  5. Dragon Touch A1x Plus Cameras Replacement: paso 5, imagen 1 de 1
    Herramienta utilizada en este paso:
    Plastic Cards
    $2.99
    Comprar
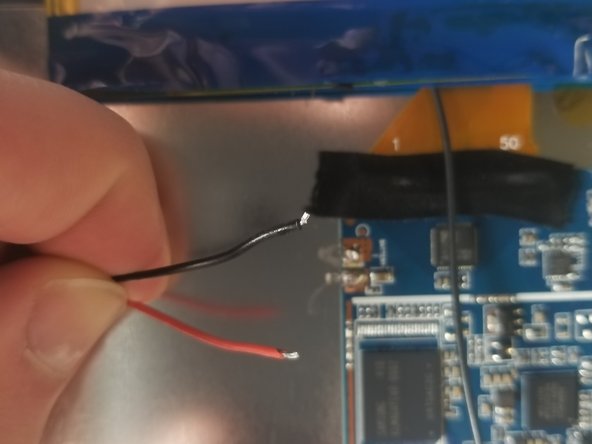
    • Insert the plastic card under the battery and use it to remove the battery from the device.

    • Be careful not to deform the battery.

  6. Dragon Touch A1x Plus Cameras Replacement: paso 6, imagen 1 de 2 Dragon Touch A1x Plus Cameras Replacement: paso 6, imagen 2 de 2
    • Desolder the red and black wires connecting the battery to the motherboard and remove the battery.

  7. Dragon Touch A1x Plus Cameras Replacement, Cameras: paso 7, imagen 1 de 2 Dragon Touch A1x Plus Cameras Replacement, Cameras: paso 7, imagen 2 de 2
    • Remove black tape holding the cameras to the motherboard.

  8. Dragon Touch A1x Plus Cameras Replacement: paso 8, imagen 1 de 2 Dragon Touch A1x Plus Cameras Replacement: paso 8, imagen 2 de 2
    • Use your fingernail to flip up the small locking flap on the ZIF connector.

    • Pull the ribbon cable from the ZIF connector.

  9. Dragon Touch A1x Plus Cameras Replacement: paso 9, imagen 1 de 1
    • Remove the front camera from the device using your fingers.

  10. Dragon Touch A1x Plus Cameras Replacement: paso 10, imagen 1 de 2 Dragon Touch A1x Plus Cameras Replacement: paso 10, imagen 2 de 2
    • Melt the glue holding the rear camera in place using a hair dryer.

    • Insert the metal spludger under the rear camera and pry it free from the device.

Conclusión

To reassemble your device, follow these instructions in reverse order.

Josh Null

Miembro Desde 03/21/18

313 Reputación

3 Guías creadas

Equipo

IUPUI, Team S5-G5, Baechle Spring 2018 Miembro de IUPUI, Team S5-G5, Baechle Spring 2018

IUPUI-BAECHLE-S18S5G5

3 Miembros

6 Guías creadas

0 comentarios

Agregar Comentario

Ver Estadísticas:

Ultimas 24 horas: 2

Ultimos 7 días: 4

Ultimos 30 días: 5

Todo El Tiempo: 162