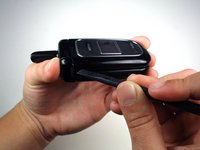
Saltar al contenido principal

Disassembling Nokia 2366i Front Display

Qué necesitas

  1. Disassembling Nokia 2366i Front Display, Battery: paso 1, imagen 1 de 2 Disassembling Nokia 2366i Front Display, Battery: paso 1, imagen 2 de 2
    • Turn off the phone.

    • Position the phone so that the back side is in view.

  2. Disassembling Nokia 2366i Front Display: paso 2, imagen 1 de 1
    • Apply pressure on the cover while simultaneously sliding the cover downward.

    • Remove the back battery cover.

  3. Disassembling Nokia 2366i Front Display: paso 3, imagen 1 de 3 Disassembling Nokia 2366i Front Display: paso 3, imagen 2 de 3 Disassembling Nokia 2366i Front Display: paso 3, imagen 3 de 3
    • Insert the spudger between the base of the phone and the phone battery.

    • Position the phone so that the battery won't fall out of the phone.

    • Carefully lift the battery out of the phone.

    • The battery lifts out of the phone easily.

  4. Disassembling Nokia 2366i Front Display, Front Cover: paso 4, imagen 1 de 1
    • Keep the phone closed.

    • Hold the phones sideways with the front cover of the phone facing up.

  5. Disassembling Nokia 2366i Front Display: paso 5, imagen 1 de 2 Disassembling Nokia 2366i Front Display: paso 5, imagen 2 de 2
    • Find the slight crease on the side that divides the display assembly in half.

    • Slowly wedge the spudger into the crease.

    • It's a little difficult to perform this step because the crease is narrow. Do not rush because you may damage the phone

  6. Disassembling Nokia 2366i Front Display: paso 6, imagen 1 de 2 Disassembling Nokia 2366i Front Display: paso 6, imagen 2 de 2
    • Run the spudger all along the crease while lifting up.

    • Separate the front cover from the front base.

  7. Disassembling Nokia 2366i Front Display, Main Display: paso 7, imagen 1 de 2 Disassembling Nokia 2366i Front Display, Main Display: paso 7, imagen 2 de 2
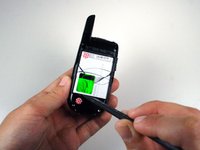
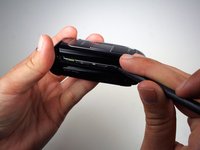
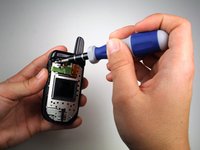
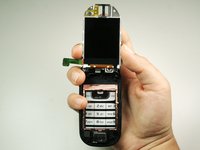
    • Remove the four 5mm screws on the metal casing using the T6 Torx screwdriver.

  8. Disassembling Nokia 2366i Front Display: paso 8, imagen 1 de 2 Disassembling Nokia 2366i Front Display: paso 8, imagen 2 de 2
    • Using the spudger, disconnect the green display cable.

  9. Disassembling Nokia 2366i Front Display: paso 9, imagen 1 de 3 Disassembling Nokia 2366i Front Display: paso 9, imagen 2 de 3 Disassembling Nokia 2366i Front Display: paso 9, imagen 3 de 3
    • Lift the metal casing.

    • Be careful not to pull the casing too hard because it is still attached to the phone by a wire.

    • Remove the main display from under the metal casing.

  10. Disassembling Nokia 2366i Front Display, Front Display: paso 10, imagen 1 de 3 Disassembling Nokia 2366i Front Display, Front Display: paso 10, imagen 2 de 3 Disassembling Nokia 2366i Front Display, Front Display: paso 10, imagen 3 de 3
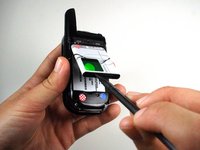
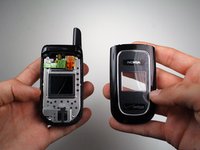
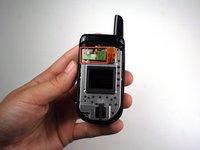
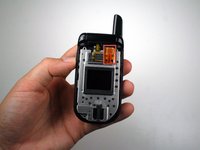
    • Fold the metal casing back over.

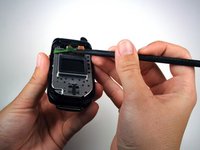
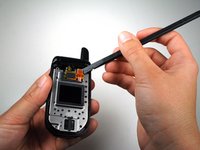
    • Disconnect the orange front display data cable with the spudger.

    • Hold the phone so that the antenna is facing towards you.

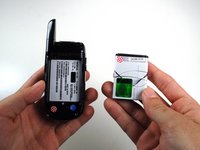
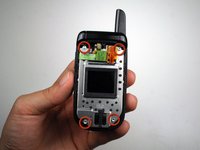
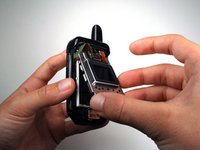
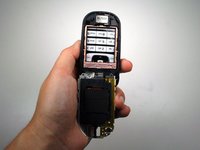
    • Lift up and flip over the metal casing.

  11. Disassembling Nokia 2366i Front Display: paso 11, imagen 1 de 1
    • Using your fingers, remove the front display.

Conclusión

To reassemble your device, follow these instructions in reverse order.

Michael Machado

Miembro Desde 01/21/11

334 Reputación

3 Guías creadas

Equipo

Cal Poly, Team 1-14, Amido Winter 2011 Miembro de Cal Poly, Team 1-14, Amido Winter 2011

CPSU-AMIDO-W11S1G14

5 Miembros

16 Guías creadas

0 comentarios

Agregar Comentario

Ver Estadísticas:

Ultimas 24 horas: 0

Ultimos 7 días: 0

Ultimos 30 días: 1

Todo El Tiempo: 934