Saltar al contenido principal
Únete a la Comunidad de Reparación - Crear Cuenta

Disassembling Kodak Easyshare C813 Front Cover

Qué necesitas

    1. Disassembling Kodak Easyshare C813 Front Cover, Battery: paso 1, imagen 1 de 1
      • Turn off camera by firmly pressing the power button that is located on the top of the camera near the selector dial.

      Pregunta a FixBot

      Agregar Comentario

    2. Disassembling Kodak Easyshare C813 Front Cover: paso 2, imagen 1 de 3 Disassembling Kodak Easyshare C813 Front Cover: paso 2, imagen 2 de 3 Disassembling Kodak Easyshare C813 Front Cover: paso 2, imagen 3 de 3
      • Press thumb firmly on battery door and slide it in the direction of the arrow.

      • Lift thumb allowing the door to swing open.

      Pregunta a FixBot

      Agregar Comentario

    1. Disassembling Kodak Easyshare C813 Front Cover, Back Cover: paso 3, imagen 1 de 1
      Herramienta utilizada en este paso:
      Anti-Static Wrist Strap
      $7.95
      Pregunta a FixBot

      Agregar Comentario

    2. Disassembling Kodak Easyshare C813 Front Cover: paso 4, imagen 1 de 1
      • Turn the camera off by firmly pressing the power button located on top of the camera.

      Pregunta a FixBot

      Agregar Comentario

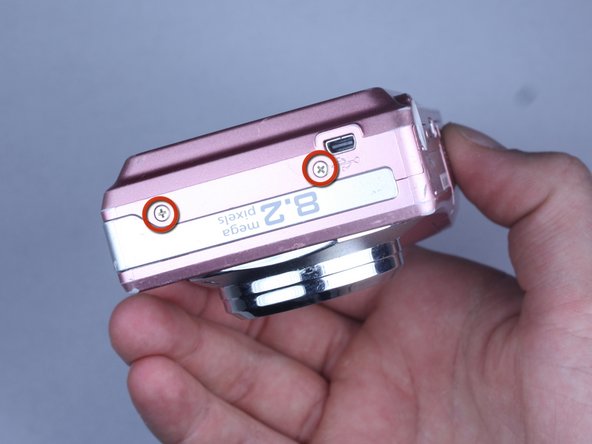
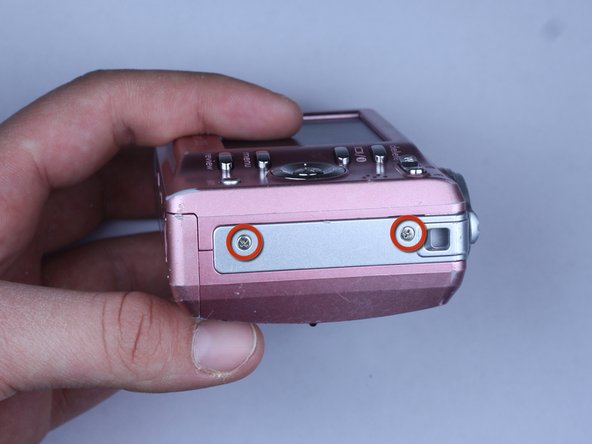
    3. Disassembling Kodak Easyshare C813 Front Cover: paso 5, imagen 1 de 3 Disassembling Kodak Easyshare C813 Front Cover: paso 5, imagen 2 de 3 Disassembling Kodak Easyshare C813 Front Cover: paso 5, imagen 3 de 3
      • Locate the 7 screws holding the back cover on.

      • Three screws are located on the bottom of the camera.

      • Two screws are located on the side shown in the photograph.

      • Two final screws are located on the opposite side shown in the photograph.

      Pregunta a FixBot

      Agregar Comentario

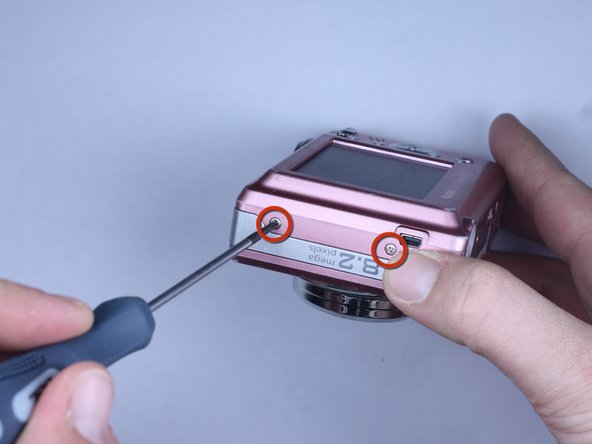
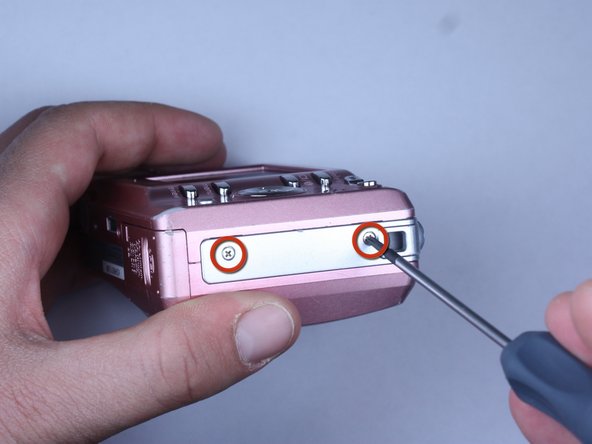
    4. Disassembling Kodak Easyshare C813 Front Cover: paso 6, imagen 1 de 3 Disassembling Kodak Easyshare C813 Front Cover: paso 6, imagen 2 de 3 Disassembling Kodak Easyshare C813 Front Cover: paso 6, imagen 3 de 3
      • Remove all 7 screws:

      • Hold the camera firmly with one hand so that you can still see a screw.

      • Place the Philips 00(Found here)screwdriver into the screw.

      • Turn the screwdriver to the left until it is free.

      • Repeat for the remaining screws.

      Pregunta a FixBot

      Agregar Comentario

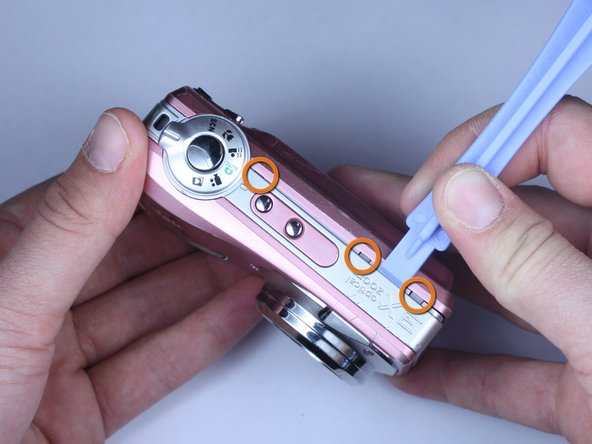
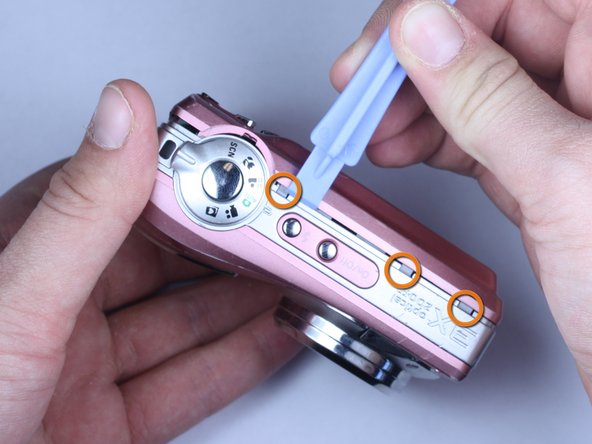
    5. Disassembling Kodak Easyshare C813 Front Cover: paso 7, imagen 1 de 3 Disassembling Kodak Easyshare C813 Front Cover: paso 7, imagen 2 de 3 Disassembling Kodak Easyshare C813 Front Cover: paso 7, imagen 3 de 3
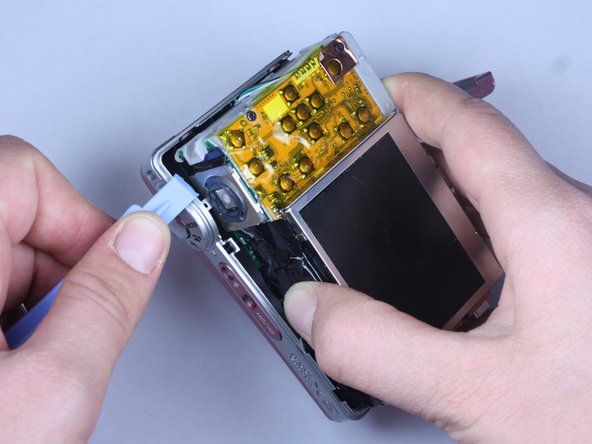
      • Use plastic opening tools to slightly open the side of the case.

      • Insert a plastic opening tool and apply pressure to the internal three tabs at the top.

      • The first two are near the words "3X Optical Zoom".

      • The third is near the shutter button.

      Pregunta a FixBot

      Agregar Comentario

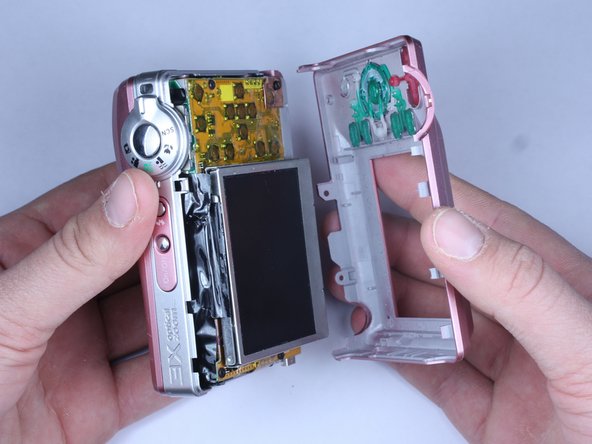
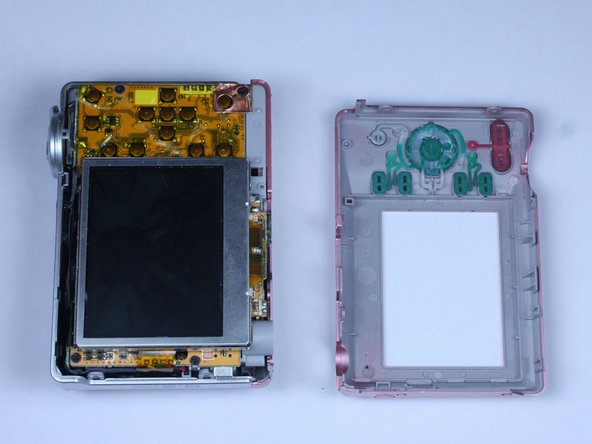
    6. Disassembling Kodak Easyshare C813 Front Cover: paso 8, imagen 1 de 3 Disassembling Kodak Easyshare C813 Front Cover: paso 8, imagen 2 de 3 Disassembling Kodak Easyshare C813 Front Cover: paso 8, imagen 3 de 3
      • Gently pull apart the back cover from the rest of the camera.

      • Make sure there are no more screws or tabs keeping the cover on.

      • Use the plastic opening tool to separate any sides still closely connected.

      Pregunta a FixBot

      Agregar Comentario

    1. Disassembling Kodak Easyshare C813 Front Cover, Front Cover: paso 9, imagen 1 de 2 Disassembling Kodak Easyshare C813 Front Cover, Front Cover: paso 9, imagen 2 de 2
      • Open the battery door.

      • Press thumb firmly on battery door and slide it in the direction of the arrow.

      • Lift thumb allowing the door to swing open.

      Pregunta a FixBot

      Agregar Comentario

    2. Disassembling Kodak Easyshare C813 Front Cover: paso 10, imagen 1 de 3 Disassembling Kodak Easyshare C813 Front Cover: paso 10, imagen 2 de 3 Disassembling Kodak Easyshare C813 Front Cover: paso 10, imagen 3 de 3
      • Use the plastic opening tool to lift the casing around the shutter button.

      • Gently remove the front cover from the device.

      Pregunta a FixBot

      Agregar Comentario

    3. Disassembling Kodak Easyshare C813 Front Cover: paso 11, imagen 1 de 1
      • Do not touch the terminals shown in the photo. These link to the capacitor which could shock you if not discharged.

      • To discharge the capacitor follow this guide.

      Pregunta a FixBot

      Agregar Comentario

Linea de Meta

Cancelar: No complete esta guía.

2 personas más completaron esta guía.

Equipo

Cal Poly, Team 24-22, Regan Spring 2010 Miembro de Cal Poly, Team 24-22, Regan Spring 2010

CPSU-REGAN-S10S24G22

Miembros de 4

70 Guías creadas

0Guía Comentarios

Agregar Comentario

Ver Estadísticas:

Ultimas 24 horas: 5

Ultimos 7 días: 15

Ultimos 30 días: 63

Todo El Tiempo: 4,810