Saltar al contenido principal

Esta guía ha sufrido modificaciones. Revisa la última versión sin revisar.

Disassembling IBM ThinkPad 560z Upper Case

Qué necesitas

  1. Disassembling IBM ThinkPad 560z Upper Case, Battery Removal: paso 1, imagen 1 de 1
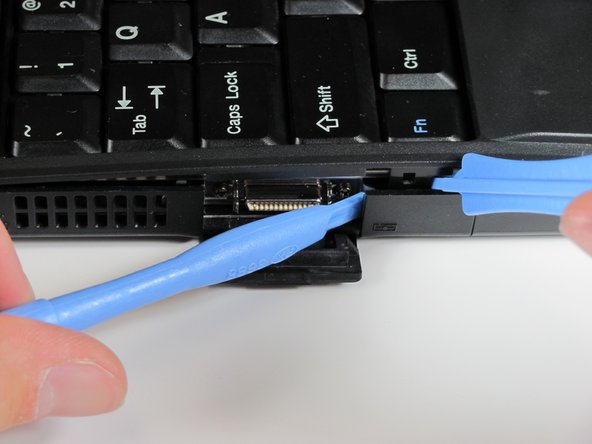
    • Slide the battery release latch to the right.

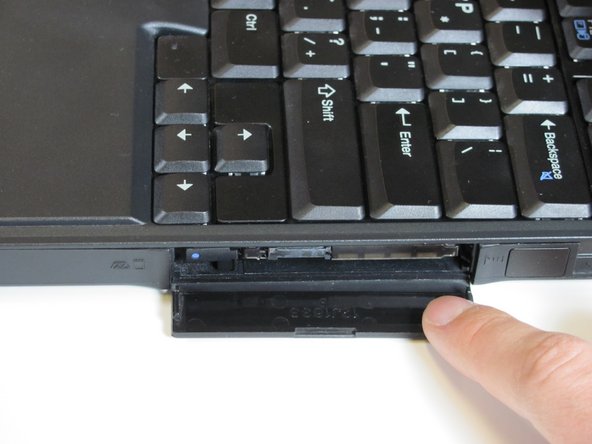
    • Pull out the battery out towards the front of the device.

  2. Disassembling IBM ThinkPad 560z Upper Case, Upper Case: paso 2, imagen 1 de 1
    • Remove the 7 mm Phillips #0 screws.

    • Remove the 10 mm Phillips #0 screws.

    • Remove the 14 mm Phillips #0 screw.

  3. Disassembling IBM ThinkPad 560z Upper Case: paso 3, imagen 1 de 2 Disassembling IBM ThinkPad 560z Upper Case: paso 3, imagen 2 de 2
    • Open the flap on the left hand side.

  4. Disassembling IBM ThinkPad 560z Upper Case: paso 4, imagen 1 de 2 Disassembling IBM ThinkPad 560z Upper Case: paso 4, imagen 2 de 2
    • Insert the plastic opening tools between the right and left sides of the latch.

    • Pry the right side of the latch, and then pry the left side to detach the laptop's cover.

  5. Disassembling IBM ThinkPad 560z Upper Case: paso 5, imagen 1 de 2 Disassembling IBM ThinkPad 560z Upper Case: paso 5, imagen 2 de 2
    • Open the flap on the right side.

  6. Disassembling IBM ThinkPad 560z Upper Case: paso 6, imagen 1 de 1
    • Insert the plastic opening tools towards the right side of the latch.

    • Gently pry the right side out to release the top cover.

  7. Disassembling IBM ThinkPad 560z Upper Case: paso 7, imagen 1 de 2 Disassembling IBM ThinkPad 560z Upper Case: paso 7, imagen 2 de 2
    • Lift the keyboard slowly.

    • A cable connects the keyboard to the motherboard. If you are not careful, you will damage the cable.

  8. Disassembling IBM ThinkPad 560z Upper Case: paso 8, imagen 1 de 1
    • Use your fingers or a spudger to detach the connector.

  9. Disassembling IBM ThinkPad 560z Upper Case: paso 9, imagen 1 de 2 Disassembling IBM ThinkPad 560z Upper Case: paso 9, imagen 2 de 2
    • Carefully lift and remove the keyboard.

Conclusión

To reassemble your device, follow these instructions in reverse order.

Equipo

Cal Poly, Team 26-27, Regan Spring 2010 Miembro de Cal Poly, Team 26-27, Regan Spring 2010

CPSU-REGAN-S10S26G27

3 Miembros

18 Guías creadas

0 comentarios

Agregar Comentario

Ver Estadísticas:

Ultimas 24 horas: 1

Ultimos 7 días: 3

Ultimos 30 días: 4

Todo El Tiempo: 1,728