Esta versión puede contener ediciones incorrectas. Cambie a la última instantánea verificada.
Qué necesitas
-
-
Rota la impresora 90 grados a la derecha, para que el lado de panel correspondiente al panel de control esté frente a ti.
-
Remueve los dos tornillos Torx T10 de 12 mm del panel izquierdo.
-
-
-
Aparta el panel superior de la impresora.
-
Remueve los dos tornillos Torx T10 de 12 mm del frente superior de la impresora.
-
-
-
Este paso está sin traducir. Ayuda a traducirlo
-
Set aside the ink cartridge carriage.
-
Remove the three T10 12mm Torx screws holding the paper guide to the printer body.
-
Lift the paper guide directly up to remove it and set it aside.
-
-
Este paso está sin traducir. Ayuda a traducirlo
-
Remove the five T10 12mm Torx screws from the roller holder.
-
-
Este paso está sin traducir. Ayuda a traducirlo
-
Remove the plastic gear cover by pulling it away from the printer body and lifting it up.
-
-
Este paso está sin traducir. Ayuda a traducirlo
-
Remove the metal tab by rotating it away from the body of the printer and pulling up.
-
Remove the brush by grasping it firmly by the base and lift straight up.
-
-
Este paso está sin traducir. Ayuda a traducirlo
-
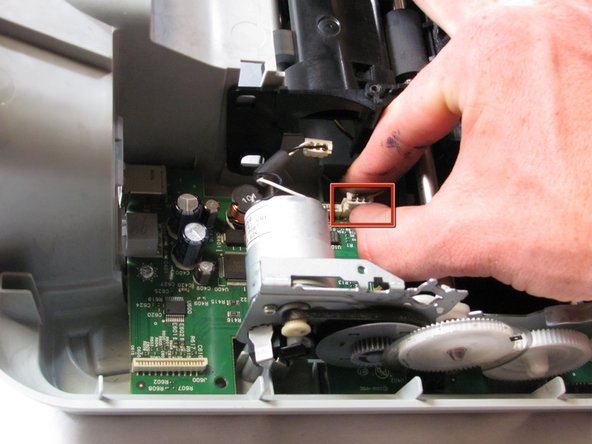
Remove the connector holding the feed roller motor to the logic board by pulling it strait up
-
Remove the T10 12mm Torx screw on the roller panel.
-
-
Este paso está sin traducir. Ayuda a traducirlo
-
Disconnect the page sensor from the logic board by pulling straight up on the connector.
-
-
Este paso está sin traducir. Ayuda a traducirlo
-
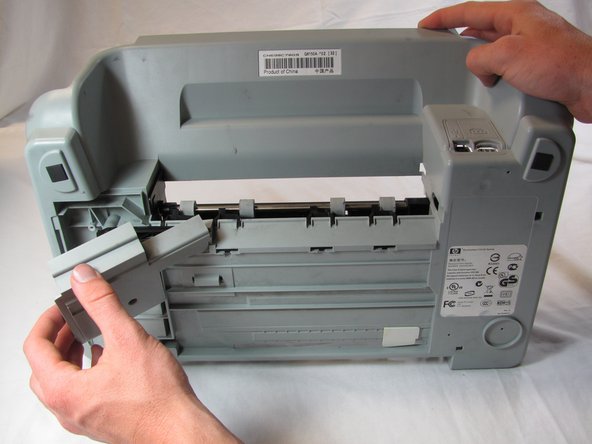
Rotate the printer 180 degrees and turn it up on to the front side, so that the back of the printer is facing up and the bottom facing you.
-
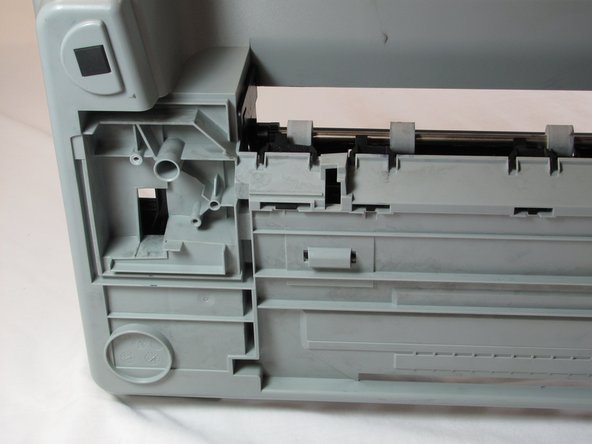
Push in the tab on the left side of the back panel and pull outward to remove the back panel.
-
-
Este paso está sin traducir. Ayuda a traducirlo
-
Tilt the printer up until the bottom of the printer can be seen.
-
Remove the T10 12mm Torx screw from the bottom panel.
-
Grasp the top edge of the bottom panel and pull to remove it.
-
-
Este paso está sin traducir. Ayuda a traducirlo
-
Remove the black plastic cross member from the bottom of the printer.
-
-
Este paso está sin traducir. Ayuda a traducirlo
-
Turn the printer back down so that it is sitting on the bottom panel and rotate the printer 180 degrees.
-
-
Este paso está sin traducir. Ayuda a traducirlo
-
Remove the printer head cleaner by lifting the front of the printer head cleaner above the track and slide it forward.
-
-
Este paso está sin traducir. Ayuda a traducirlo
-
Grasp the left side of the feed roller assembly and pull towards the front of the printer and up to free the metal tab from the slot.
-
-
Este paso está sin traducir. Ayuda a traducirlo
-
Lift the feed roller assembly straight up to remove it.
-


Cancelar: No complete esta guía.
20 personas más completaron esta guía.
Equipo

Cal Poly, Team 20-30, Maness Fall 2011 Miembro de Cal Poly, Team 20-30, Maness Fall 2011
CPSU-MANESS-F11S20G30
4 Miembros
25 Guías creadas
7 comentarios
m ayuda este tipo d informacion muchas gracias saludos n-n
The HP Photosmart c4580 has enough in common with this model that this guide enabled me to get into the head cleaner reservoir and remove the years of accumulated ink gumming up the works - thanks!