Esta versión puede contener ediciones incorrectas. Cambie a la última instantánea verificada.
Qué necesitas
-
Este paso está sin traducir. Ayuda a traducirlo
-
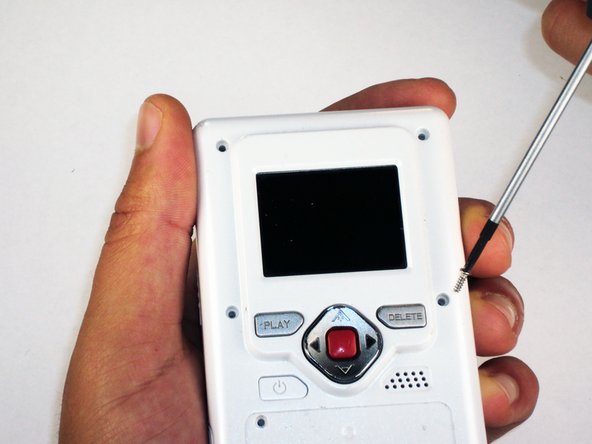
Remove metal sticker under the LCD screen with a spudger.
-
-
Este paso está sin traducir. Ayuda a traducirlo
-
Remove the 4 gray screw caps with the spudger. These cover the screw heads and protect from dirt or grime.
-
-
Este paso está sin traducir. Ayuda a traducirlo
-
Remove the 5 10mm screws with the #00 Phillips screwdriver. These connect the back of the outer shell to the front of the outer shell.
-
-
-
Este paso está sin traducir. Ayuda a traducirlo
-
Open battery door. This can be done by gently depressing and sliding the battery down downward.
-
-
Este paso está sin traducir. Ayuda a traducirlo
-
Use the spudger to separate outer shells.
-
The spudger must be inserted between the shell halves to pry the edges apart.
-
Slowly work around the outside to separate the halves.
-
-
Este paso está sin traducir. Ayuda a traducirlo
-
Remove the 3 5mm screws securing the circuit board to the front shell with the #00 Phillips screwdriver.
-
-
Este paso está sin traducir. Ayuda a traducirlo
-
Disconnect the USB port cable from the back side of the circuit board.
-
-
Este paso está sin traducir. Ayuda a traducirlo
-
Slide out the battery contacts.
-
Battery contacts
-
Slot where battery contacts were located
-


Cancelar: No complete esta guía.
Una persona más ha completado esta guía.
Equipo

Cal Poly, Team 26-21, Regan Spring 2010 Miembro de Cal Poly, Team 26-21, Regan Spring 2010
CPSU-REGAN-S10S26G21
4 Miembros
12 Guías creadas
Un comentario
Thank you. Where is the reset button on these first generation Flip Videos (mine doesn’t have one visible on outside, must be on inside.