Esta versión puede contener ediciones incorrectas. Cambie a la última instantánea verificada.
Qué necesitas
-
Este paso está sin traducir. Ayuda a traducirlo
-
Remove the 8 Phillips screws from the back of the speaker.
-
-
Este paso está sin traducir. Ayuda a traducirlo
-
Carefully remove the back panel, lifting out the metal electronics-box with it.
-
-
Este paso está sin traducir. Ayuda a traducirlo
-
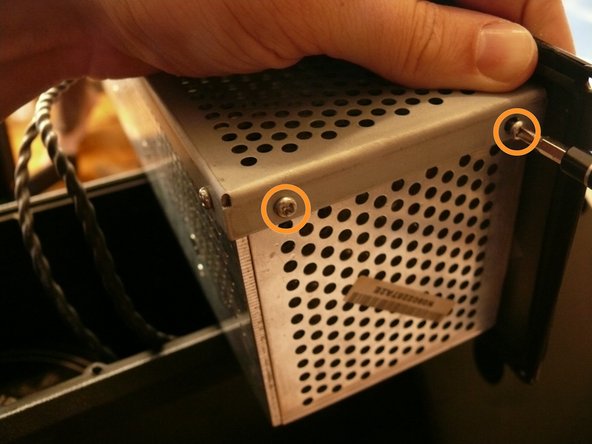
There are two silver, 6 mm-long machine screws with two 1/8" inner-diameter washers on the exterior of the metal electronics box; remove these first using a #2 philips screwdriver.
-
There are five of the same type of machine screw (silver, 6 mm-long) remaining around the metal electronics box's exterior; remove these as well.
-
-
-
Este paso está sin traducir. Ayuda a traducirlo
-
Remove the portion of the metal housing that you freed with the 7 screws in the previous step.
-
-
Este paso está sin traducir. Ayuda a traducirlo
-
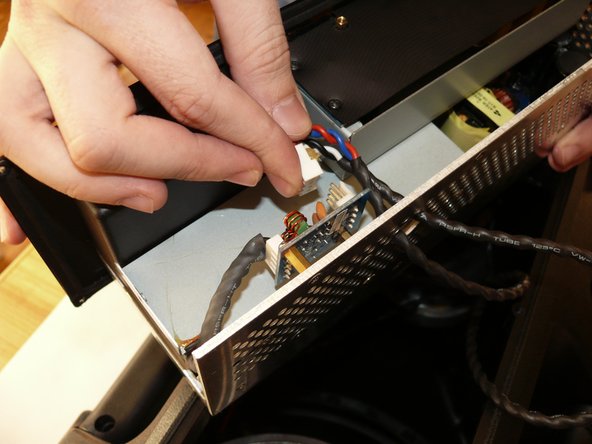
Inside the metal electronics box housing is a white clip attached to a small PCB; remove this.
-
Snake the clip head through the hole in the metal electronics box casing.
-
-
Este paso está sin traducir. Ayuda a traducirlo
-
Remove the 4, 7/32" long machine screws with a #2 phillips head screwdriver.
-
-
Este paso está sin traducir. Ayuda a traducirlo
-
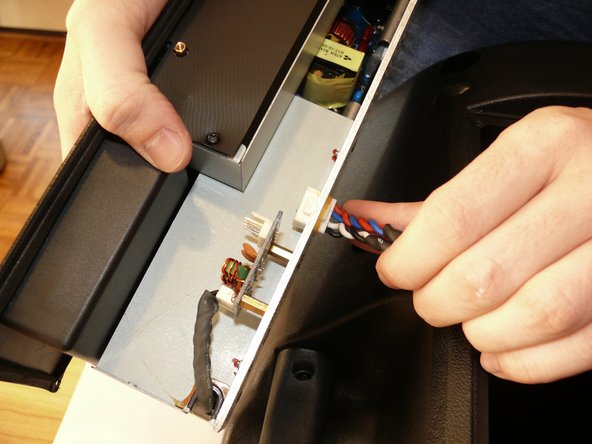
Rotate the back panel so you can view the interior; note the three wires attached.
-
Remove the wires to you can fully remove the back panel.
-


Cancelar: No complete esta guía.
5 personas más completaron esta guía.
2 comentarios
[|hello sir i am using behringer b215 d eurolive active speaker and power controler ic shot in one spesker and his ic code is this]-VIPer22A (4C6107) and please solve my this problems can you help me
If problem exist please contact stprofessionals@gmail.com
They're from Lahore they'll solve your problem. Email them get their contact and go to the store and have your all equipment fixed.