Saltar al contenido principal

Digital AV Mixer WJ-AVE5 Disassembly

Qué necesitas

  1. Digital AV Mixer WJ-AVE5 Disassembly, View From Above: paso 1, imagen 1 de 1
    • This is a Digital AV Mixer (Model WJ-AVE5) and we'll be covering the steps required to remove the top-board and controls.

  2. Digital AV Mixer WJ-AVE5 Disassembly, The Knob: paso 2, imagen 1 de 1
    • Unscrew the stick extension by turning it left. If you're running into resistance try holding the shaft of the stick, during previous service this extension may have had Loctite applied to stock it from loosening.

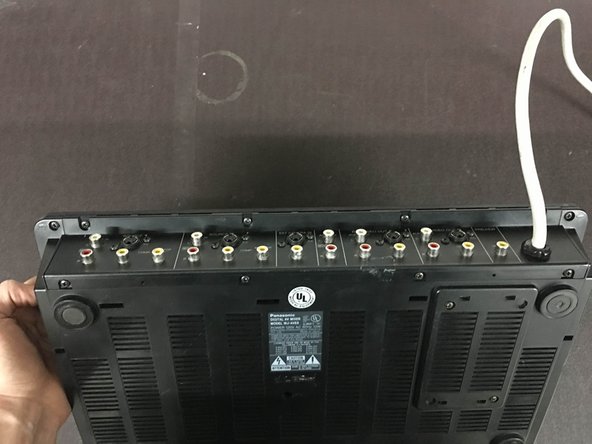
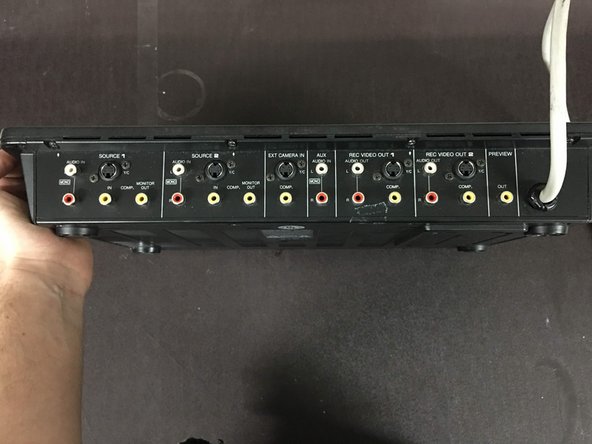
  3. Digital AV Mixer WJ-AVE5 Disassembly, View From Below: paso 3, imagen 1 de 3 Digital AV Mixer WJ-AVE5 Disassembly, View From Below: paso 3, imagen 2 de 3 Digital AV Mixer WJ-AVE5 Disassembly, View From Below: paso 3, imagen 3 de 3
    • This is the bottom of your Digital Mixer. There are Seventeen (17) screws that need to move forward.

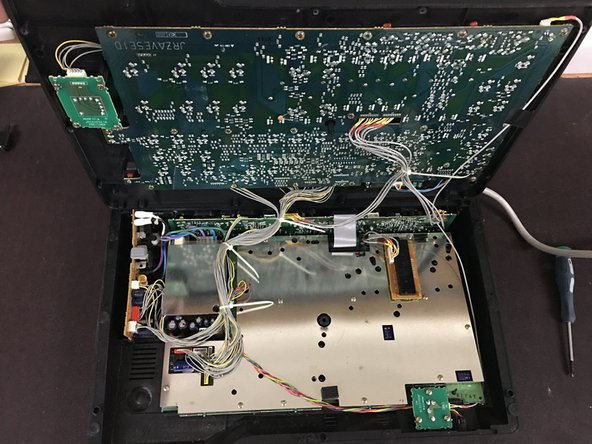
  4. Digital AV Mixer WJ-AVE5 Disassembly, The Pizza Box Open: paso 4, imagen 1 de 2 Digital AV Mixer WJ-AVE5 Disassembly, The Pizza Box Open: paso 4, imagen 2 de 2
    • Now the top-board should pivot up like a pizza-box allowing access to both the solder side of the top-board and the EMI Shielding for both the Primary Power Board and the Primary Control Board.

  5. Digital AV Mixer WJ-AVE5 Disassembly, Solder-Side of Top-Board: paso 5, imagen 1 de 1
    • Shot of the solder-side of the top-board for reference on connector locations, cable routing, and component reference.

  6. Digital AV Mixer WJ-AVE5 Disassembly: paso 6, imagen 1 de 1
    • Shot of the bottom-board for reference on connector locations, cable routing, and component reference.

Conclusión

To reassemble your device, follow these instructions in reverse order.

3 personas más completaron esta guía.

Equipo

Bridgetown Repair Miembro de Bridgetown Repair

Business

2 Miembros

7 Guías creadas

0 comentarios

Agregar Comentario

Ver Estadísticas:

Ultimas 24 horas: 0

Ultimos 7 días: 1

Ultimos 30 días: 7

Todo El Tiempo: 648